The Calibrator can be used for calibrating instruments. It consists of two sub-
windows which can be independently
(
* configured to measure, generate or sim-
ulate a signal. One sub-window for the instrument's input and another for the
instrument's output.
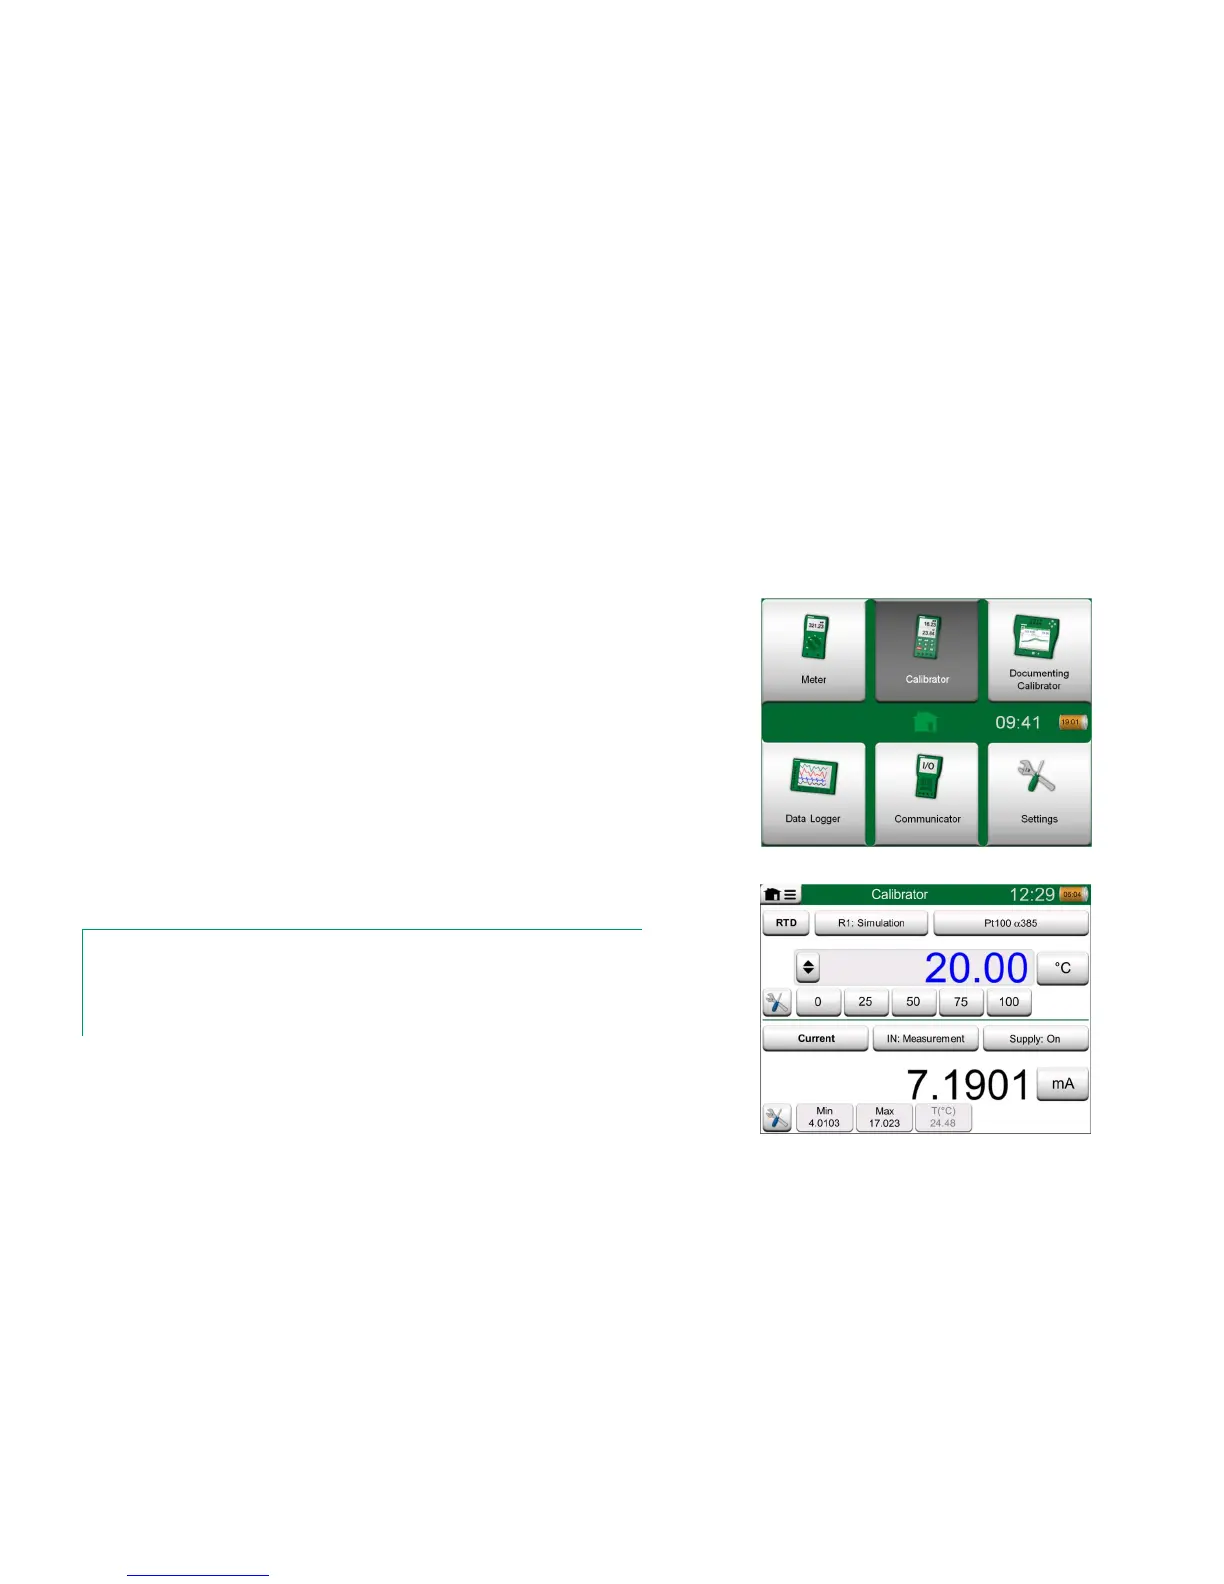
Start the Calibrator by tapping on the Calibrator icon in MC6's Home View (see
adjacent picture). A window like the one on the lower right corner of this page
opens. To configure a sub-window do as follows:
Select the Quantity of the signal by tapping the button in the upper left
corner of the sub-window. Hint: Quantity button has bold font.
Other, Quantity dependent settings appear to the right of Quantity but-
ton. The button closest to the Quantity button defines whether you
measure, generate or simulate a signal and which terminals are active.
For information on connections and essential settings, see Part 2, Active Ter-
minals and Connections.
Note.
If you want to document your calibration results, use MC6's optional Documenting Calibrator
feature or manually document the calibration data displayed in Calibrator.
For information on External Devices (Pressure and Temperature Controllers) used together
with Calibrator, see Part 9, Additional Information.
*
)
A measurement, generation or simulation in one sub-window reserve terminals in
MC6. This may affect the availability of measurements, generations and simulations
in the other sub-window. To free terminals, tap on the quantity button and in the
opened window, tap on the "Stop" button.