SELECTING THE INSTRUMENT
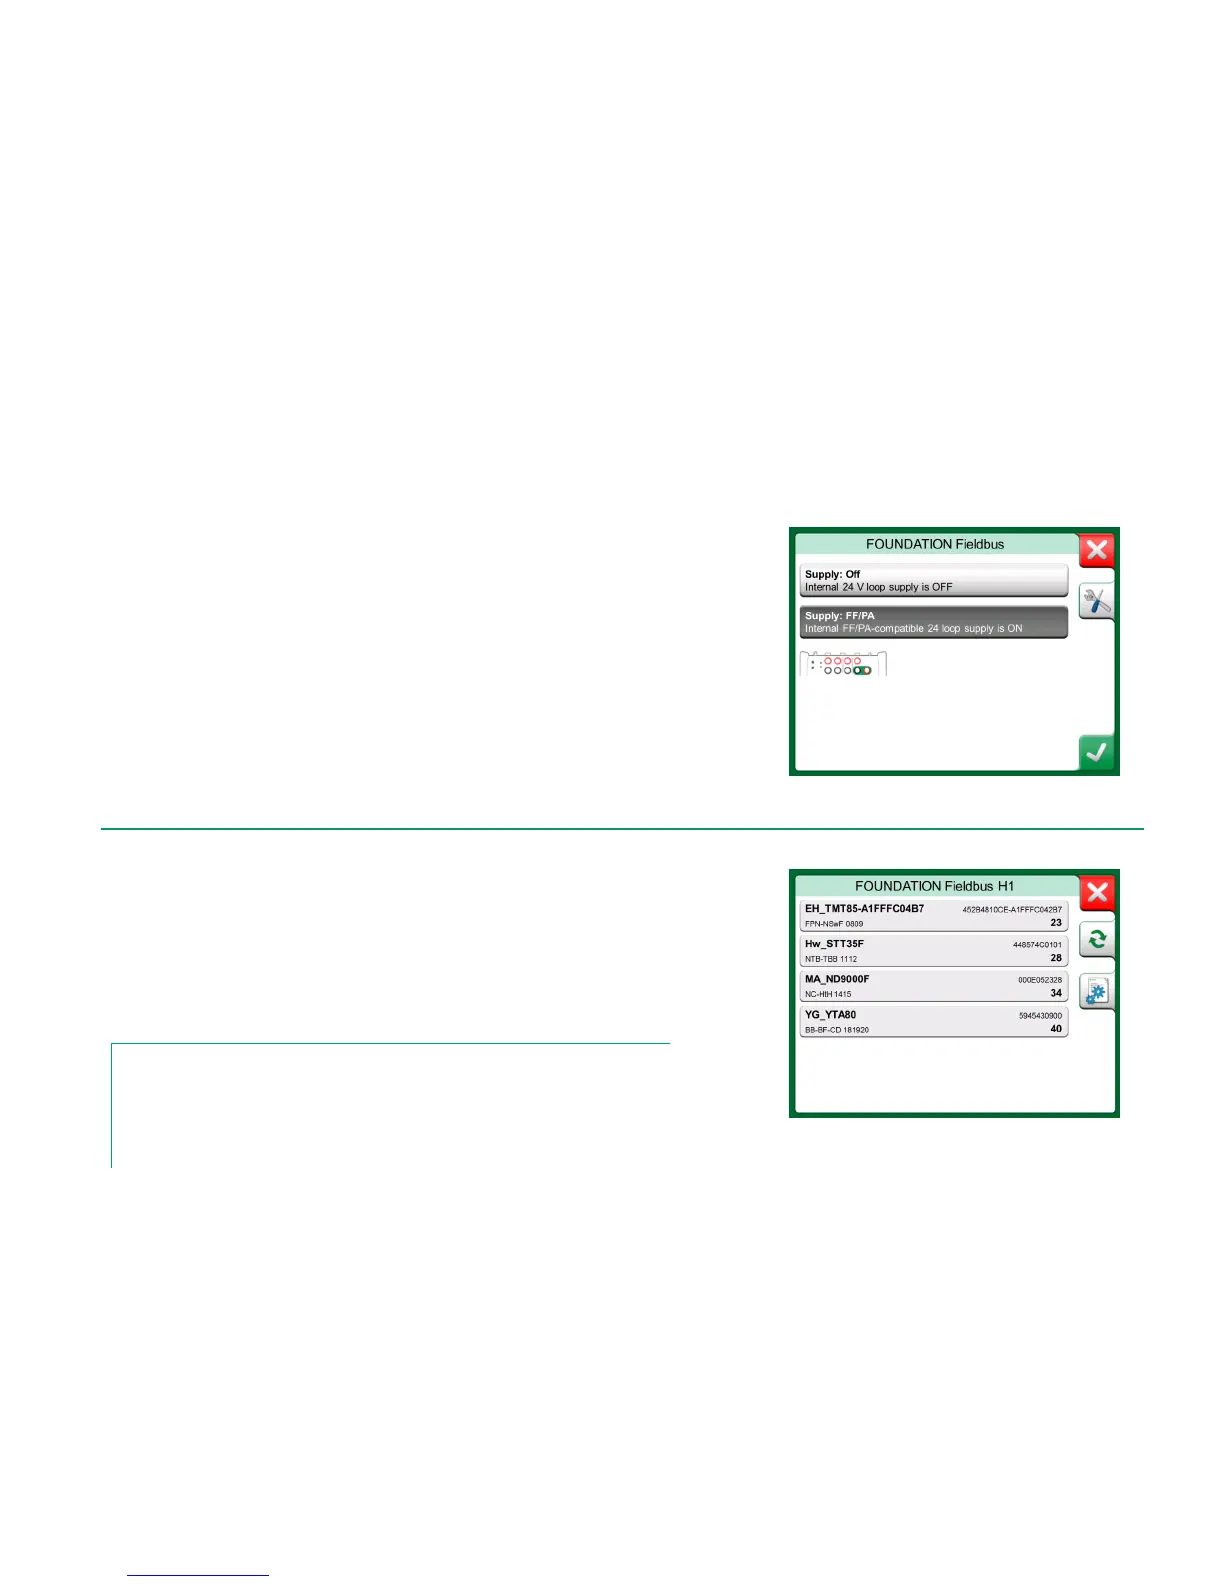
When a communication protocol is selected, a window opens for choosing
whether MC6's internal 24 V supply is used or not. When using an external
supply, ensure communication by using either a Fieldbus/HART compliant power
supply or add a suitable resistor between the power supply and the fieldbus. See
chapter Connections on page 62 and consult your power supply's manual.
There is also a button for editing/checking the Protocol Settings. The default
settings should apply, so do not make changes unless you are sure. Consult the
fieldbus instrument's manual, in case of communication problems.
See also HART Device Description Specifics on page 69.
When continuing, MC6 searches for connected instruments and a window with a
list of found devices opens. The window also includes a "refresh" button (two
"rotating arrows") to retry the search for connected instruments. The button with
the cogwheels allows you to quickly edit the tag and address for the listed instru-
ments. When edit mode is on, the button backgrounds change to blue.
When not editing tag and address, select the instrument for calibration by tapping
on its name in the displayed list. Then MC6 uploads the instrument's data into its
memory and when ready, displays it.
Note.
If MC6 does not have the Device Description file for the selected instrument, a window opens
informing you of the situation. Look for new Device Description files at Beamex's web site:
http://www.beamex.com. Install a downloaded Device Description file using the Device De-
scription Installer software available, e.g. on the CD-ROM shipped with MC6. Further information
is in the software's help file.