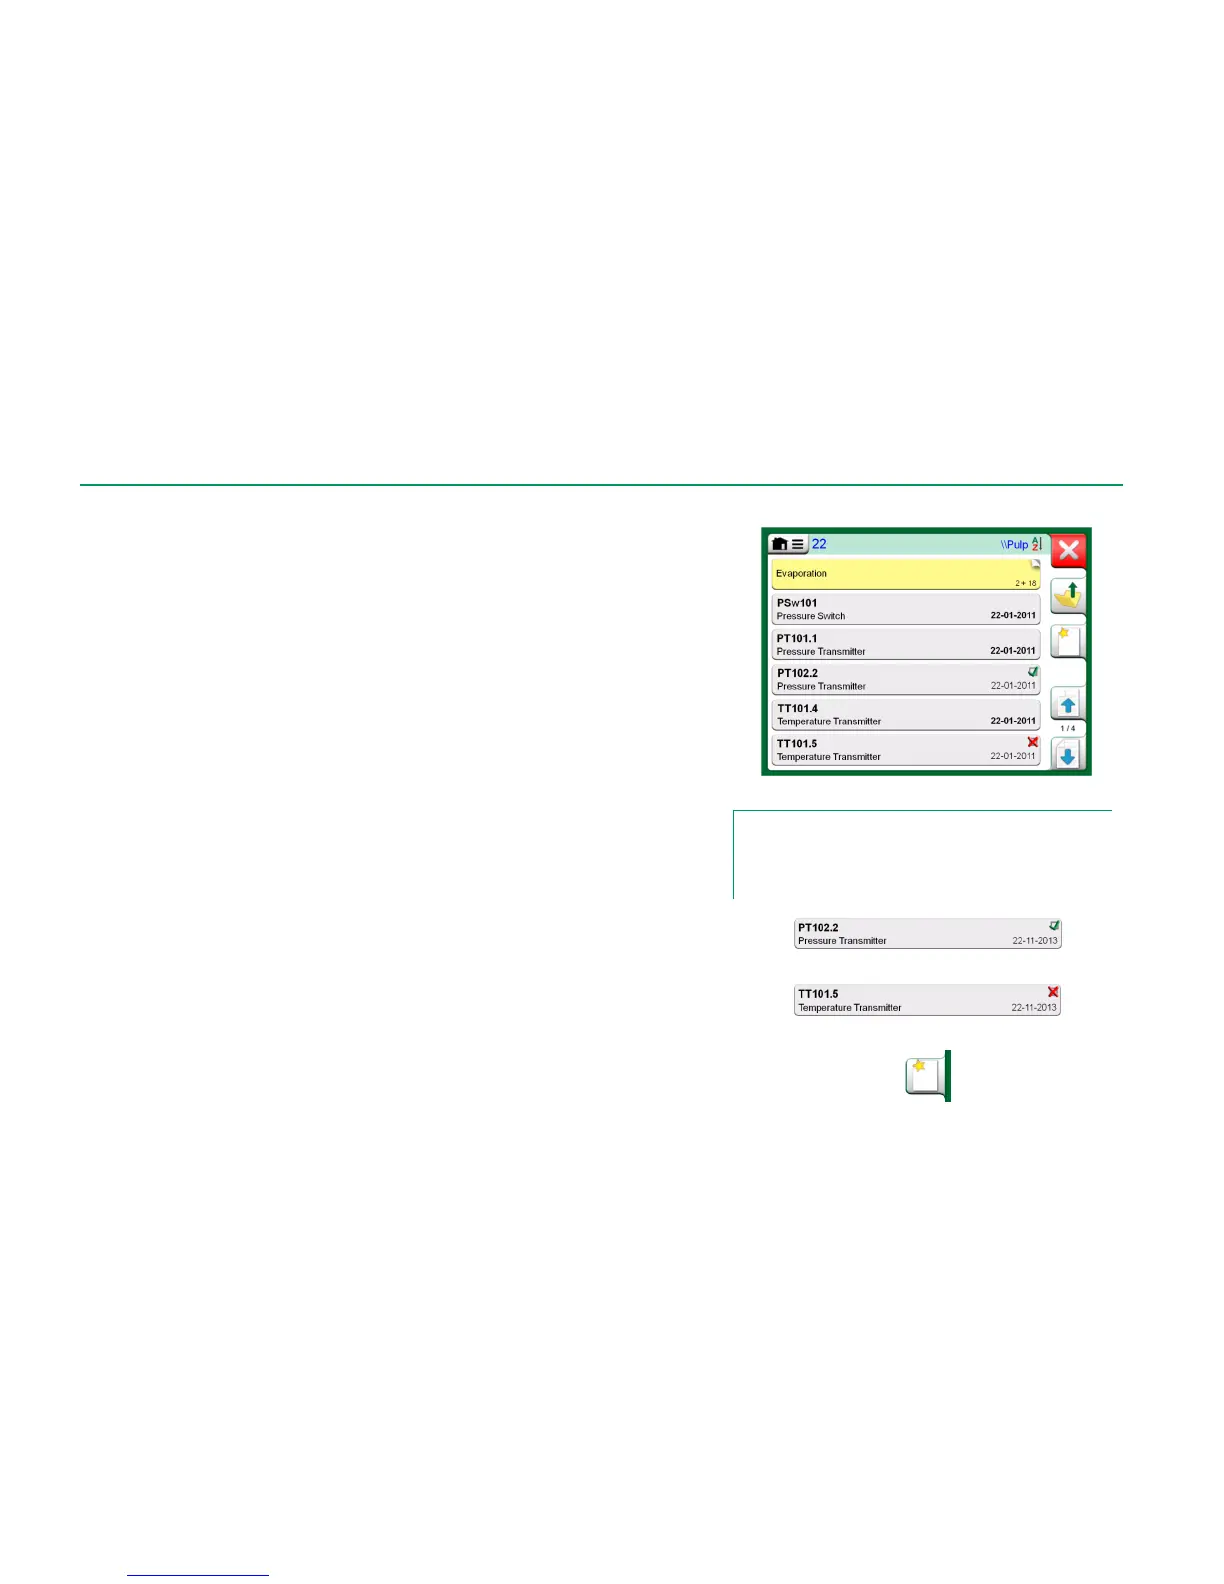
When you start the Documenting Calibrator, you arrive in Instrument List win-
dow. See adjacent picture for an example of an Instrument List.
MC6 allows you to hierarchically organize your instruments into a Plant Struc-
ture. The Instrument List window may contain both instruments (gray items) and
Plant Structure Levels (yellow items). The following sub chapters present fea-
tures available in Instrument List window and its menu.
See also Work Order View Mode on page 40.
INSTRUMENTS
Instruments have a gray background in the Instrument List window. The instru-
ment's upper text row displays the contents of one of the following fields: Posi-
tion ID, Name, Device ID or Device Serial Number. The first non-empty of the
aforementioned fields, in presented order, is displayed. The second row dis-
plays (possible) Function Name and Calibration Due Date data.
If the instrument has been calibrated, the rightmost end displays an icon. The
displayed icon depends on whether the instrument's latest calibration
"Passed", i.e. the found maximum errors were smaller than the instrument's
"Reject If" error limit, or did it "Fail". See pictures to the right.
To select an instrument for calibration, tap on it. Then the Instrument Over-
view Window, presented on page 41, opens.
To create a new instrument, tap the "Create New Instrument" button. See pic-
ture to the right. Then several pages of instrument configuration data opens.
Note that by default only basic pages are shown. View all pages by selecting
Show, All Pages from the menu available when creating/editing an instrument.
To delete an instrument, select it and use the delete command available in the
menu of opened Instrument Overview Window, presented on page 41.
Example of an Instrument List.
Note.
The Instrument List may be several pages long. Remember to
use the page browse buttons available on the right side of the
window.
Instrument's latest calibration "Passed"
Instrument's latest calibration "Failed"
"Create New Instrument" button