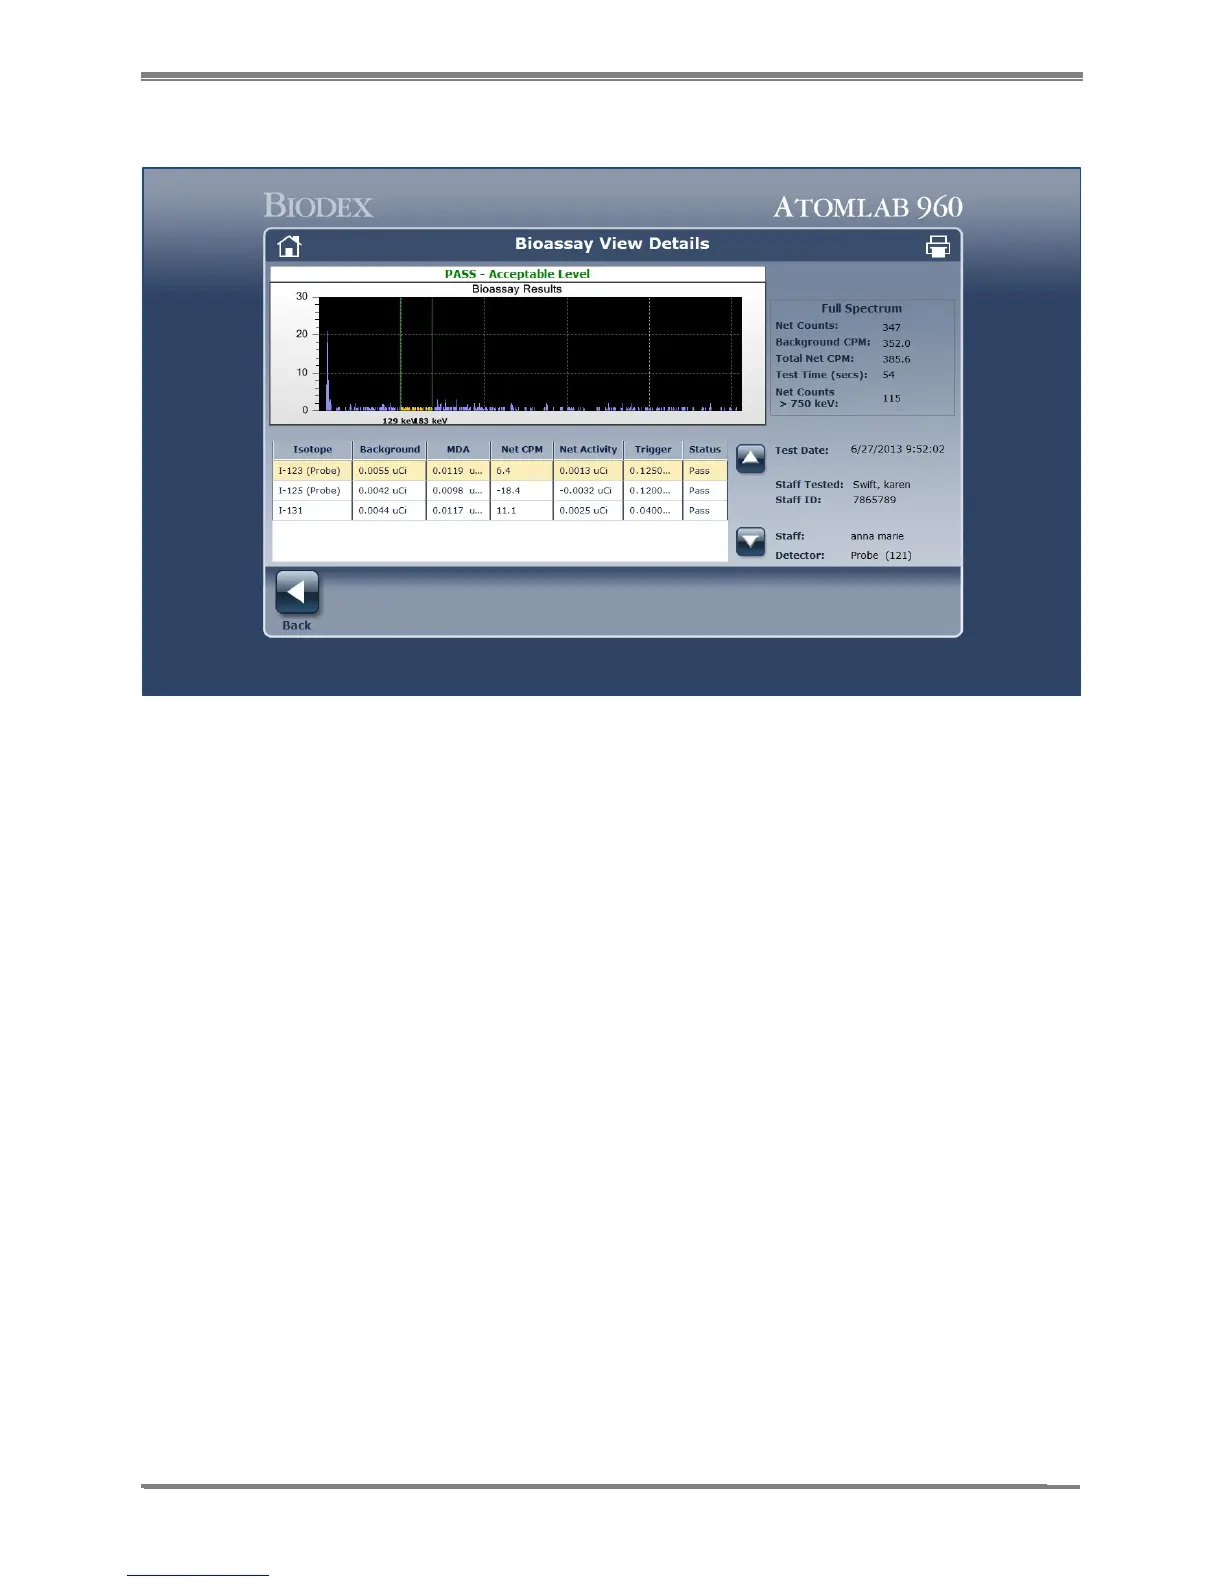
Figure 9.8. Bioassay View Details screen.
14. To print Bioassay results from the Bioassay View Details screen, Bioassay History screen or
Reports, select <Printer> from the top right corner of the screen. The selected Bioassay
Report will now be displayed. Select <Printer> again to print the report. Selecting the <+>
or <-> icons enlarges or decreases the report on the screen for viewing purposes. To save a
copy of the Bioassay Report to the computer, select <Save> and follow the standard
Windows save procedure. Select <Back> to return to the Bioassay View Details screen.
Select <Back> to return to the Bioassay History screen.
NOTE: Bioassay results may also be printed from the <Reports> menu on the <Home>
screen.
15. On the Bioassay History screen, select <View Options>. The Bioassay History View Options
screen is now displayed. This screen allows the user to select a specific “Staff Type”,
specific “Staff Name” or “All”, and the “Date Range” to be displayed for the results of the
testing on the Bioassay History screen.