Select An Isotope:
1. From the <Home> screen, select the <Utilities> icon. The Utilities Menu is now displayed.
2. Select <Isotopes>. The Select An Isotope screen is now displayed. From this screen you can
add an isotope, edit an isotope, delete an isotope and add detector efficiency. If a detector
has been selected, it is listed on the upper left side of the Select An Isotope list. If the
detector is listed as unknown, use the <Search> key to select the desired detector from the
Select Detector List.
NOTE: Some isotopes have different ROIs for the Probe and Well.
Add A New (User-Defined) Isotope
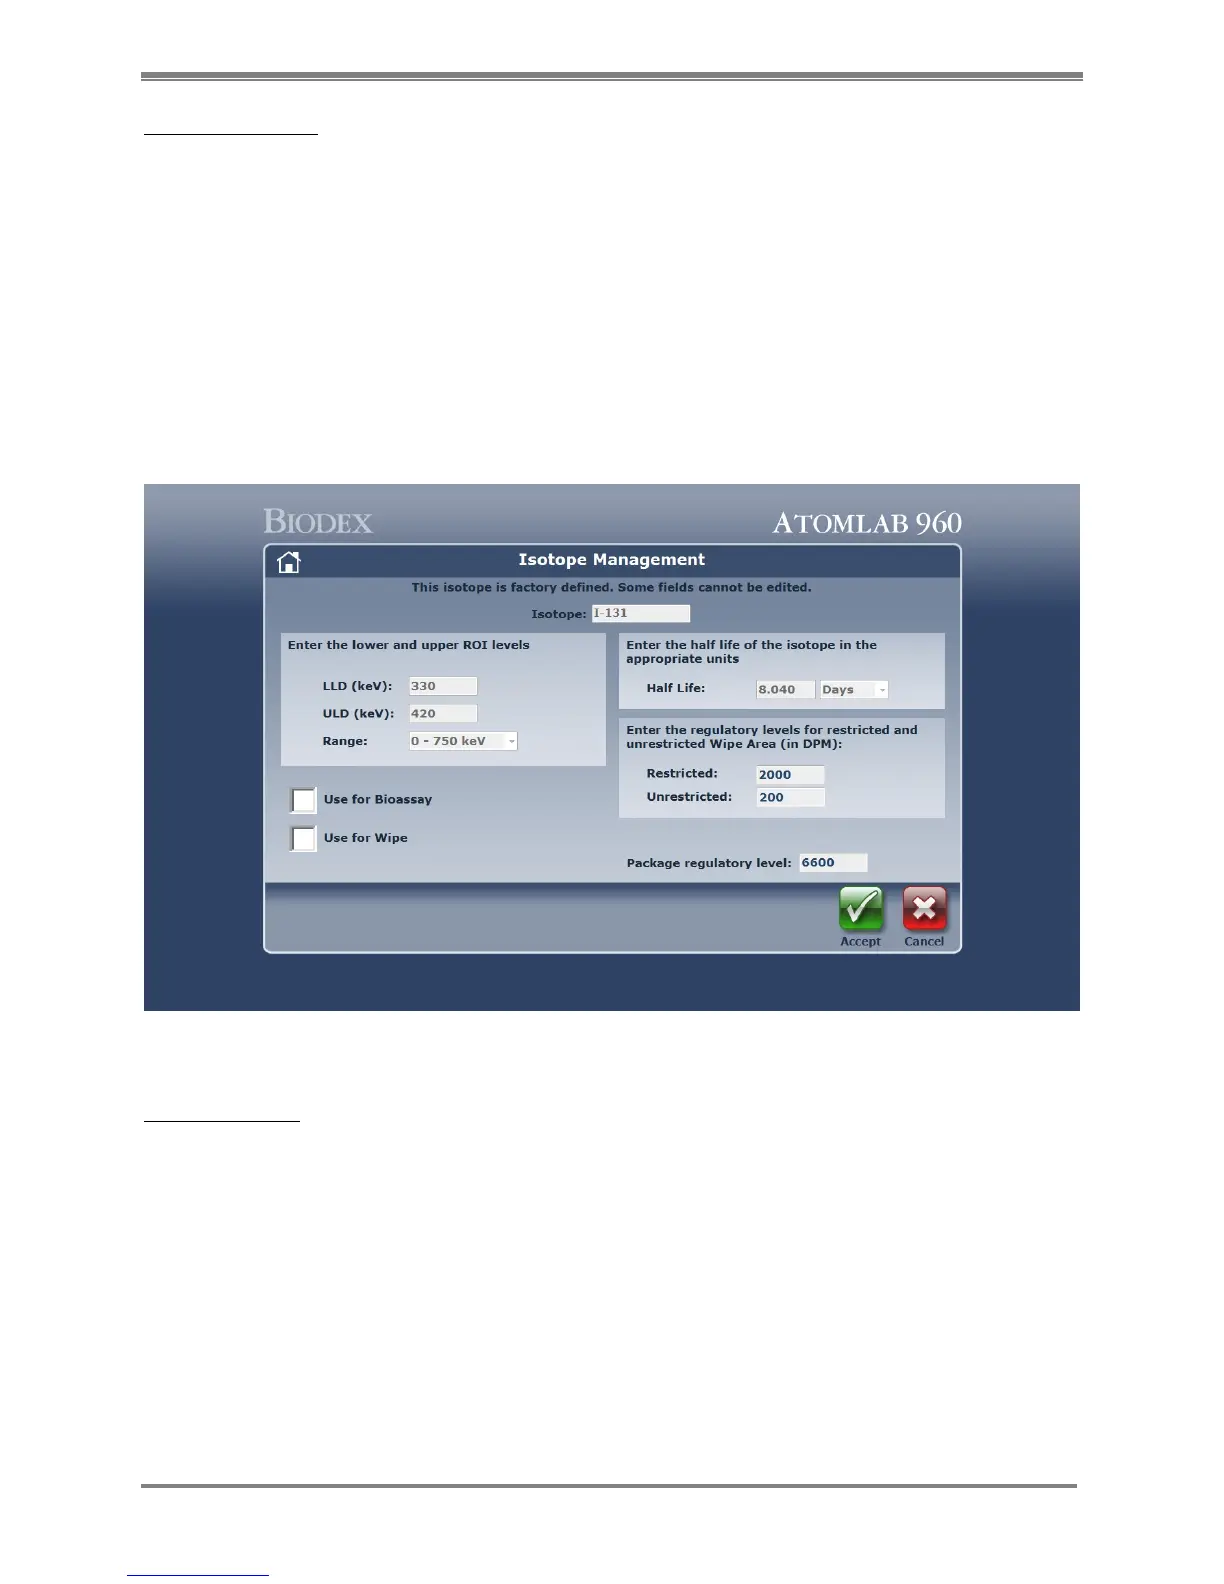
(See Figure 4.16.)
Figure 4.16. The Isotope Management screen.
Add An Isotope:
1. Select <Add Isotope>. The Isotope Management screen is now displayed.
2. Enter a unique isotope name in the top field.
3. Enter the lower and upper ROI levels. (See Determining ROI later in this chapter.)
4. Enter or select the KeV range. A drop-down box provides preset ranges from which to
choose, if desired.
5. Select/De-select Use for Wipe.
6. Enter the half-life of the isotope in the appropriate units: minutes, hours, days or years.
7. Enter the regulatory levels for the restricted and unrestricted Wipe Area in DPM units.
8. Enter the regulatory package level. The standard level is 6,600 DPM based on a wipe area
of 10cm
2
.
9. When all fields are completed, select <Accept> to save the data and select the current
isotope.