Perform Chi-Square:
1. After the system has been turned ON and allowed to warm-up and stabilize, select the <right
arrow> from the Quality Assurance screen, then select <Chi-Square).
2. Select <CHI Square>. The <Select Detector> screen is now displayed.
3. Highlight the well or probe on which to perform Chi Square and select <Accept> to confirm.
4. Position the 10 µCi, Cs-137 source in the collimator of the appropriate detector and select
<Accept>. The Count Rate screen is now displayed.
5. The Counting Chi-Square screen is now displayed with the selected isotope and detector
listed above the counting window. The Chi-Square number is displayed beneath the
spectrum. This is the sample number currently in progress. The system will automatically
increment until all 10 passes or samples have been counted. At the completion of the 10th
pass the system will calculate Chi-Square and display the value on the screen, along with a
passed or failed note. At this point the result is entered into the system memory. To the
right of the screen, ROI Counts, ROI CPM, Elapsed Time and Time Remaining are displayed.
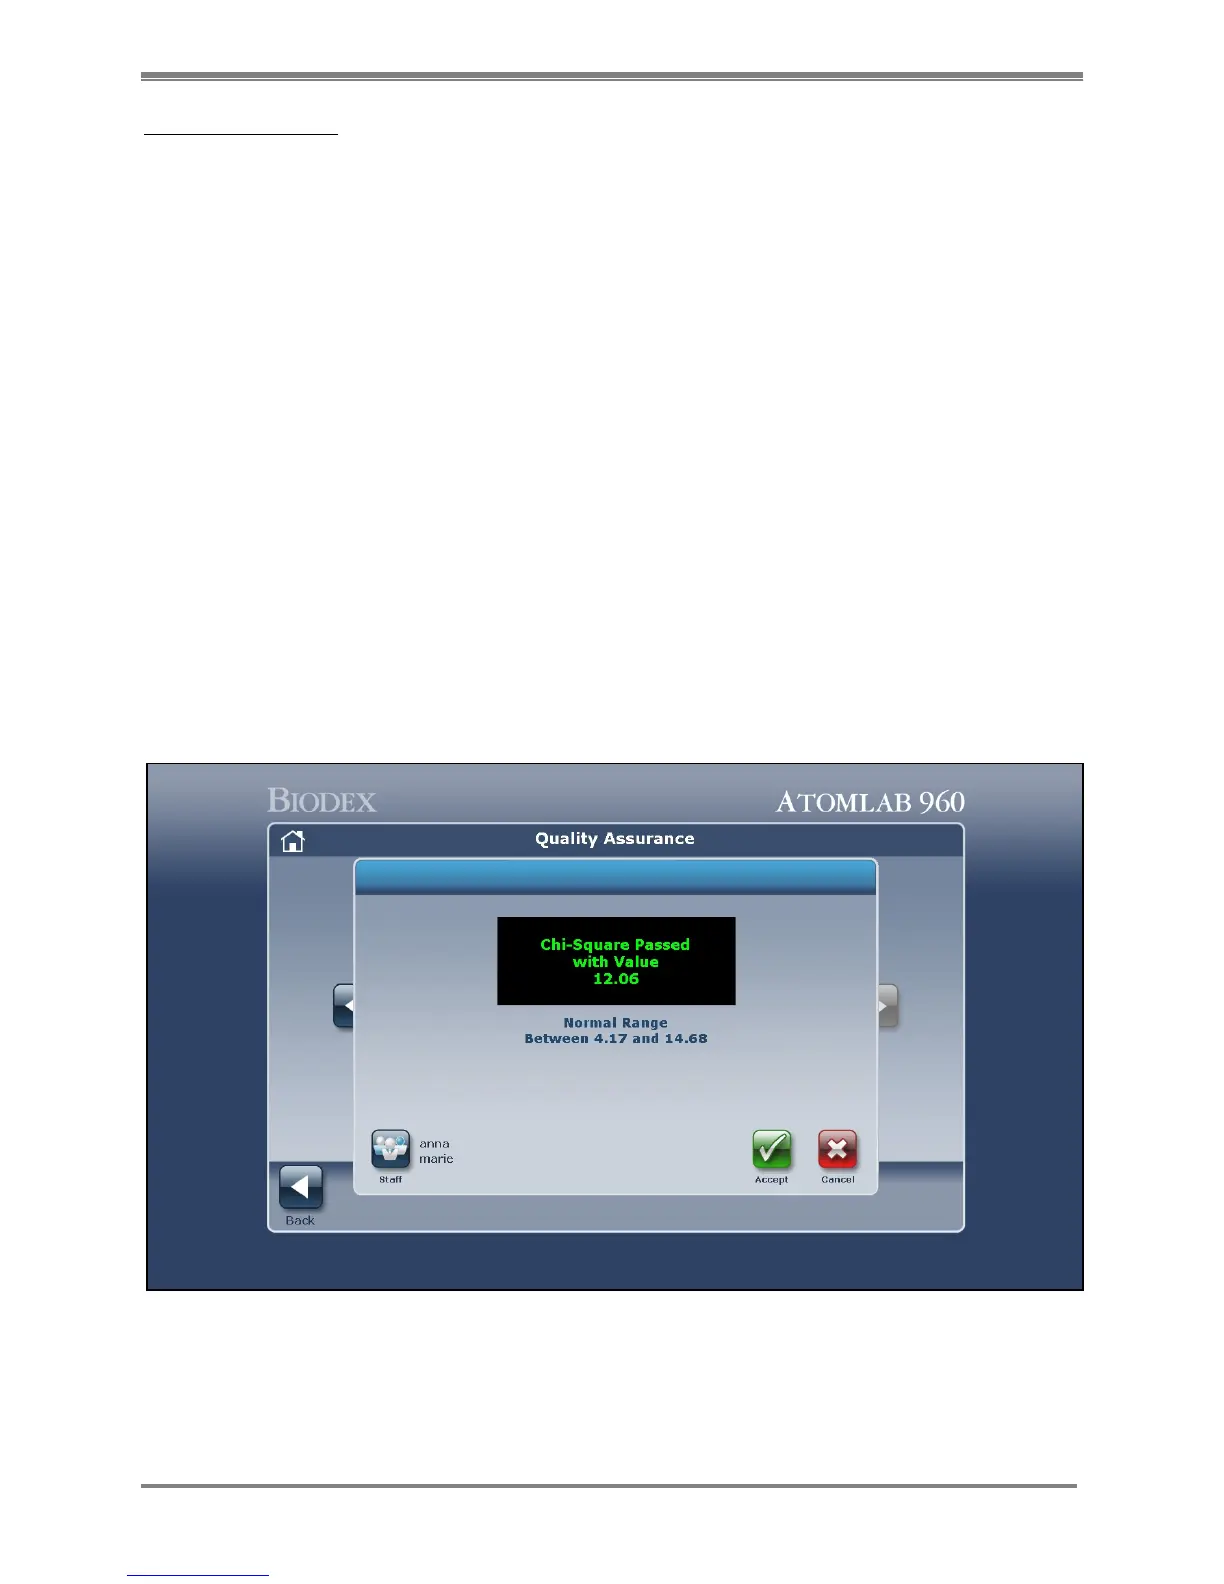
6. When Chi-Square completes, a "Chi-Square Passed" or “Chi-Square Failed” message will
display on the screen.
7. The user can select <Staff> to view, select and update the <Staff>, <Accept> the Chi-Square
Information displayed, or <Cancel> to return to the Select Detector screen without saving the
Chi Square.
8. If the Chi Square Information is acceptable, select <Accept> to accept the Chi-Square results
and return to the Quality Assurance screen.
Figure 5.17. A Chi-Square counting screen showing that Chi-Square passed.