5-16 QUALITY ASSURANCE Biodex Medical Systems, Inc. © 2014
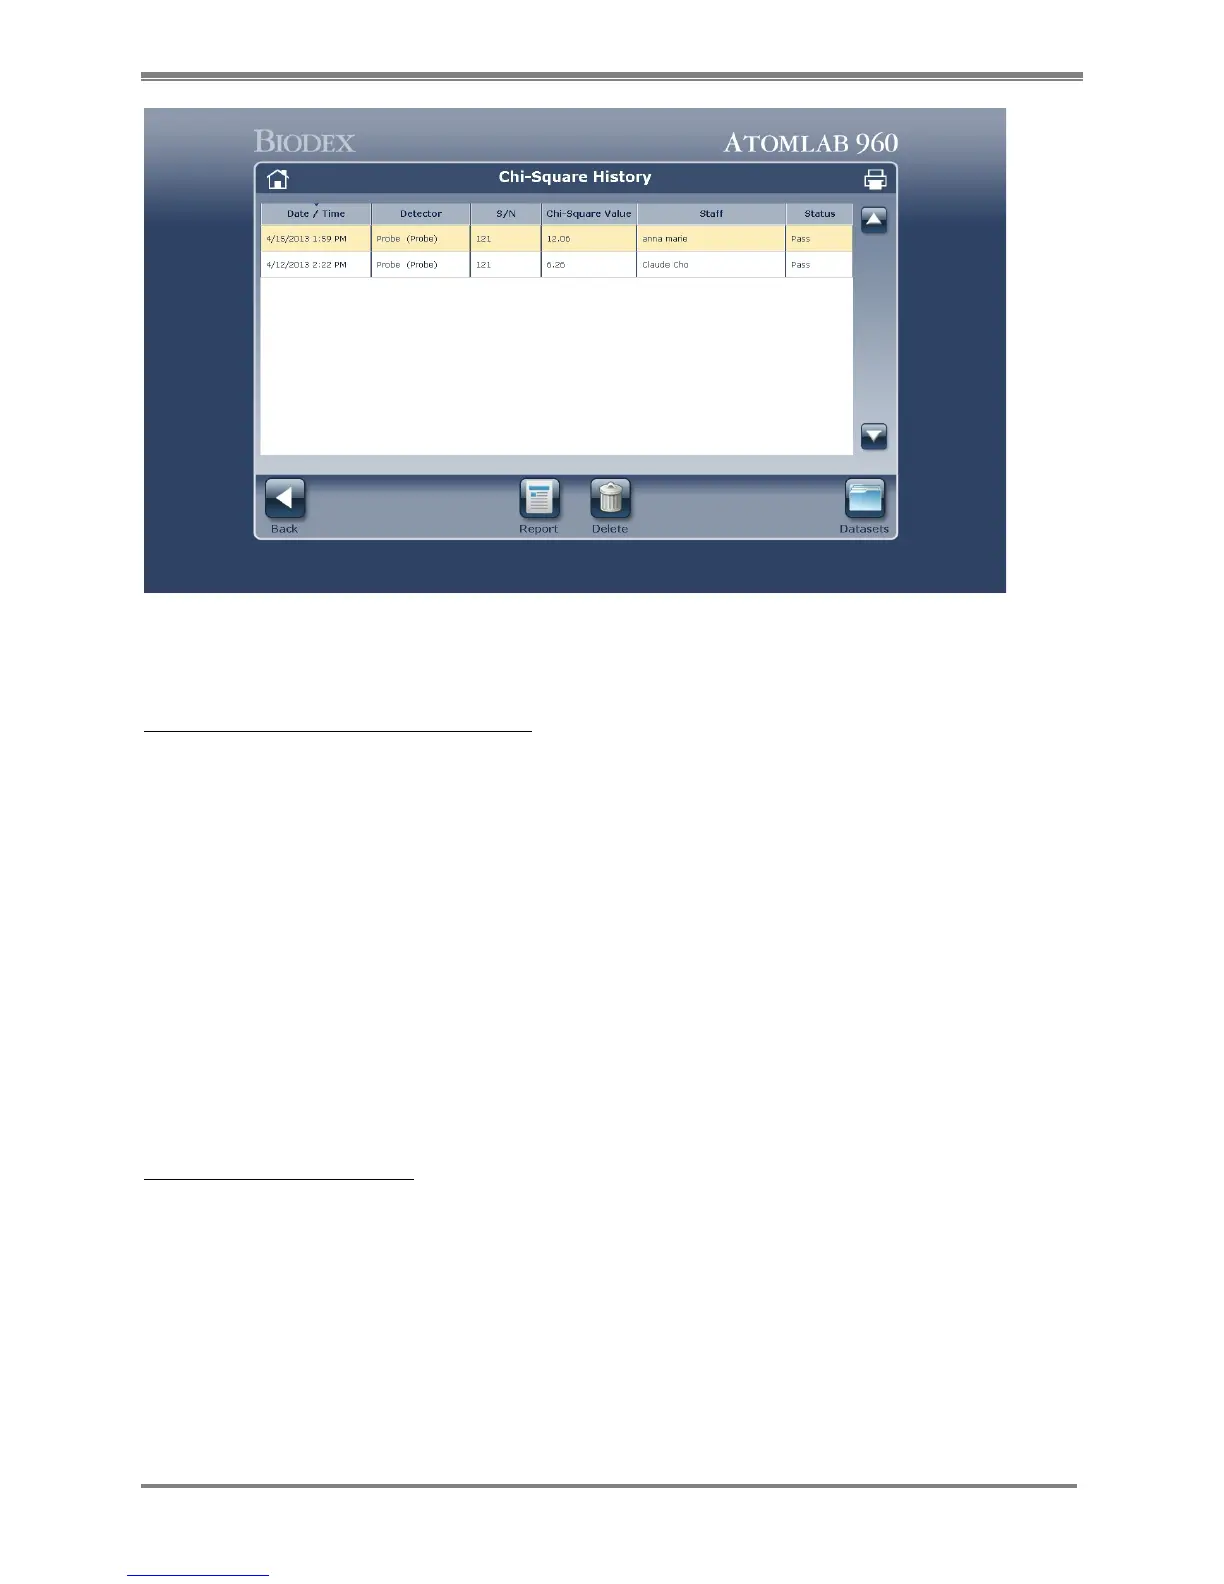
Figure 5.18. Chi-Square History screen.
View, Print or Save A Chi-Square Report:
1. Select <Chi Square History> from the Quality Assurance screen. The Chi-Square History
screen is now displayed. Select the <Report> icon at the bottom of the screen.
2. Press the <Print> icon at the top of the screen and follow standard Windows procedure to
print the Chi-Square results.
3. If you would like to view and print Chi-Square details, highlight the desired report and select
<Report>. The Chi-Square Details screen is now displayed showing the date measured, value,
status, detector, detector serial number, Chi-Square Table and associated staff. Select
<Print> to print the selected Chi-Square Detailed report or <Save> to save report as desired.
4. Select <Datasets> to view or print a Chi-Square Detailed report. Select <Close> when you are
done to return to the Chi-Square History screen.
NOTE: To print a list of all Chi-Square performed, select the printer icon at the top of the
screen and enter the desired date range from the Chi-Square History List. If you want the
Chi-Square details, check the include Measurement. The date range selected is now displayed.
Delete A Chi Square Report:
1. Select <Chi Square History> from the Quality Assurance Page. The Chi Square History screen
is now displayed.
2. Highlight the Chi Square report to delete and select <Delete>. The system displays a
message that you are about to permanently remove the selected report.
3. Select <Accept> to delete the report and return to the Chi Square History screen, or <Cancel>
to return to the Chi Square History screen without making a deletion.