Setting the ATEM Camera ID
URSA Cine can also stream to an ATEM Television Studio HD8 ISO with tally, record trigger
and basic camera control functionality. For this, you will need to set the ATEM Camera ID in the
URSA Cine setup settings.
For more information on setting your camera’s ATEM Camera ID, refer to the ‘Setup Settings’
section earlier in this manual.
Creating the XML File
To create an XML settings file connect ATEM Streaming Bridge to the internet by plugging a
network cable from the ‘Ethernet’ port to an internet router or network switch.
Connect ATEM Streaming Bridge to your computer using a USB-C cable and launch ATEM Setup.
In the setup tab, confirm the network settings are correct and select ‘Internet’ from the ‘stream
service’ options. You should see a ‘visible worldwide’ message in the internet status box. This
means everything is working correctly.
A Note About Port Forwarding
If you see a port forwarding or UPnP error in the ‘internet status’ box you will need to
ask your internet provider or network administrator to set up port forwarding on your
internet connection to ‘TCP port 1935’.
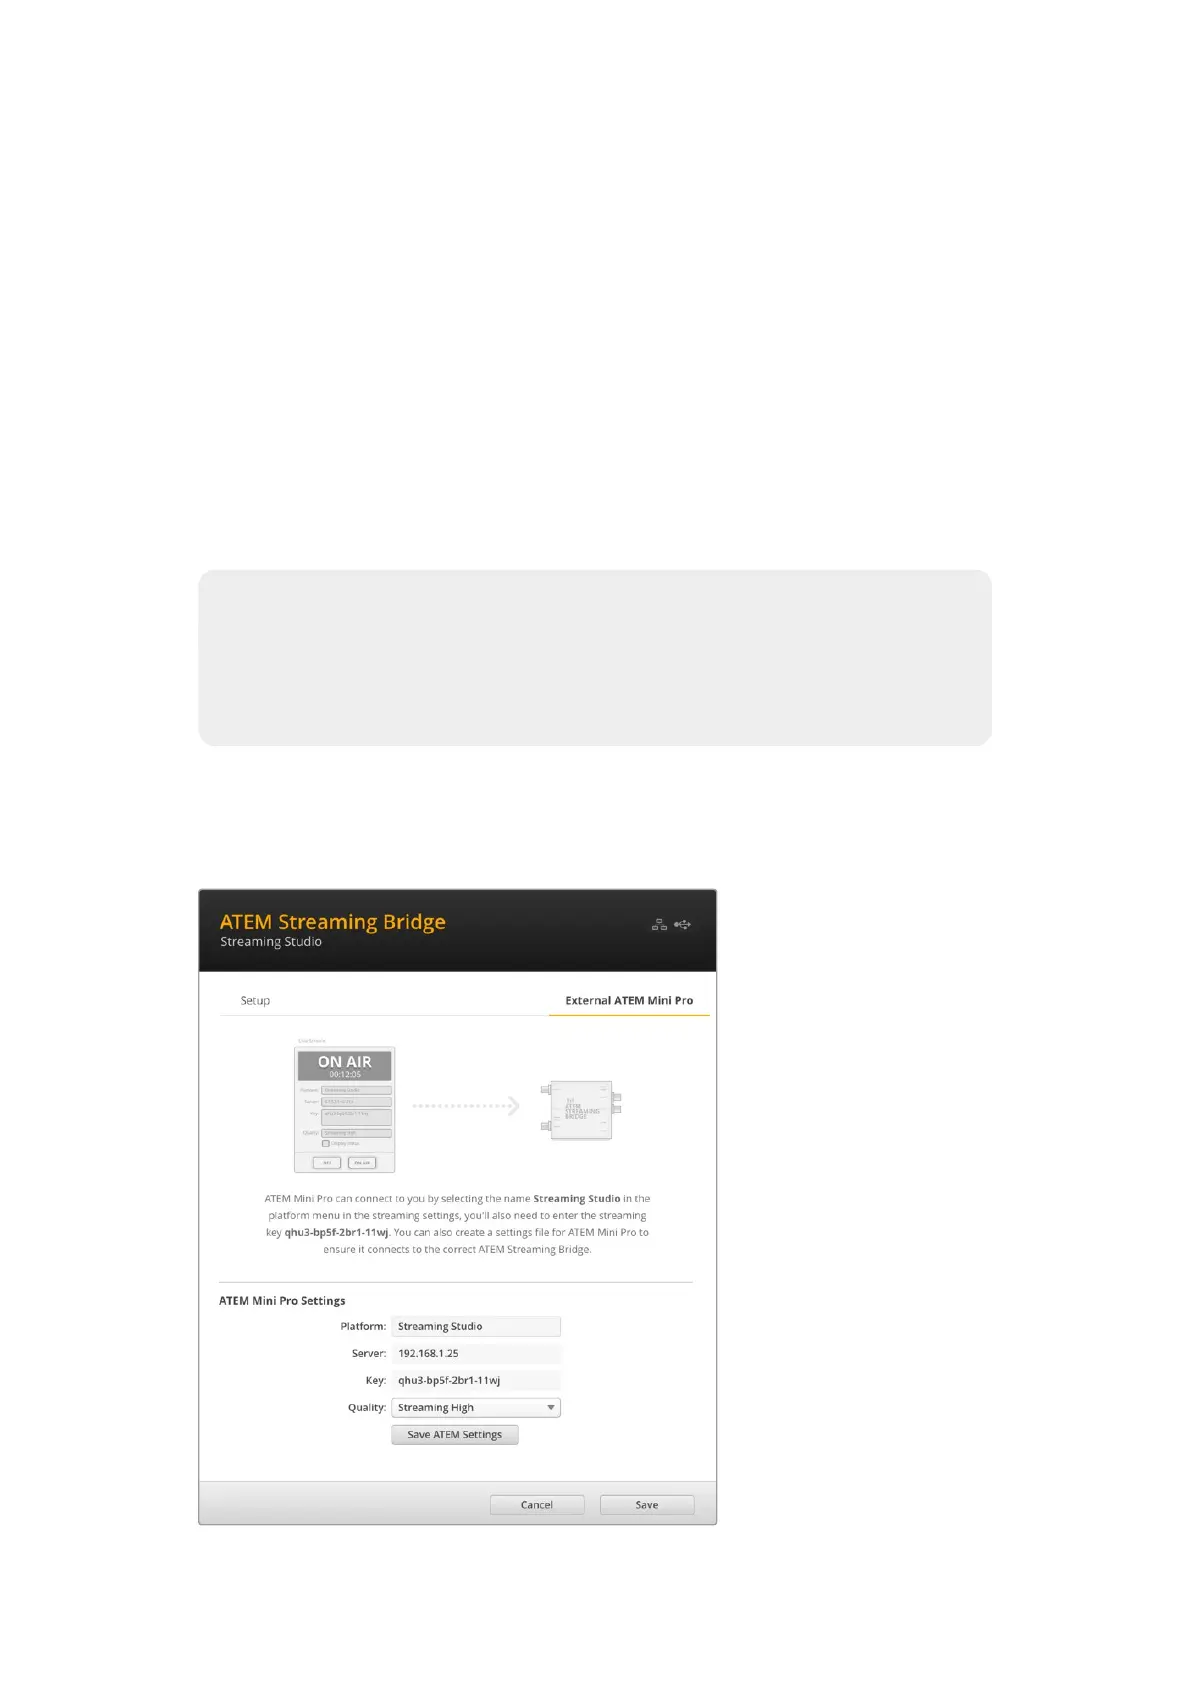
Exporting the XML File
Once you have confirmed your settings in the ATEM Setup tab and have successfully
connected your ATEM Streaming Bridge to your network or the internet, you can export the
XML setup file.
1 Click the ‘external
ATEMMini Pro’ tabin the
top right of the window.
2 Click in the ‘platform’ box
and type a new name.
This name will be the
name listed in the remote
Blackmagic URSA Cine’s
platform menu.
3 Select the quality you
want to stream. This
setting will set the quality
setting in the remote
URSA Cine.
4 Click the ‘Save ATEM
Settings’ button, choose
a location on your
computer to save the
XML file and click ‘save’.
5 You can now email the
saved XML fileto the
remote operator.
143Settings