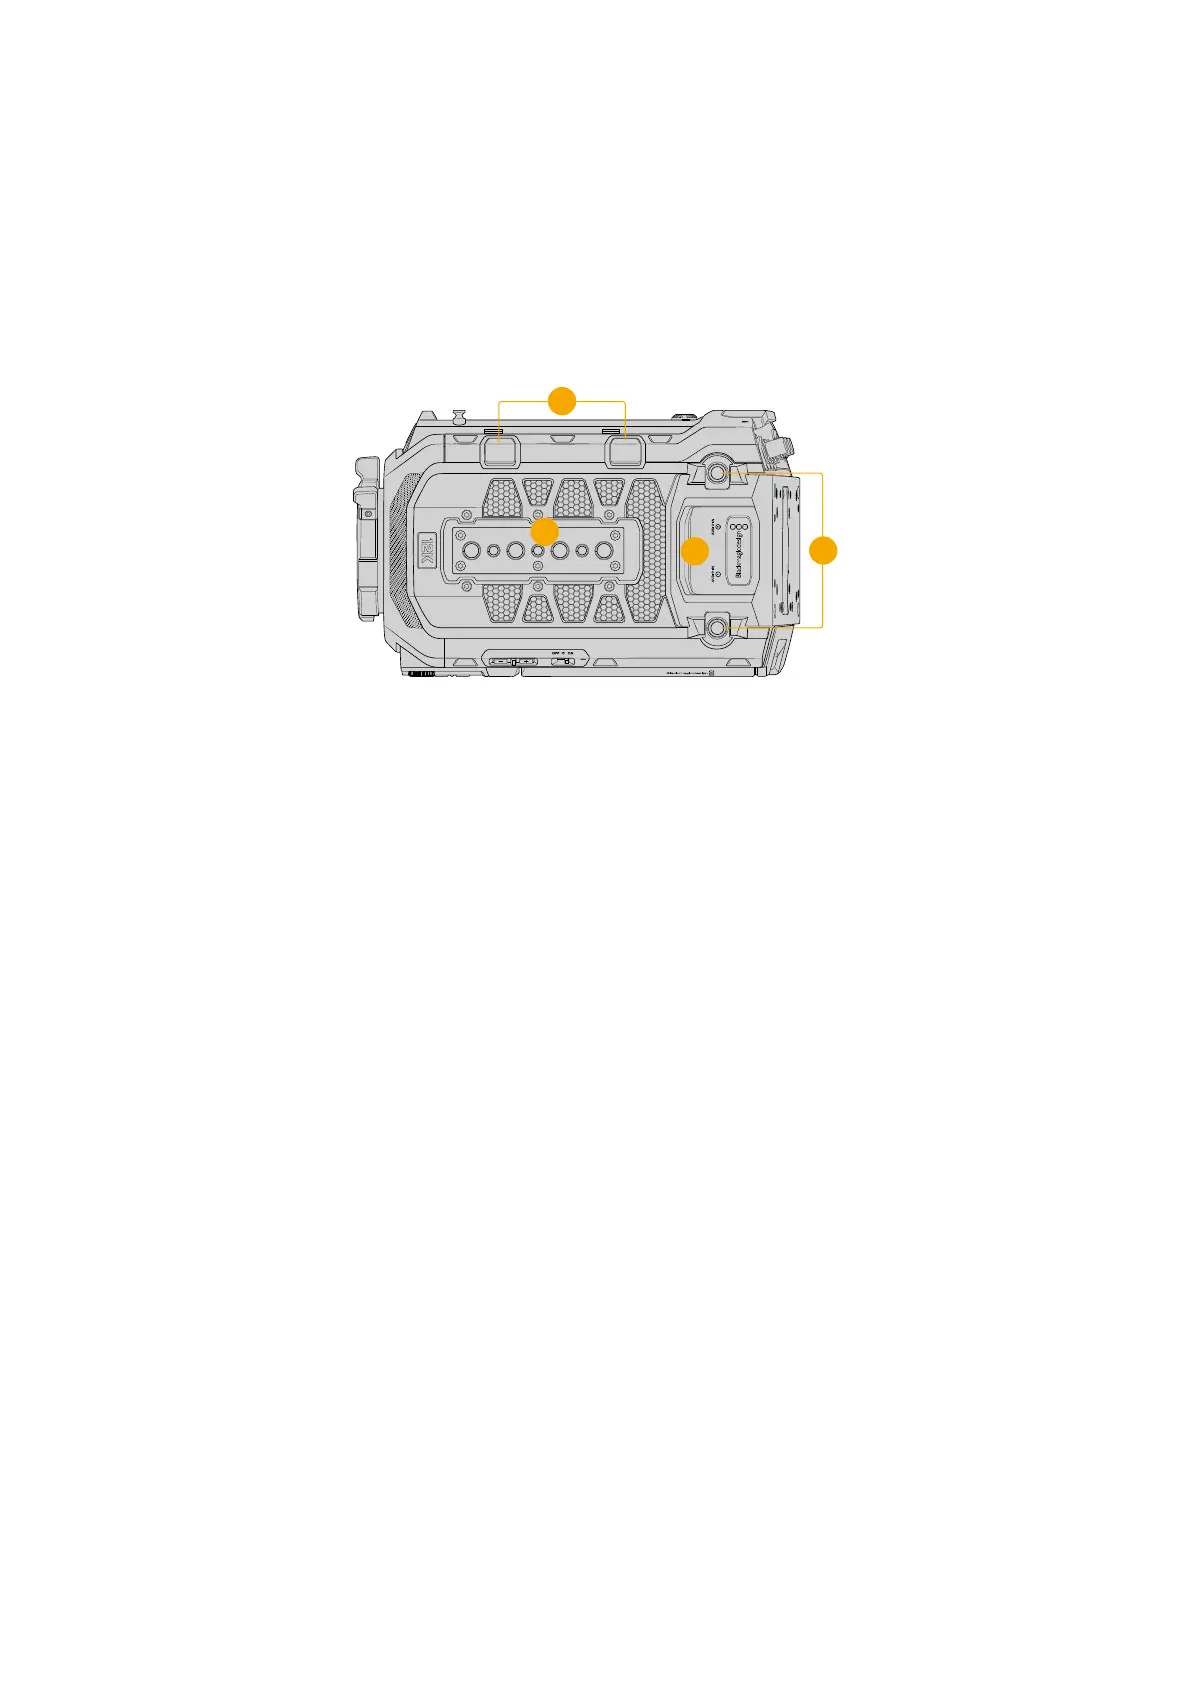
Top Panel
The top panel features balanced XLR connectors for plugging in microphones and audio
equipment. WiFi antennas are attached to the antenna mounts towards the rear panel on each
side of the XLR connectors.
USB ports located towards the right side assist station let you connect accessories, or connect
to a computer to update the camera. 1/4” 20 and 3/8” 16 mounting points are provided for
attaching the top handle and accessories.
2
3
1
4
External analog audio can be plugged into the balanced
XLRconnectorson the top panel
1 USB-C Ports
The USB ports on the top edge of the camera are for expansion. The port closer to the
rear panel is used to connect to a computer when updating the camera, or for using
cellular data tethering when streaming from URSA Cine or uploading your proxy files to
Blackmagic Cloud.
2 Top Panel Mounting Points
Your camera’s top panel contains seven strong mounting points for attaching the top
handle andaccessories. The mounting points include three 1/4” 20 and four 3/8” 16 threads.
To ensure proper ventilation, take care not to obstruct your camera’s fan vents when
connecting accessories.
3 XLR Audio In
Use the balanced XLR inputs to plug in external analog audio from professional equipment
such as audio mixers, PA systems or external microphones. The XLR connectors supply
48V phantom power so you can use microphones that aren’t self powered. Refer to the
‘internal control panel’ section for more information on phantom power.
4 WiFi Antenna Points
These points are for attaching WiFi antennas to the camera. Please ensure that you use the
antennas that were included with your URSA Cine camera.
To attach the antennas:
1 First unscrew the dust caps from each point and keep them somewhere safe.
2 Connect the included WiFi antennas by screwing them onto each point until they feel
secured to the camera. Avoid over tightening to prevent stripping their threads.
18URSA Cine Overview