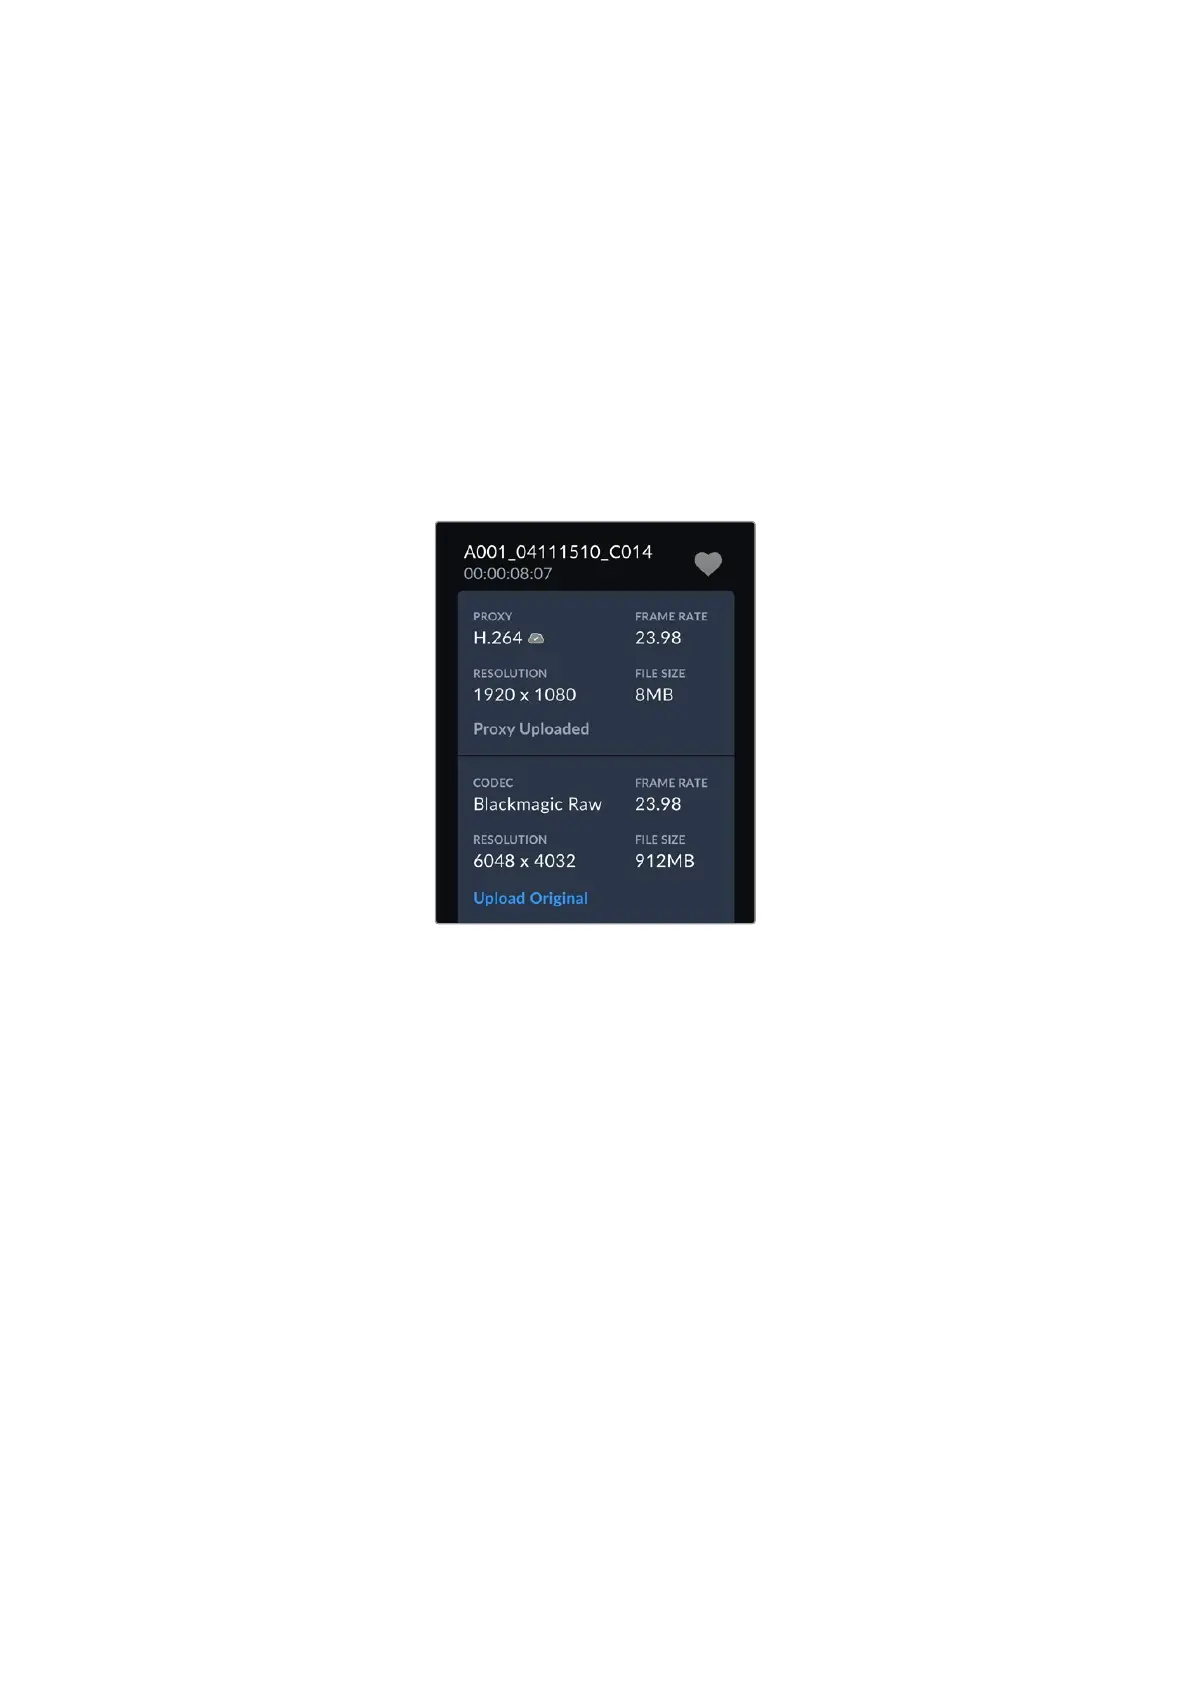
Upload Original
When uploading clips to Blackmagic Cloud projects with ‘proxies only’ selected in your
camera’s ‘setup’ settings, you can still choose to upload an original clip using the clip’s
metadata viewer. For example, this can be helpful when you are shooting at high resolutions
using Blackmagic RAW with low compression as the files can get very large. To save cellular
upload data you may choose to upload proxies only and then upload specific original clips later
as required.
To upload an original clip:
1 Select the Blackmagic Cloud project from the projects panel and tap the clip to open it in
the playback viewer.
2 Tap the ‘information’ icon in the controls menu to display the clip’s metadata.
3 In the metadata window, scroll to the section that displays metadata information for your
clip’s original file. Tap the ‘upload original’ button.
Uploading to your Blackmagic Cloud Storage
You can also choose to upload clips directly to your own private Blackmagic Cloud storage.
This can be useful if you want to upload and back up clips but not into a specific DaVinci
Resolve project. Access your cloud storage by logging into your Blackmagic Cloud account on
your computer and selecting ‘cloud storage’ from the menu.
To upload clips to your Blackmagic Cloud storage:
1 Tap the sidebar icon at the top left of the Blackmagic Cloud project panel.
2 Scroll to the bottom of the project list and select your cloud storage, this will be named with
your Blackmagic Cloud user name, followed by ‘storage’.
37Uploading Clips to Blackmagic Cloud