Using the 1st AC Page
When shooting with PL or LPL lenses that have built in Cooke /i technology, and also some EF
cine primes and zooms your URSA Cine will be able to read the movement of the focus, iris and
zoom position through the lens mount. This means you can set marks on the focus distance
scale on the right of the screen that you can use for precisely and repeatedly hitting any
specific exposure and focus points you choose.
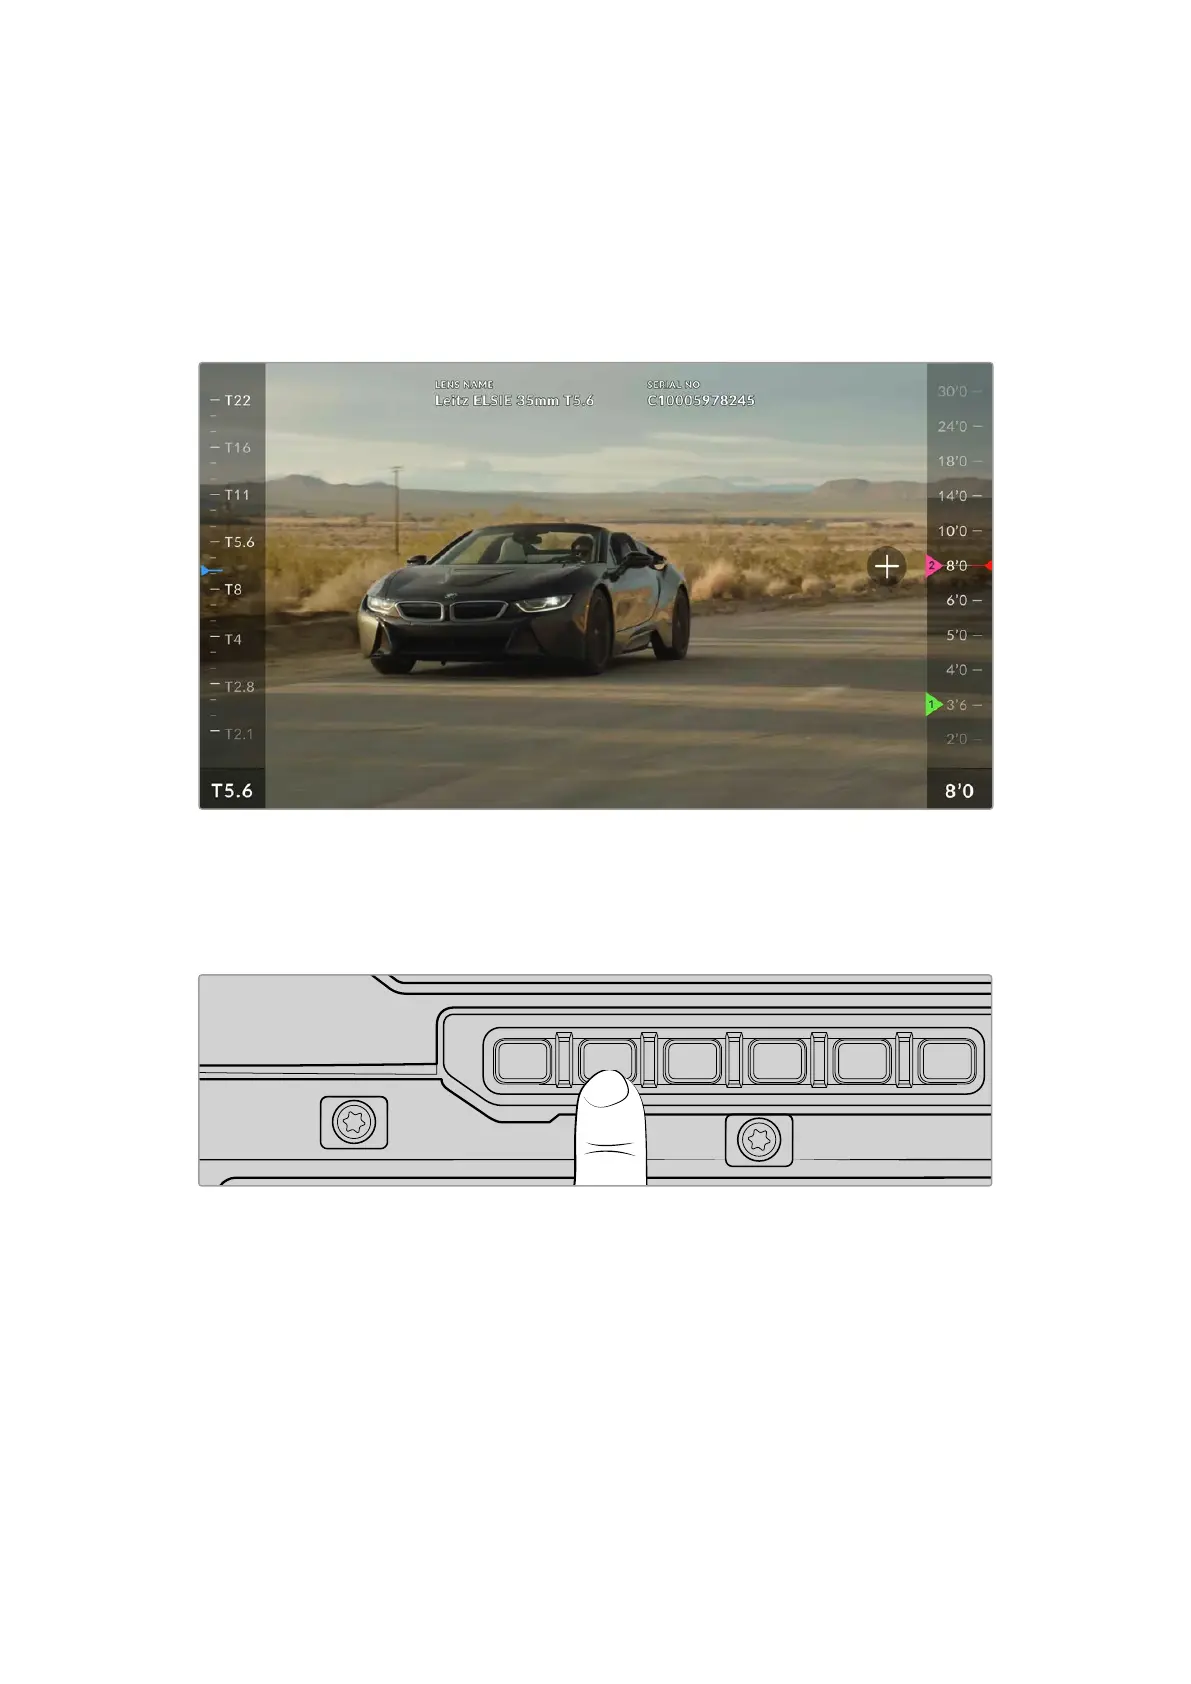
The 1st AC page lets you set multiple focus marks on a line scale to make sure you achieve perfect focus
and exposure
To set the focus marks:
1 Press the ‘lens’ button to open the 1st AC page on the assist station touchscreen.
12G SDI OUT
CH1/3
LOCK
EXT
RS
VIEWFINDER
CH1/2 CH3/4
DISP LENS SLATE AUD
STRM
…
REC
CH2/4
USB
12G SDI OUT
REF IN/TC IN
10G
12V/24V
2 Adjust focus on the lens and find your desired focus point. Once set, tap the plus icon on
the touchscreen. A focus mark is set on the focus scale.
3 Adjust the lens focus again to find the second focus point and repeat the same procedure.
Now when you adjust focus, you can repeatedly find those exact points by monitoring the focus
marks on the focus scale.
The color of the focus marks can be changed so they are easier to identify in a sequence.
Simply tap and hold the focus mark to reveal the color editor. Select the color you want and tap
outside of the editor to close.
To delete a focus mark, open the color editor and tap the trash icon. Tap the ‘reset’ icon to
remove all focus points.
77Control Buttons