VIEWFINDER
EXT
RS
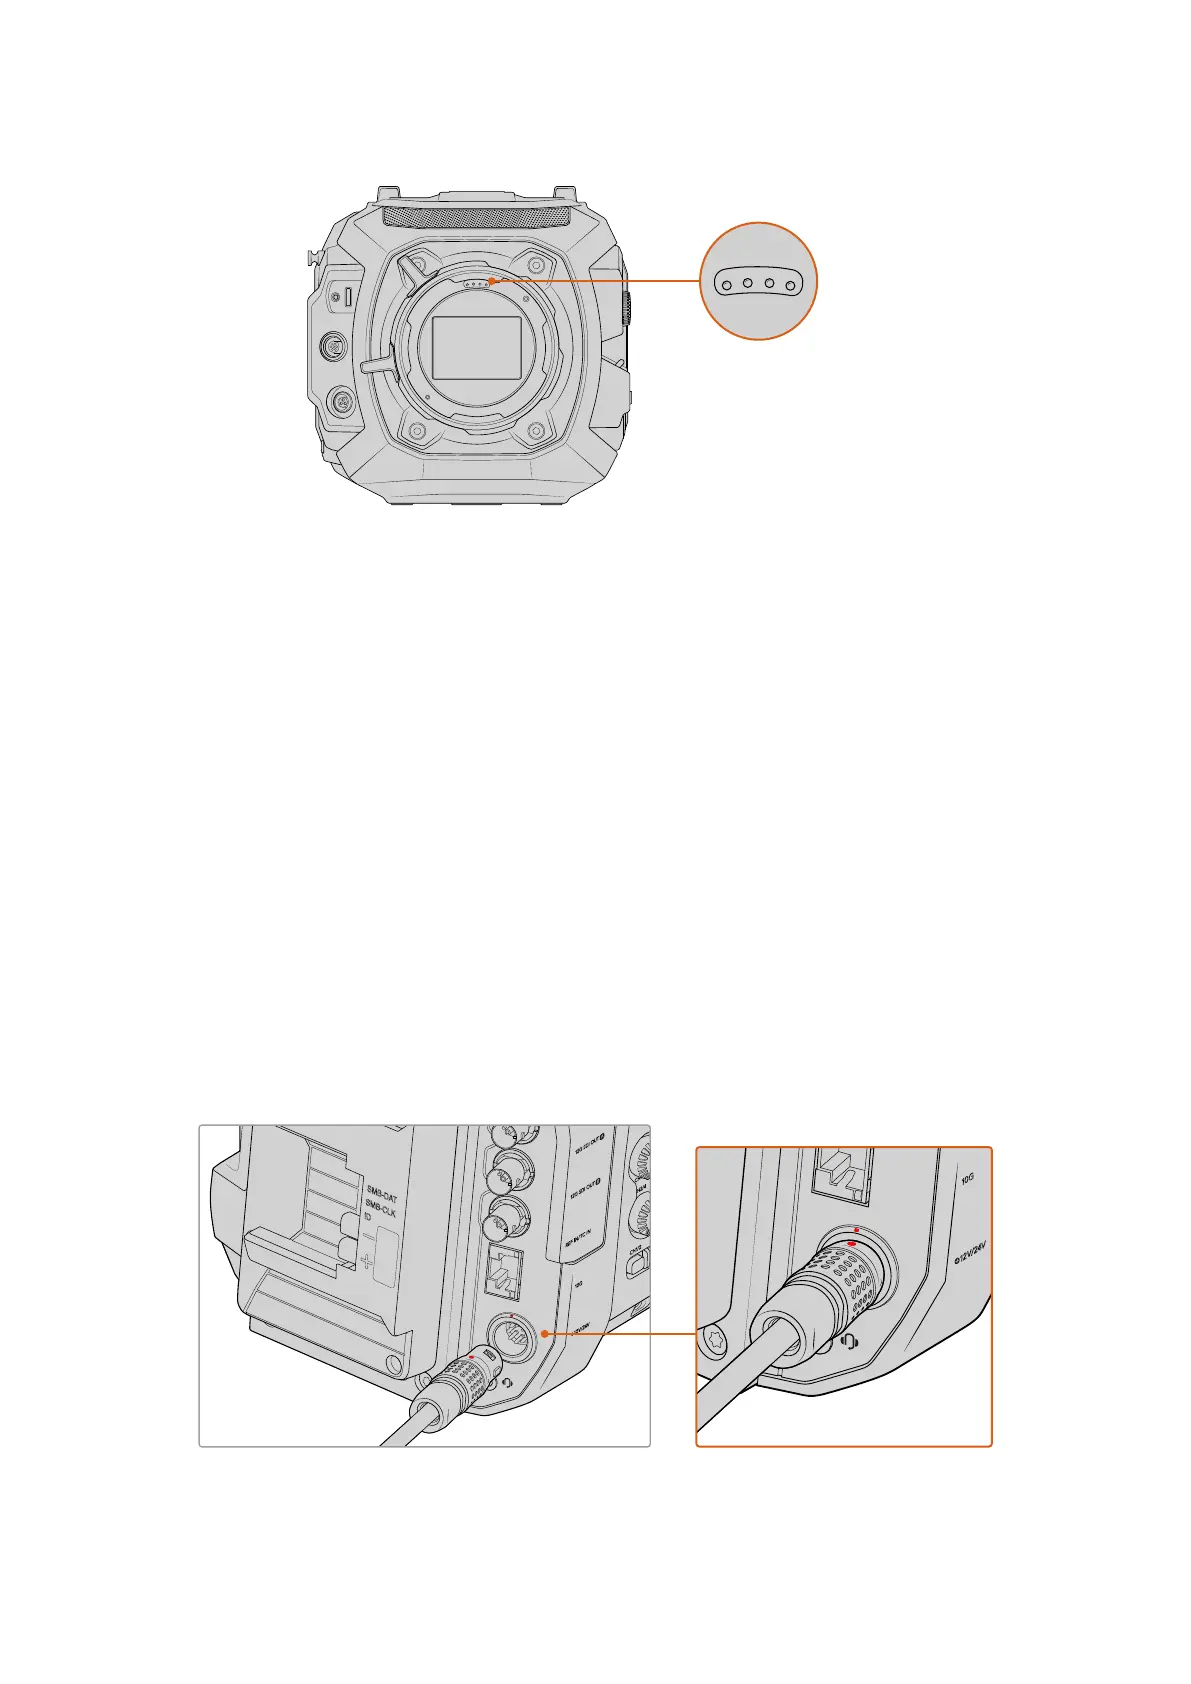
When mounting a PLlens with
/i Technology, make sure the
lens pins align with the mount
pins at the 12o'clock position
The information that is recorded as metadata via Cooke’s /i Technology interface canbe very
helpful in post production and visual effects. Knowing the lenses used in productionand their
precise settings can be helpful in the event that the setup needsto be replicated at a later date.
This detailed information can also be utilized by powerful applications such as DaVinciResolve
and Blackmagic Fusion for a wide variety of advanced functions. Forexample, the recorded
metadata can be used to simulate the specific lens in 3Dspace, or to correct lensdistortions.
Powering your Camera
Now that you have attached a PL lens, you will need to supply power. The quickest way to
power your camera is to connect external power using the supplied power adapter.
To plug in external power:
1 First remove the rubber protective dust cap and store it somewhere safe. Connect the
AC to 24V DC adapter plug to your mains power socket using a standard IEC C13 mains
power cable.
2 Connect the adapter’s 8 pin connector to the 24V DC power connector on the camera’s
rear panel.
If you have both external and battery power connected, the camera will draw from the external
power source. Removing external power while a charged battery is connected will switch your
camera to battery power without interruption.
1
2
V/24V
1
0
G
REF IN
/
TC IN
1
2G SDI OUT
1
2G SDI OUT
REC
AUD
STRM
SLATE
LENS
DISP
AUDIO IN
1
AUDIO IN
2
CH
1
/2
CH3
/
4
USB
LOCK
1
2V
1
.5A
1
2
V/24V
1
0
G
REF IN
/TC IN
1
2G SDI OUT
1
2G SDI OUT
REC
AUD
STRM
SLATE
LENS
DISP
AUDIO IN
1
AUDIO IN
2
CH
1
/2
CH3
/
4
USB
LOCK
1
2V
1
.5A
To plug in power, align the red dots and gently push the connector in until you feel it lock into place. To remove,
hold the connector’s metal sleeve and gently pull away from the camera. This will pull the sleeve back, releasing
the connector from the camera.
9Getting Started