TIP It is a good practice to adjust the Blackmagic RAW settings for your clips on the
‘color’ page before you start color grading.
Clip Settings for Blackmagic RAW
When you first import Blackmagic RAW files, DaVinci Resolve will decode the camera data
contained in the files using the ISO, white balance and tint settings used at the time of shooting.
If you’re happy with the look of these settings, you can start editing right away.
The great thing about shooting Blackmagic RAW is that you’re not tied to these settings at all!
The breadth of available post processing options when working with Blackmagic RAW files
mean that you’ll develop your own workflow over time. Experimenting with the ‘clip’ settings
for each clip in the ‘camera raw’ tab will show you just how powerful and flexible working with
Blackmagic RAW can be.
The ‘color science’ menu lets you choose whether to interpret your footage with generation 4
color science or generation 5 color science. URSA Cine uses Blackmagic Design generation
5 color science. Files made on different cameras with generation 4 color science can
be reinterpreted with generation 5 color science to match your shots from URSA Cine.
Alternatively, if you are shooting mainly with cameras that create Blackmagic RAW files with
generation 4 color science, you can mix in clips shot on URSA Cine with generation 5 color
science by reverting them to generation 4 color science. This makes it easy to match shots
filmed on cameras using different generations of Blackmagic color science.
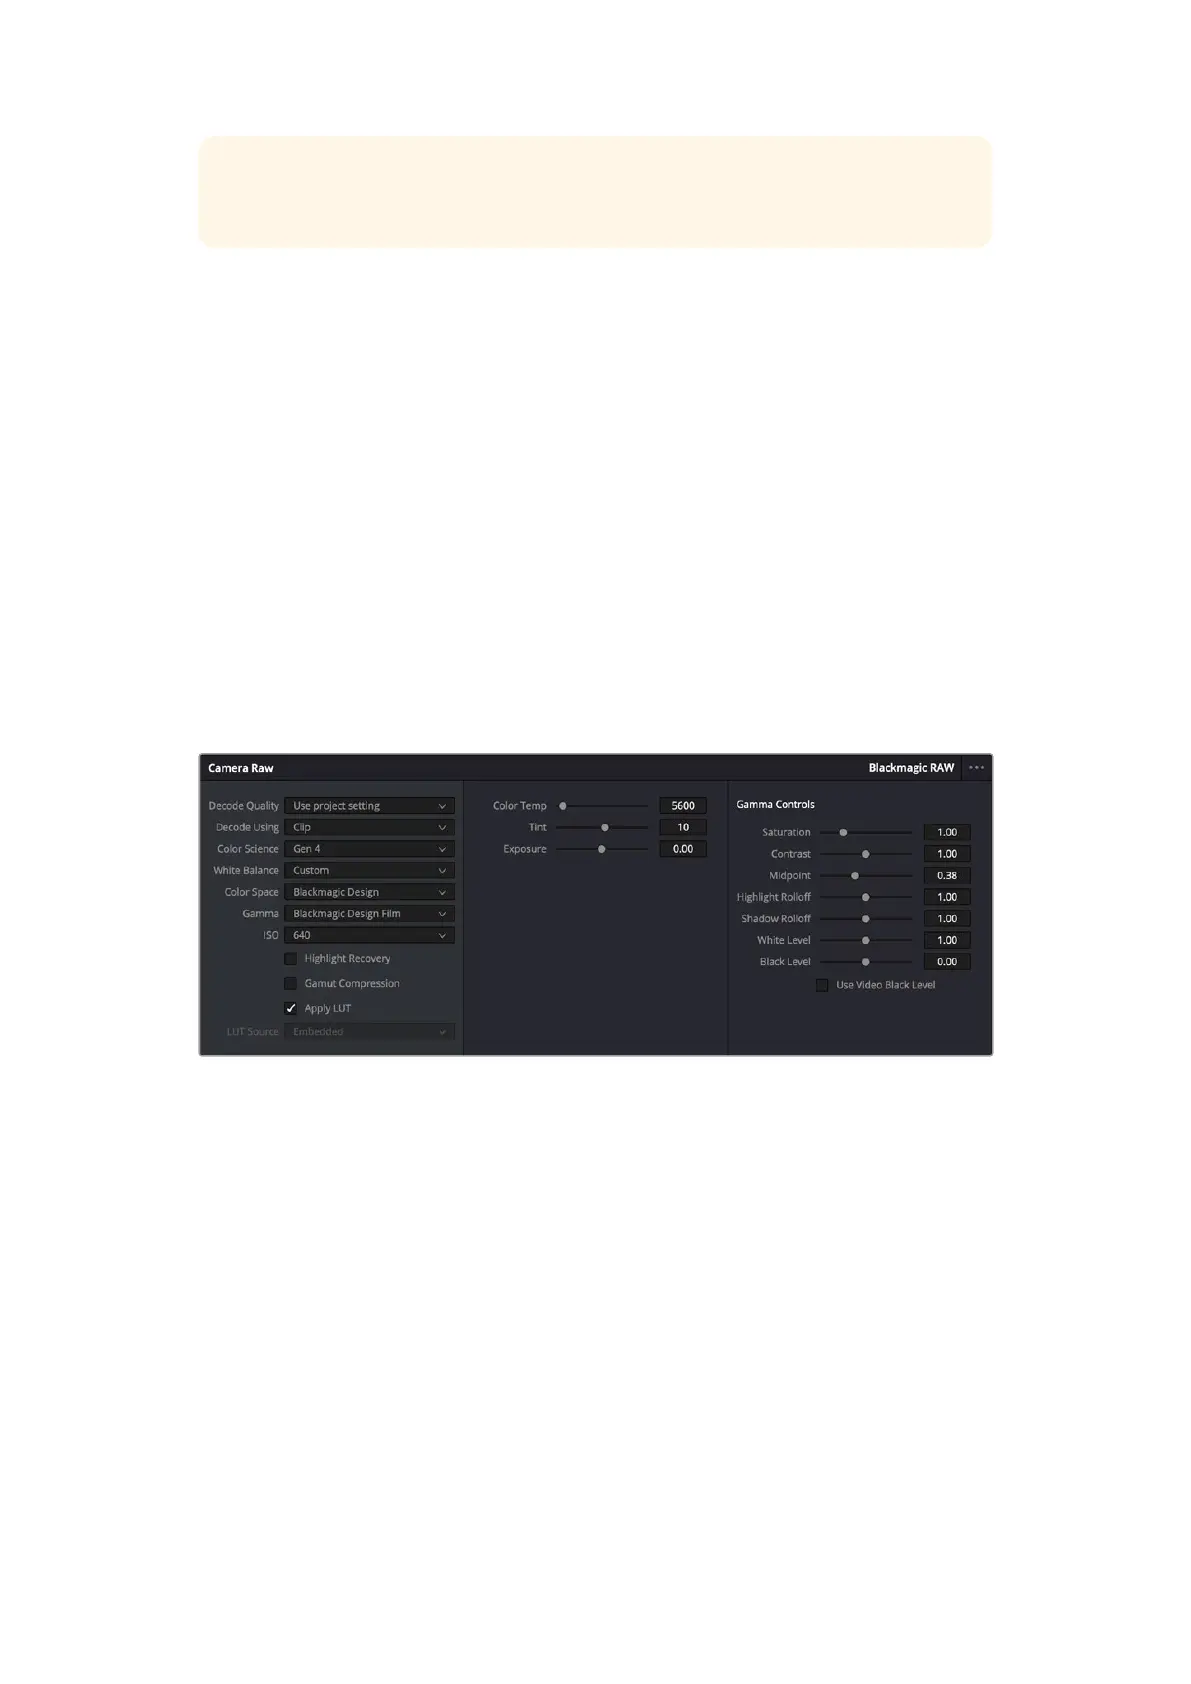
In the ‘camera raw’ tab, select ‘clip’ from the ‘decode using’ menu to make adjustments to your clip’s
BlackmagicRAW settings
Changing Blackmagic RAW Settings
Once you have set DaVinci Resolve to enable clip settings for Blackmagic RAW, the clip
settings and gamma controls are now adjustable. Adjusting these settings to optimize your clips
can bring them close to a full primaries grade. This is especially powerful when using DaVinci
Resolve’s scopes which can help you neutralize and balance the clips ready for applying a look.
The following information contains descriptions for the clip and gamma controls.
ISO
The ISO value can be changed by increasing or decreasing this setting. This setting is helpful
if you need to set the clip to a brighter or darker starting point for optimization.
Highlight Recovery
Check the box to reconstruct highlight information in clipped channels using information from
non-clipped channels.
199Using DaVinci Resolve
 Loading...