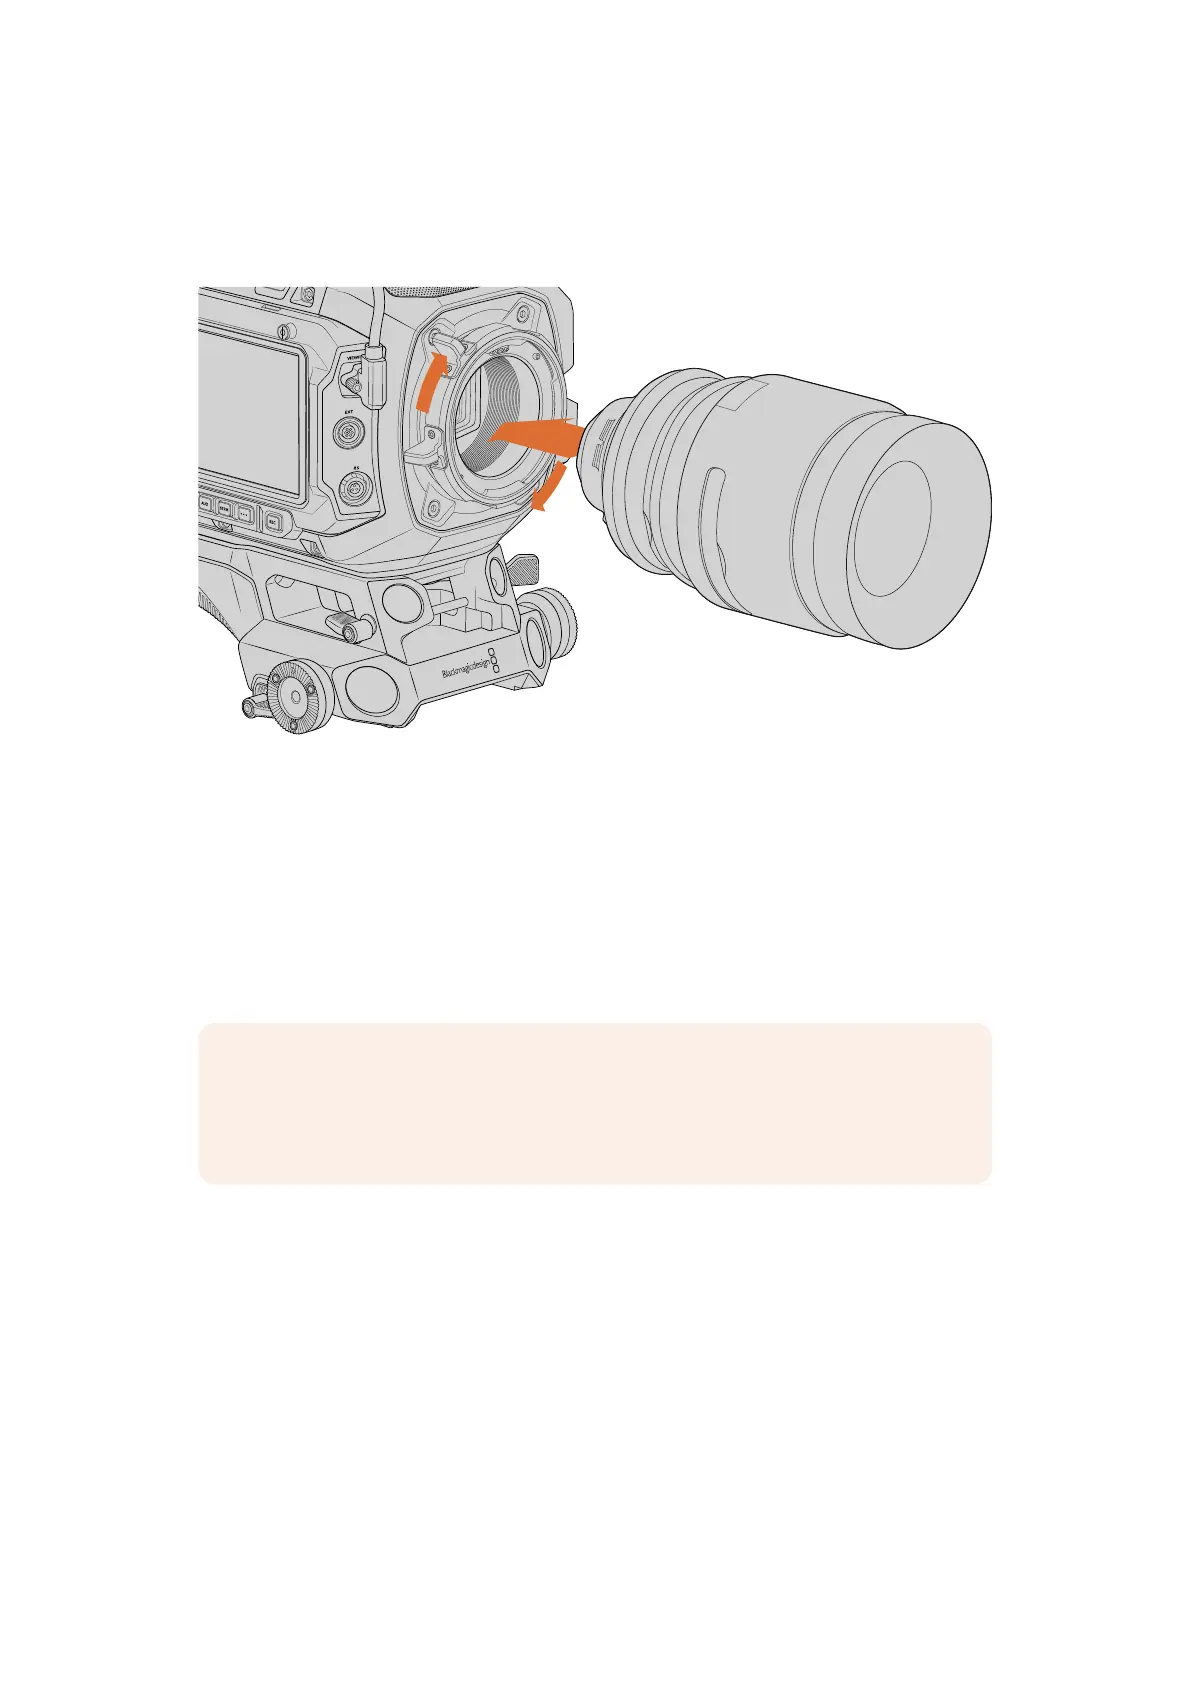
Attaching a PL Mount Lens
PL lenses are easily mounted to your camera by placing the lens against the camera’s mount
and securing it using the mount’s locking ring.
Attaching and removing a PL lens
1 Open your camera’s PL locking ring by rotating it counterclockwise until it stops.
2 Align one of the lens’ four flange notches with the locating pin on the camera mount.
Besure to align the lens for easy viewing of the lens marks.
3 Tighten the PL locking ring by rotating it clockwise.
4 To remove the lens, rotate the locking ring counterclockwise until it stops, then gently
remove the lens by pulling it directly out from the camera body. There is no need to
rotate the lens.
NOTE If attaching focus motors, you can power them from URSA Cine’s EXT port
or the RS port. These ports output 24V power for common lens motors and allows
the lens motors to send record run and stop trigger signals to the camera from their
respective hand units.
Cooke /i Technology Interface
URSA Cine’s PL mount features four pins at the 12 o’clock position that are used to communicate
with lenses featuring Cooke’s /i Technology interface. The lenses that support this interface
include lenses from Angenieux, Arri, Canon, Cooke, Fujinon, Leitz, Sigma and Zeiss. Thislets
you record lens information in your clips’ metadata such as the lens model, focal length,
aperture setting, focus distance and other lens specific information. In addition to recording
lens information viewable in the ‘lens data’ metadata slate, this connection is also important
for your camera’s first AC page that displays live focus and iris scales. These scales are
helpful indicators you can place markers on to help with critical focus and exposure. For more
information, refer to the ‘using the 1st AC page’ section of this manual.
8Getting Started