Once logged in, your Blackmagic Cloud avatar will be displayed in the controls menu. You can
tap your avatar to view your account details or to log out of your account.
Your account avatar is displayed in the controls menu
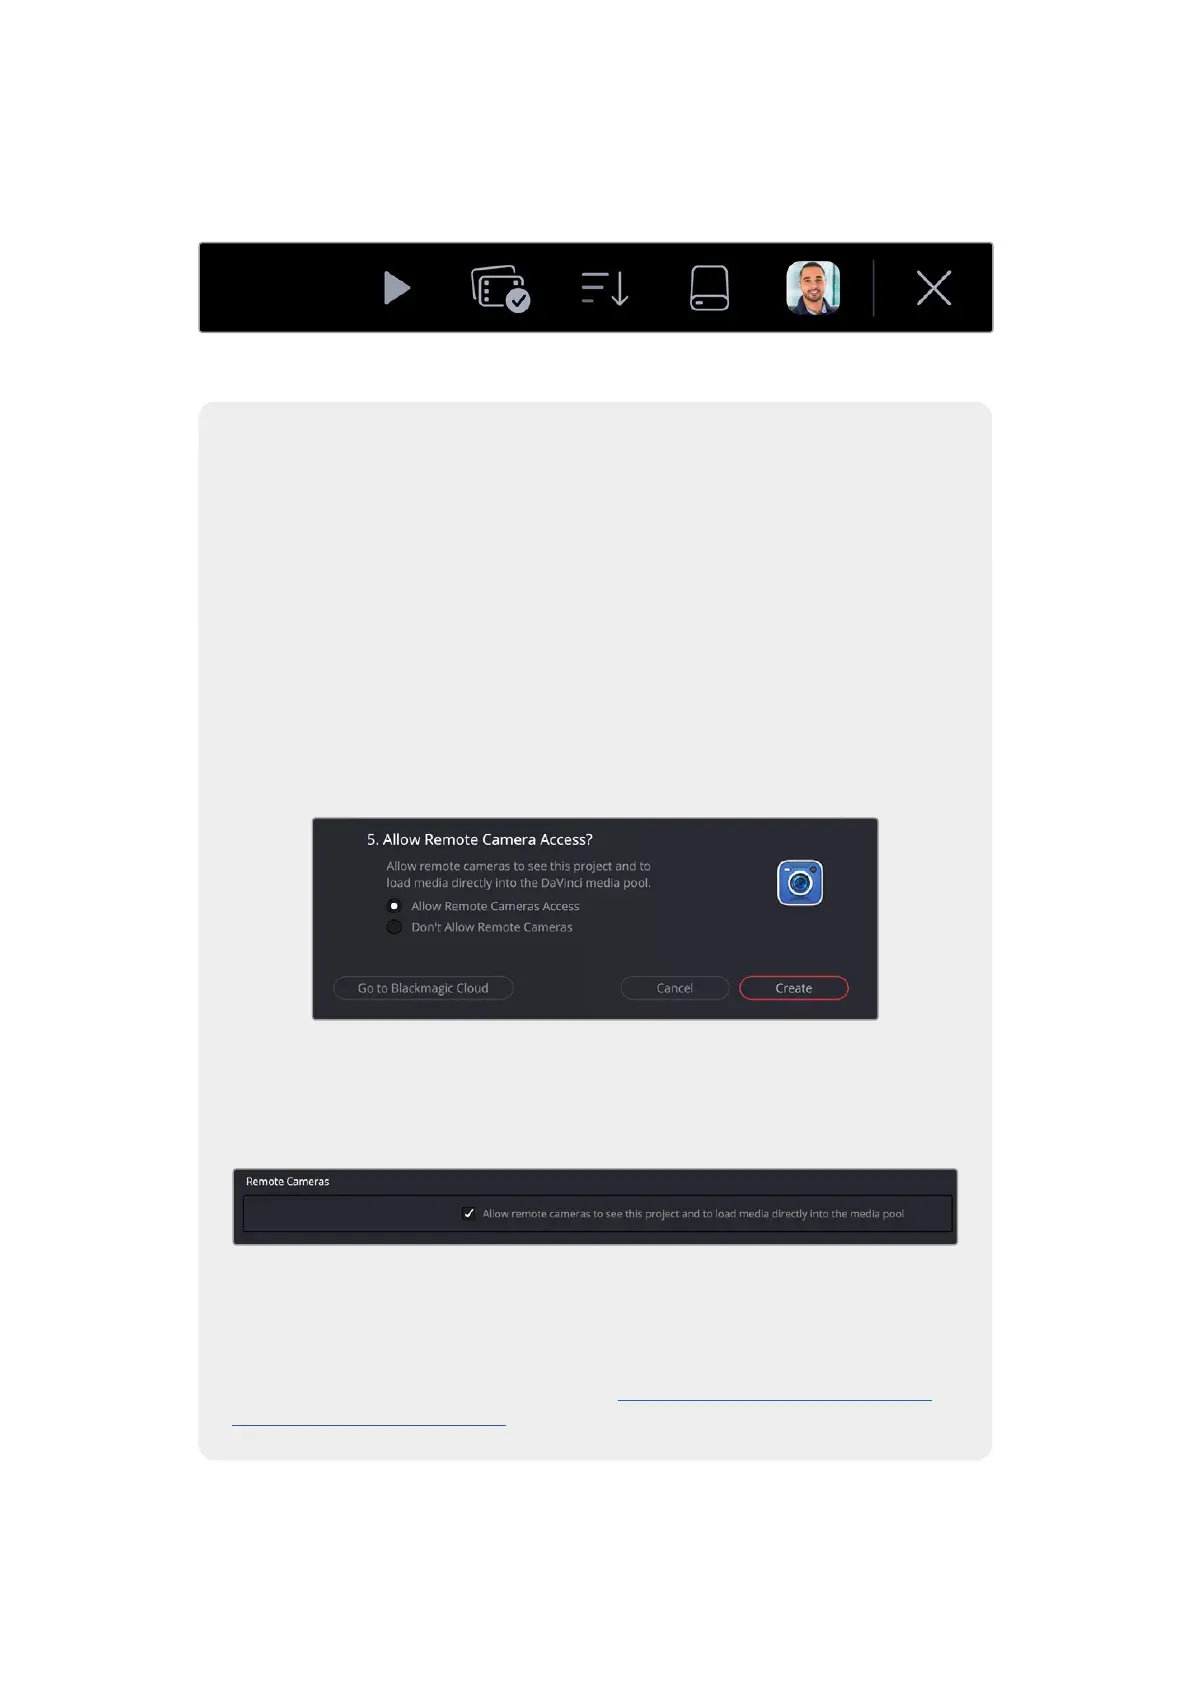
Allowing Remote Camera Access in DaVinci Resolve
You can upload clips to both new and existing Blackmagic Cloud projects from
your URSA Cine by allowing remote camera access in DaVinci Resolve’s settings.
Once remote access has been enabled for a project, it will appear in your camera’s
Blackmagic Cloud projects panel.
Allowing access to a new project:
1 Open DaVinci Resolve. In the ‘project manager’ window, select the ‘cloud’ tab and
enter your Blackmagic Cloud login details.
2 Select a Blackmagic Cloud project library from the project library list and click
‘new project’.
3 With the new project window open, enter the project details. Enable ‘allow remote
camera access’ in the new cloud project window.
If you want to upload clips to an existing DaVinci Resolve Cloud project, open the
project settings and select ‘Blackmagic Cloud’. Enable the ‘allow remote cameras
to see this project to load media directly into the media pool’ option in the ‘remote
cameras’ settings.
The Blackmagic Cloud project will appear in your Blackmagic URSA Cine’s media
pool sidebar when your camera is connected to the internet and signed into your
Blackmagic Cloud account.
For more information about DaVinci Resolve Cloud projects, refer to the DaVinciResolve
user manual. You can download the manual at www.blackmagicdesign.com/support/
family/davinci-resolve-and-fusion
33Uploading Clips to Blackmagic Cloud