2 Tap the ‘x’ at the top right of your camera’s touchscreen or press the camera’s ‘record’
button to close the media pool and return to the HUD.
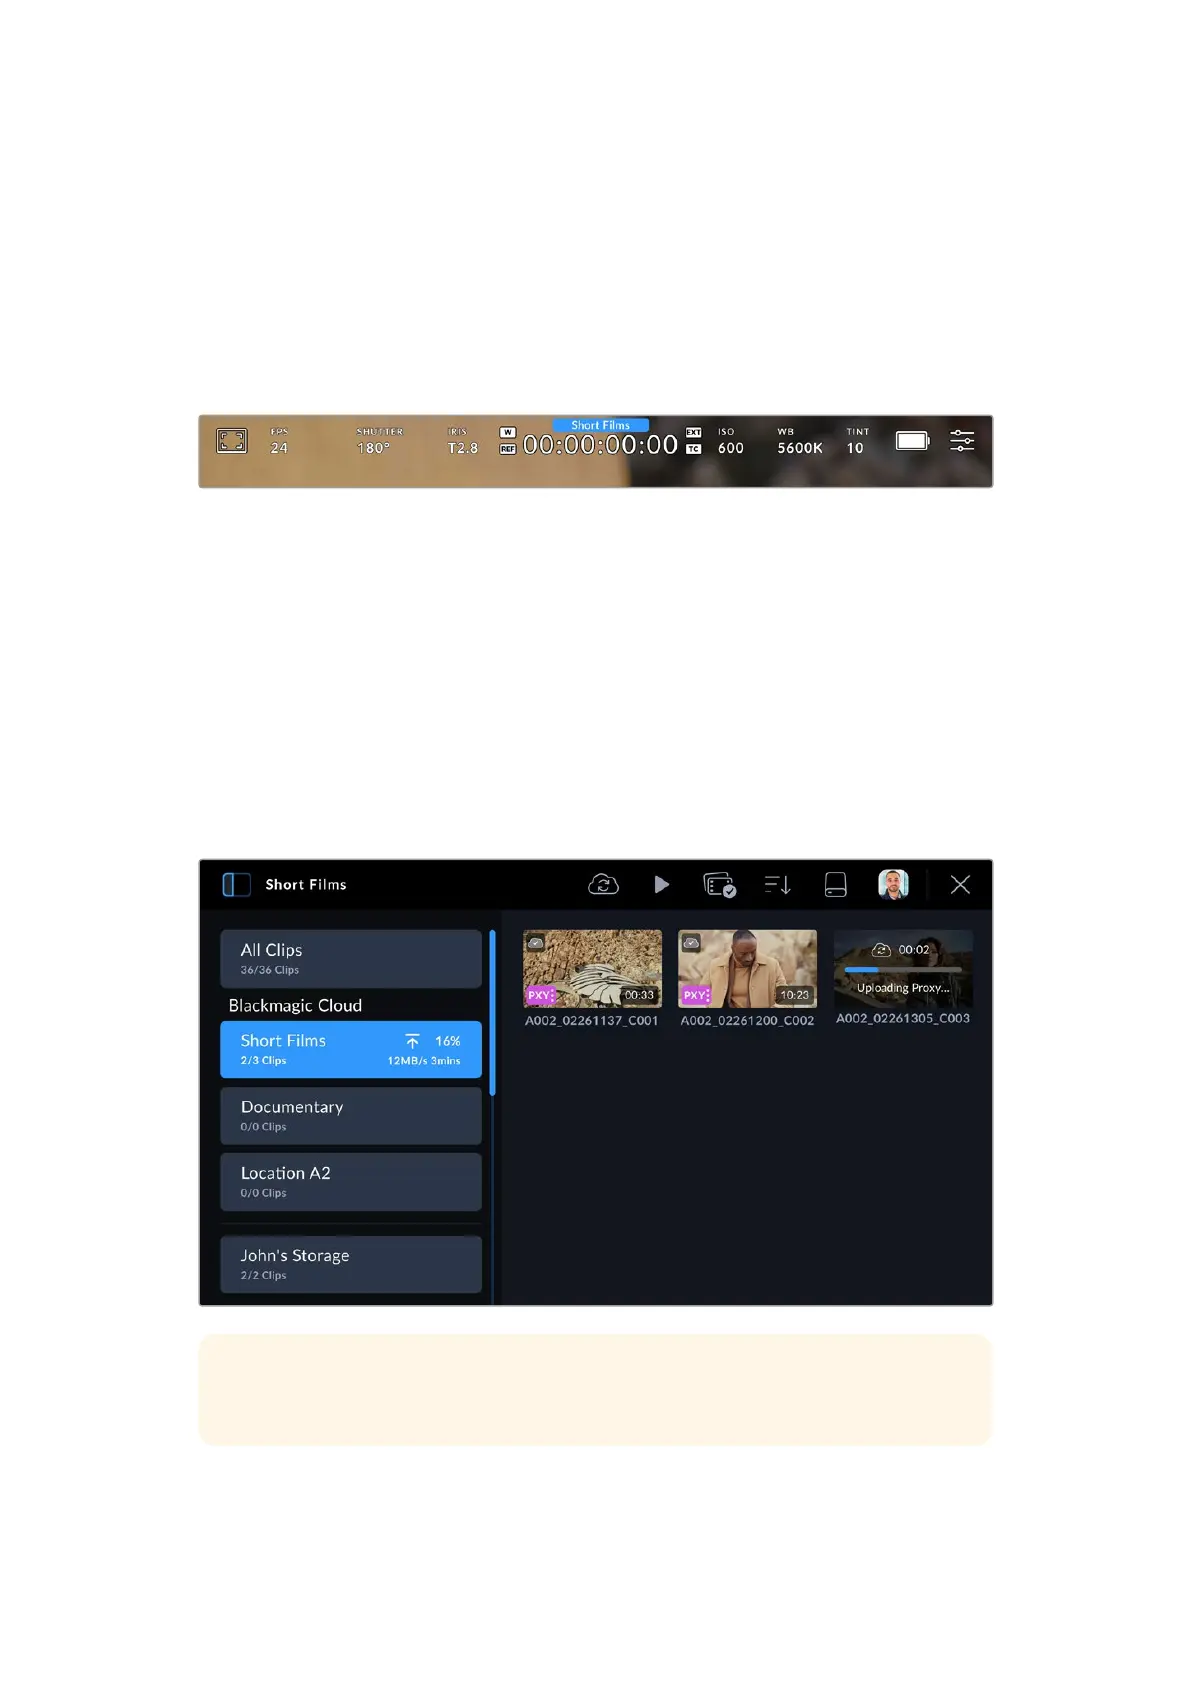
3 The name of the selected Blackmagic Cloud project will appear above the timecode display
on your camera’s HUD. The next time you record a clip, your camera will automatically start
uploading media to the selected cloud project.
If your camera’s internet connection is interrupted, the name of the cloud project will be
grayed out and uploads paused. Your camera will automatically restart the uploading
process when the internet connection is restored.
When you have finished recording, tap on your camera’s storage indicator to open the media
pool and view the upload status of your clips.
Your Blackmagic Cloud avatar will remain visible in the controls menu and you will stay logged
in even if you have disconnected your phone or removed the Ethernet connection. This ensures
that any recordings you have in your project upload queue will resume as soon as possible
after plugging in your phone or network again. Your camera will immediately try to reestablish
your internet connection and resume any uploads it has in its queue.
This also means when you choose to record directly into a project, you can operate in areas
with patchy cellular coverage and not worry about reconnecting to upload as the process
happens automatically. For example, you could record clips in locations where there is no
Internet connection or cellular signal at all and then simply plug in when you are in range or
have a wired Internet connection and quickly upload your proxies then.
TIP For information on how to set your camera to upload proxy files or both proxy and
original files, refer to the ‘settings’ section.
35Uploading Clips to Blackmagic Cloud