2 - 25
Electrical parts and motors
Basics of Assembly
Basics
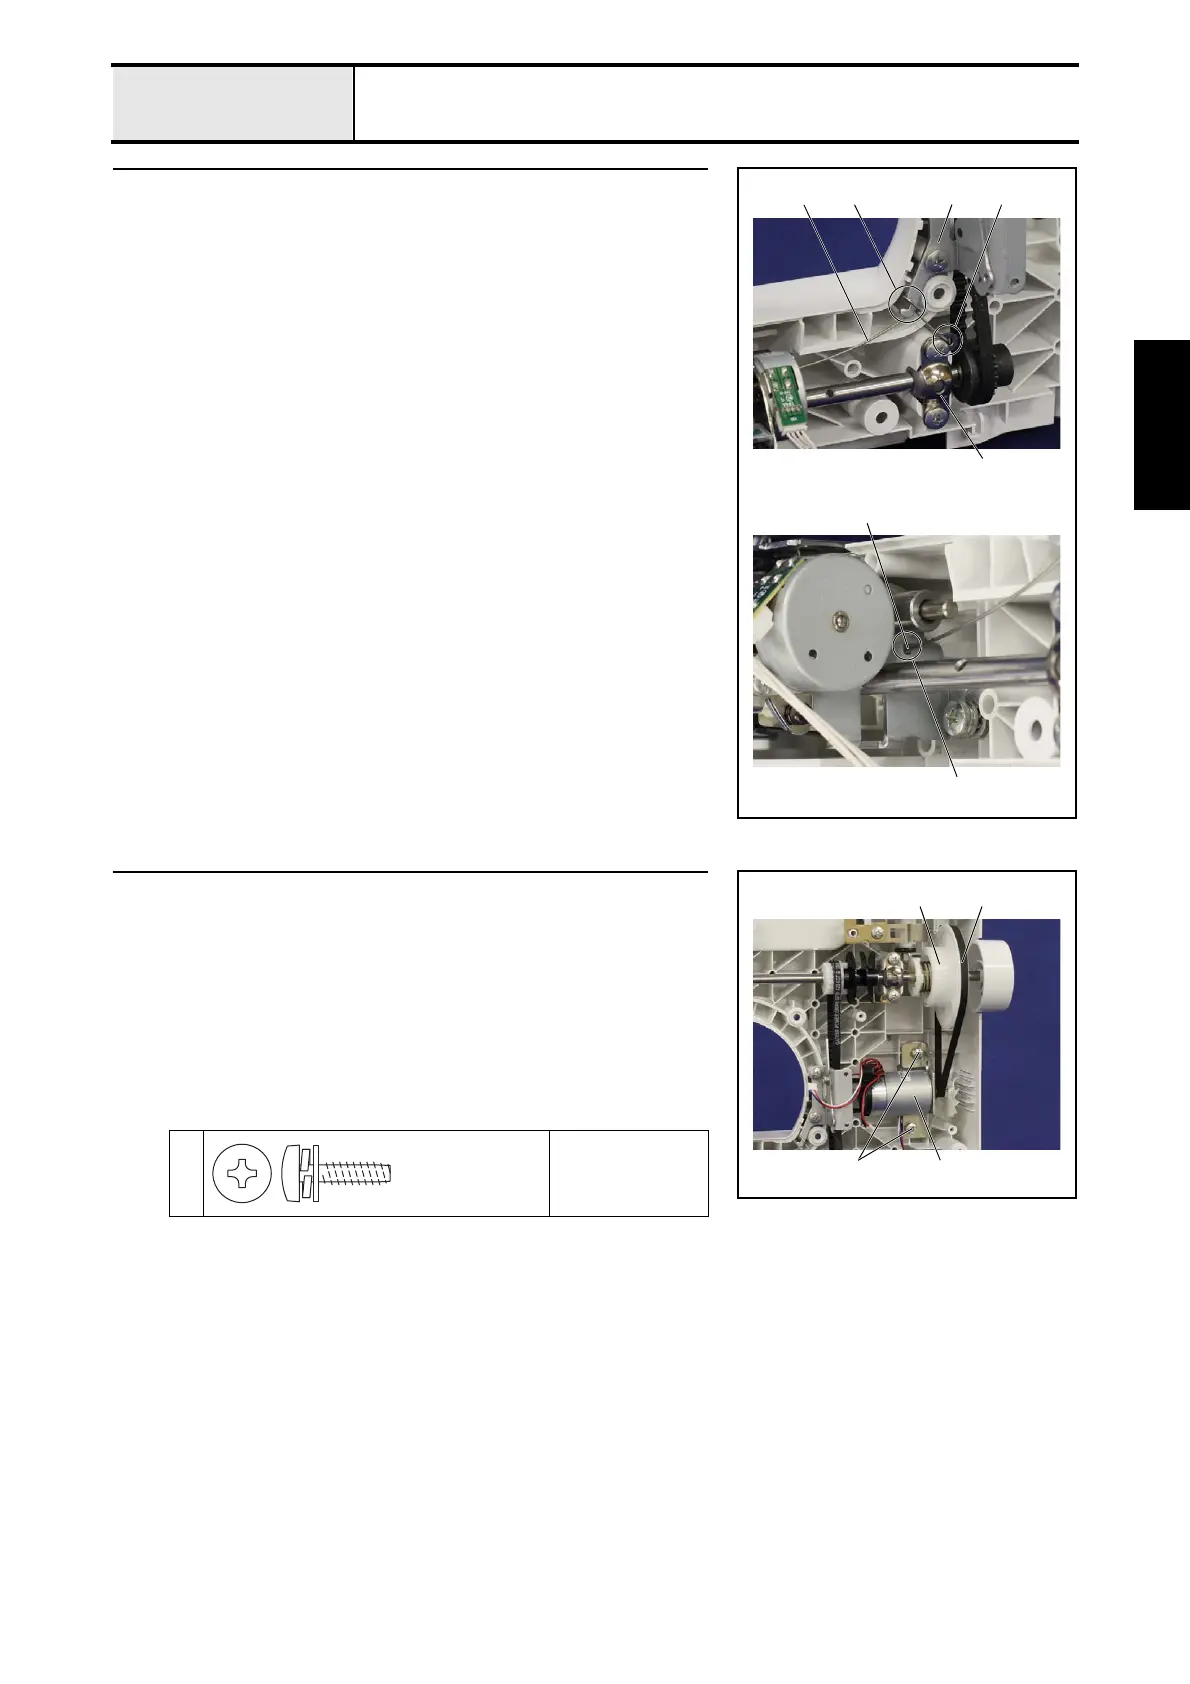
1 Attachment of Spring
1. Attach the spring 1.
*Key point
• Hang the section 2 of the spring 1 on the positioning hole of
the upper shaft bearing presser 3, and hang the section 4 on
the notch part 5 of the base plate assy. and hang the section
6 on the tension pulley holder 7.
1 6 7
3
2
4
5
2 Attachment of Main motor assy
1. Hang the motor belt 3 on the gear part of the main motor assy. 1 and the
T pulley 2.
2. Set the main motor assy. 1 to the rear cover assy., and then temporarily
tighten the 2 screws 1 and the 2 washer EX tooth 5 4.
*Key point
• Fully tighten the screw 1 after performing "4-5 Adjustment :
Motor belt tension".
→ Refer to 3 - 61 "Assembly of Main motor assy".
1
Torque
Hand start
1
2 3
1, 4
Giza Tite
M5X16
 Loading...


