C-20
Appendix C Scanner
®
2000 microEFM
11. Remove the main board/keypad assembly from the enclosure.
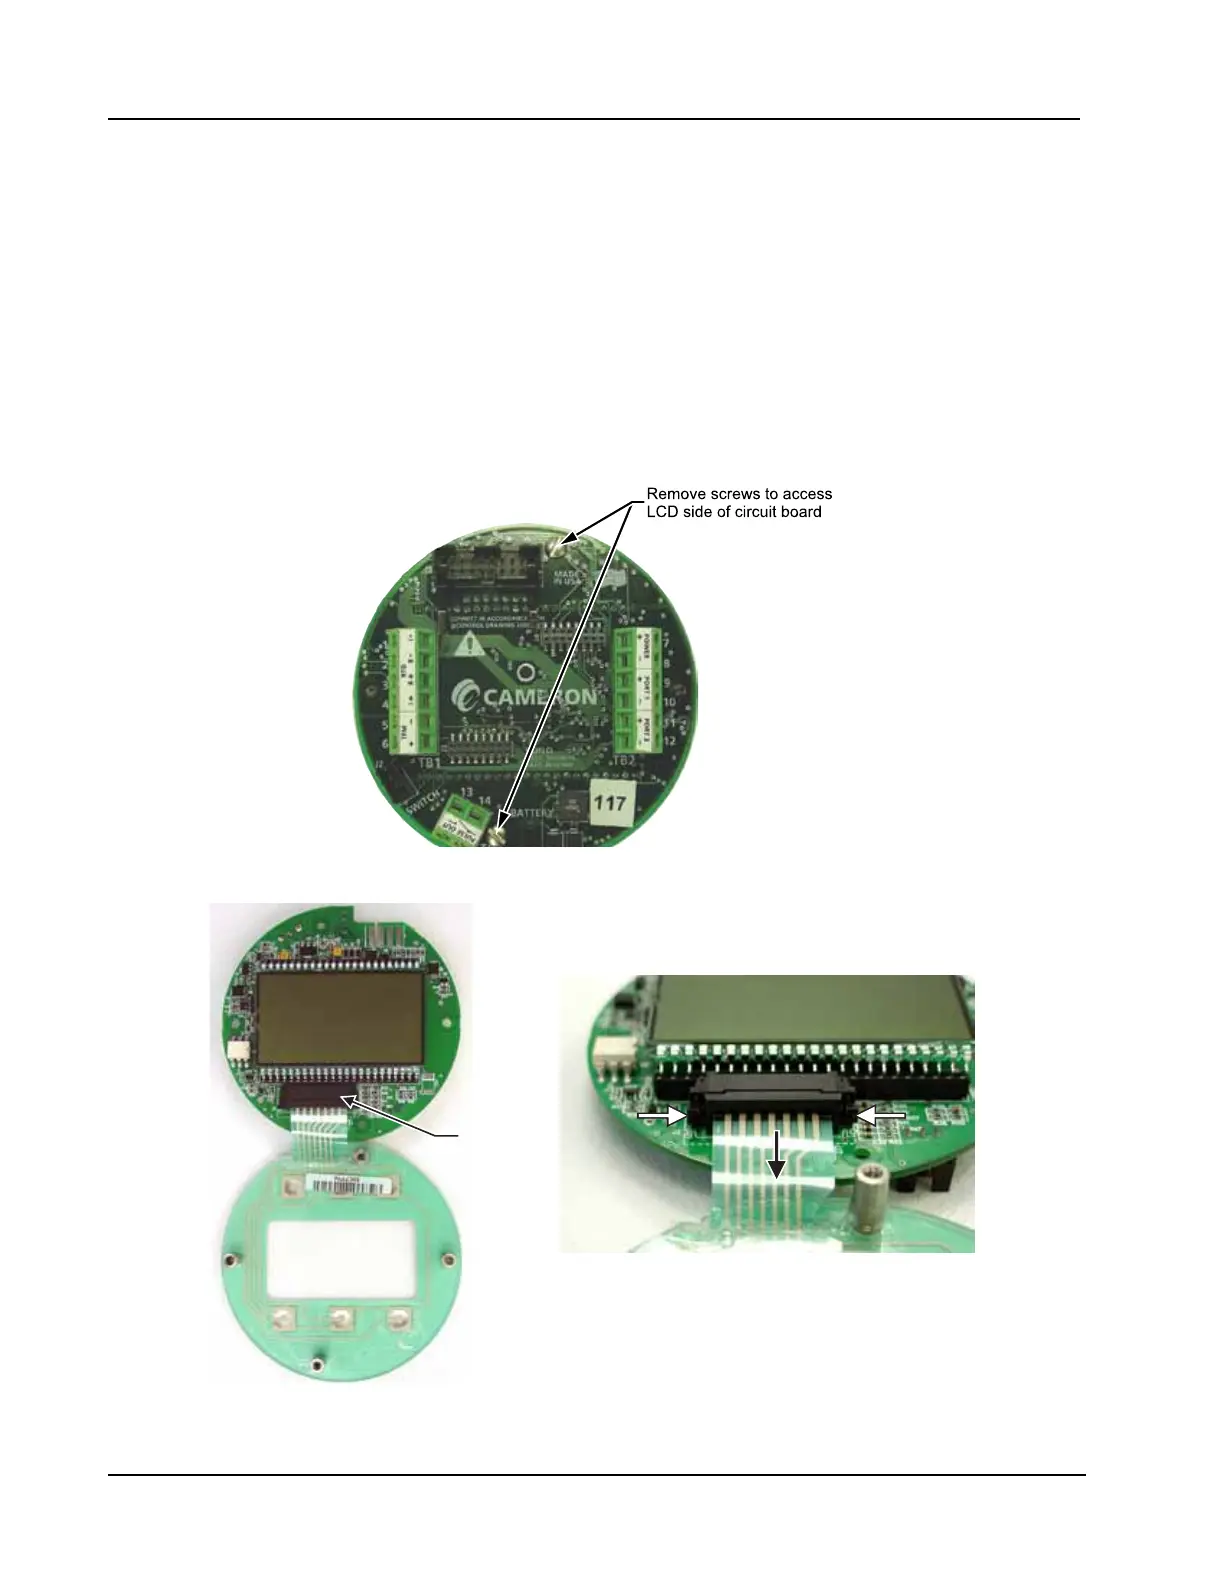
12. Remove the two #4-40 × 5/16” screws fastening the main board to the keypad (Figure C.13).
13. Remove the keypad ribbon cable from the J7 connector on the LCD side of the main board by pressing
in on the sides of the black plastic clip and pulling gently on the clip. Do not pull on the ribbon cable; the
cable will release freely when the clip opens (Figure C.14, page C-20).
14. Discard the old main board and remove the replacement board from its packaging.
15. Connect the keypad ribbon cable to the J7 connector on the LCD side of the new main board as follows:
a. Slide the end of the ribbon into the black clip as far as it will go.
b. Press the black plastic clip into the connector until it snaps.
Figure C.13—Disassembly of main board/keypad assembly
Ribbon cable
connector
Figure C.14—To release the ribbon cable from the connector, press in on the side tabs of the J7 connector
(white arrows) and gently pull forward (black arrow).