EasyManua.ls Logo

Cessna 182 1978 - Lithium 4 Cell; Removal and Installation of Antenna; Removal and Installation of Lithium Four Cell Battery-Pack

Cessna 182 1978
680 pages
Print Icon
To Next Page IconTo Next Page
To Previous Page IconTo Previous Page
Loading...
MODEL
182
&
T182
SERIES
SERVICE
MANUAL
be
folded each
time
the
surface
is
wiped
to the
case
and then
remove
the
cover
to
gain
access
to
present
a
clean
area
and
avoid
redepositing
the
battery
pack.
of
grease.
Wipe
surface
immediately
with
NOTE
clean
dry
cloth,
do
not
allow
solvent
to
dry
on
surface.
Apply
Velcro
.40
adhesive
to
Retain
the
rubber
gasket
and
screws
for
each
surface
in
a
thin
even
coat
and allow
reinstallation
to
dry
until
quite
tacky,
but
no
longer
trans-
fers
to
the
finger
when
touched
(usually
be-
c.
Disconnect
the
battery-pack
electrical
connector
tween
5
and
30
minutes).
Porous
surfaces
and
remove
battery-pack.
may
require
two
coats.
Place
the
two
sur-
d.
Place
new
battery-pack
in
the
transmitter
with
faces
in
contact
and
press
firmly
together
four
batteries
as
shown
in
the
case
in
figure
16-17.
to
ensure
intimate
contact.
Allow
24
hours
e.
Connect
the
electrical
connector
as
shown in
fig-
for
complete
cure.
ure
16-16.
NOTE
d.
To
reinstall
transmitter,
reverse
preceding
steps.
Before
installing
the
new
4
cell
battery-
pack,
check
to
ensure
that
its
voltage
is
NOTE
11.2
volts
or
greater.
An
installation
tool
is
required
to
properly
secure
sta-strap.
This
tool
may
be
pur-
chased
locally
or
ordered
from
the
Panduit
It
is
desirable
to
replace
adhesive
material
Corporation,
Tinley
Park,
Ill.,
part
number
on
the
4
cell
battery-pack,
use
only
3M
Jet
GS-2B
(Conforms
to
MS90387-1).
Melt
Adhesive
3738.
Do
not
use
other
ad-
hesive
materials
since
other
materials
may
Ensure
that
the
direction
of
flight
arrows
f.
Replace
the
transmitter
cover
and
gasket.
(placarded
on
the
transmitter)
are
pointing
g.
Remove
the
old
battery-pack
placard
from
the
towards
the
nose
of
the
aircraft.
end
of
transmitter
and
replace
with
new
battery-pack
placard
supplied
with
the
new
battery-pack.
16-107.
REMOVAL
AND
INSTALLATION
OF ANTEN-
NA.
(See
figure
16-16.
)
a.
Disconnect
co-axial
cable
from
base
of
antenna.
- --
b.
Remove
the
nut
and
lockwasher
attaching
the
Be
sure
to
enter
the
new
battery-pack
expira-
antenna
base
to
the
fuselage
and
the
antenna
will
be
tion
date
in
the
aircraft
records.
It
is
also
free
for
removal.
recommended
this
date
be
placed
in
your
ELT
c.
To
reinstall
the
antenna,
reverse
the
preceding
Owner's
Manual
for
ouick
reference.
steps.
NOTE
Upon
reinstallation
of
antenna,
cement
rubber
boot
(14)
using
RTV102,
General
Electric
Co.
or
equivalent,
to
antenna
whip
only;
do
not
apply
adhesive
to
fuse-
lage
skin
or
damage
to
paint
may
result.
16-108.
REMOVAL
AND
INSTALLATION
OF
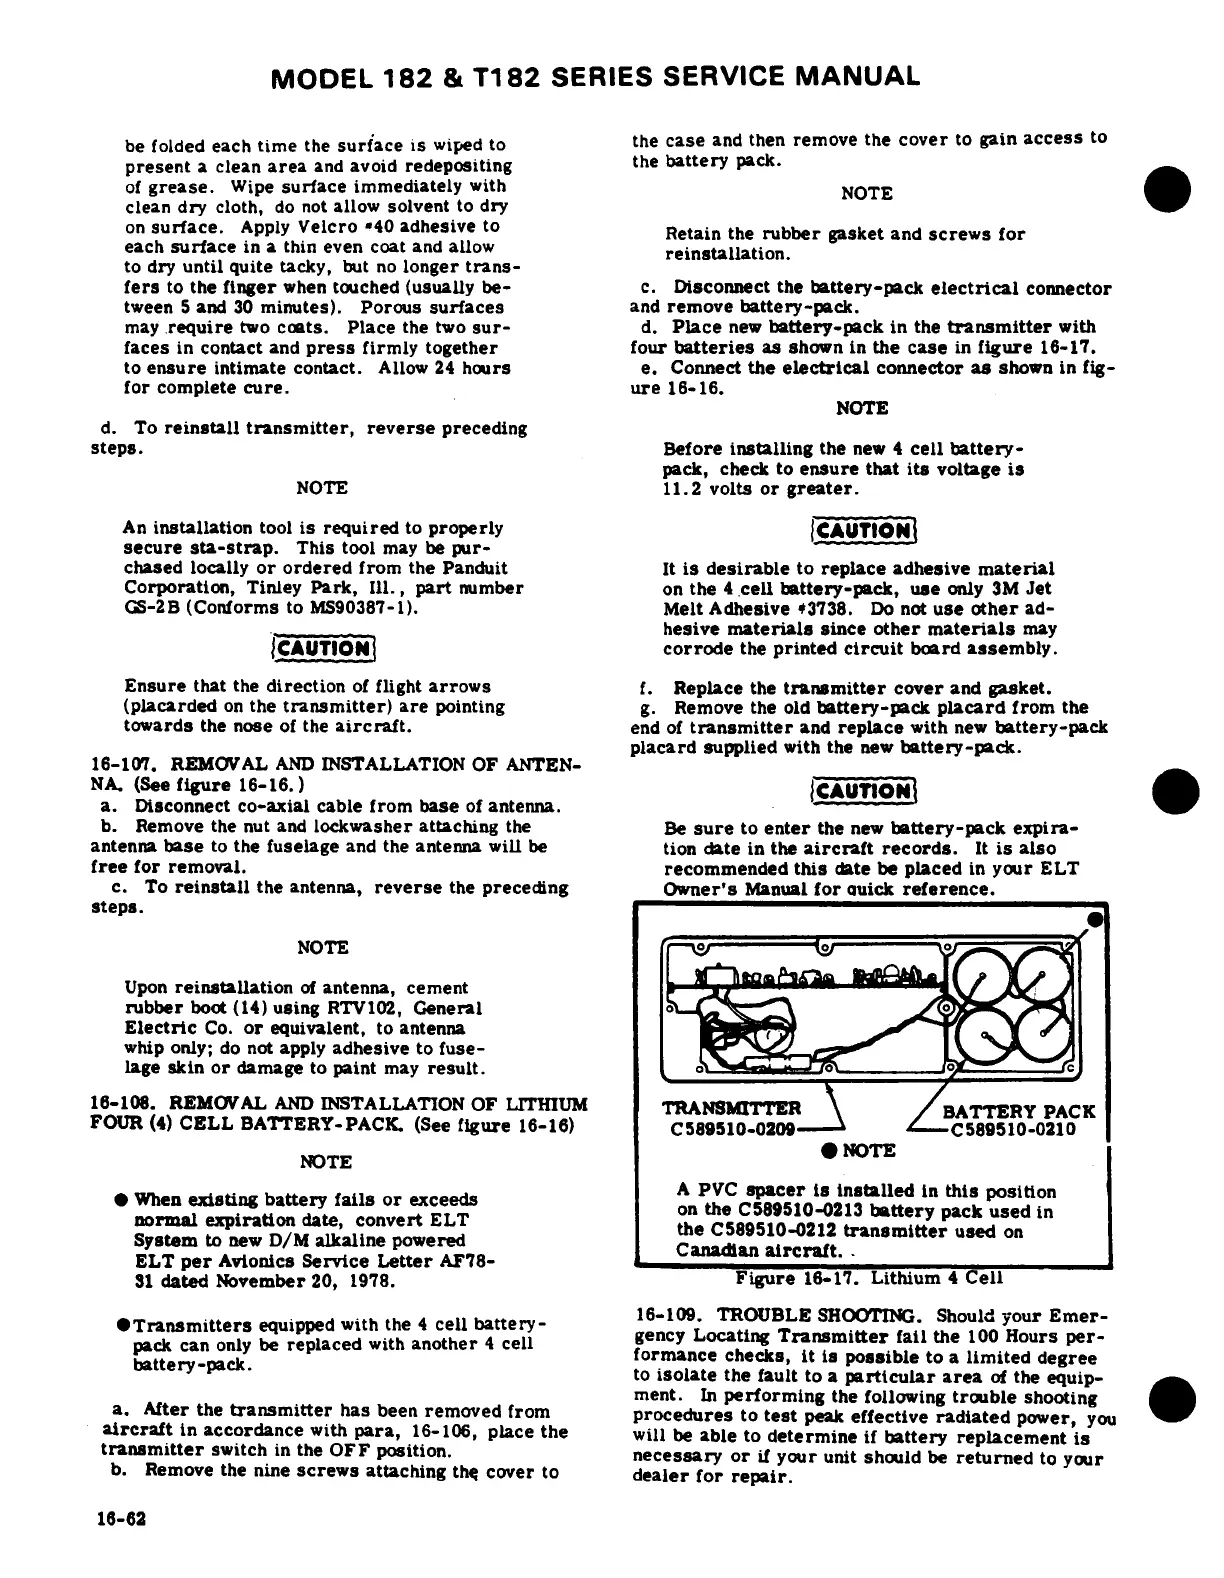
LITHIUMTRANSMITTER
BATTERY
PACK
FOUR
(4)
CELL
BATTERY-PACK.
(See
figure
16-16)
C589510-0209
NOTE
A
PVC
spacer
is
installed
In
this
position
When
existing
battery
fails
or
exceeds
normal
expiration
date,
convert
ELT
System
to
new
D/M
alkaline
powered
ELT
per
Avionics
Service
Letter
AF78-
31
dated
November
20,
1978.
Figure
16-17.
Lithium
4
Cell
Transmitters
equipped
with
the
4
cell
battery-
16-109.
TROUBLE
SHOOTING.
Should
your
Emer-
pack
can
only
be
replaced
with
another
4
cell
gency
Locating
Transmitter
fail
the
100
Hours
per-
battery-pack.
formance
checks,
it
is
possible
to
a
limited
degree
ment.
In
performing
the
following
trouble
shooting
a.
After
the
transmitter
has
been
removed
from
procedures
to
test
peak
effective
radiated
power,
you
aircraft
in
accordance
with
para,
16-106,
place
the
will
be
able
to
determine
if
battery
replacement
is
transmitter
switch
in
the
OFF
position.
necessary
or
if
your
unit
should
be
returned
to
your
b.
Remove
the
nine
screws
attaching
the
cover
to
dealer
for
repair.
16-62

Table of Contents