Manual Operation
1. Connect the network cable to the DC Power Supply for auto
detection.
2. If the network cable is not connected properly, it may cause the DC
Power Supply screen to display incorrectly. Turn OFF the DC
Power Supply, resolve the network cable problem, and reboot it to
clear the abnormal screen.
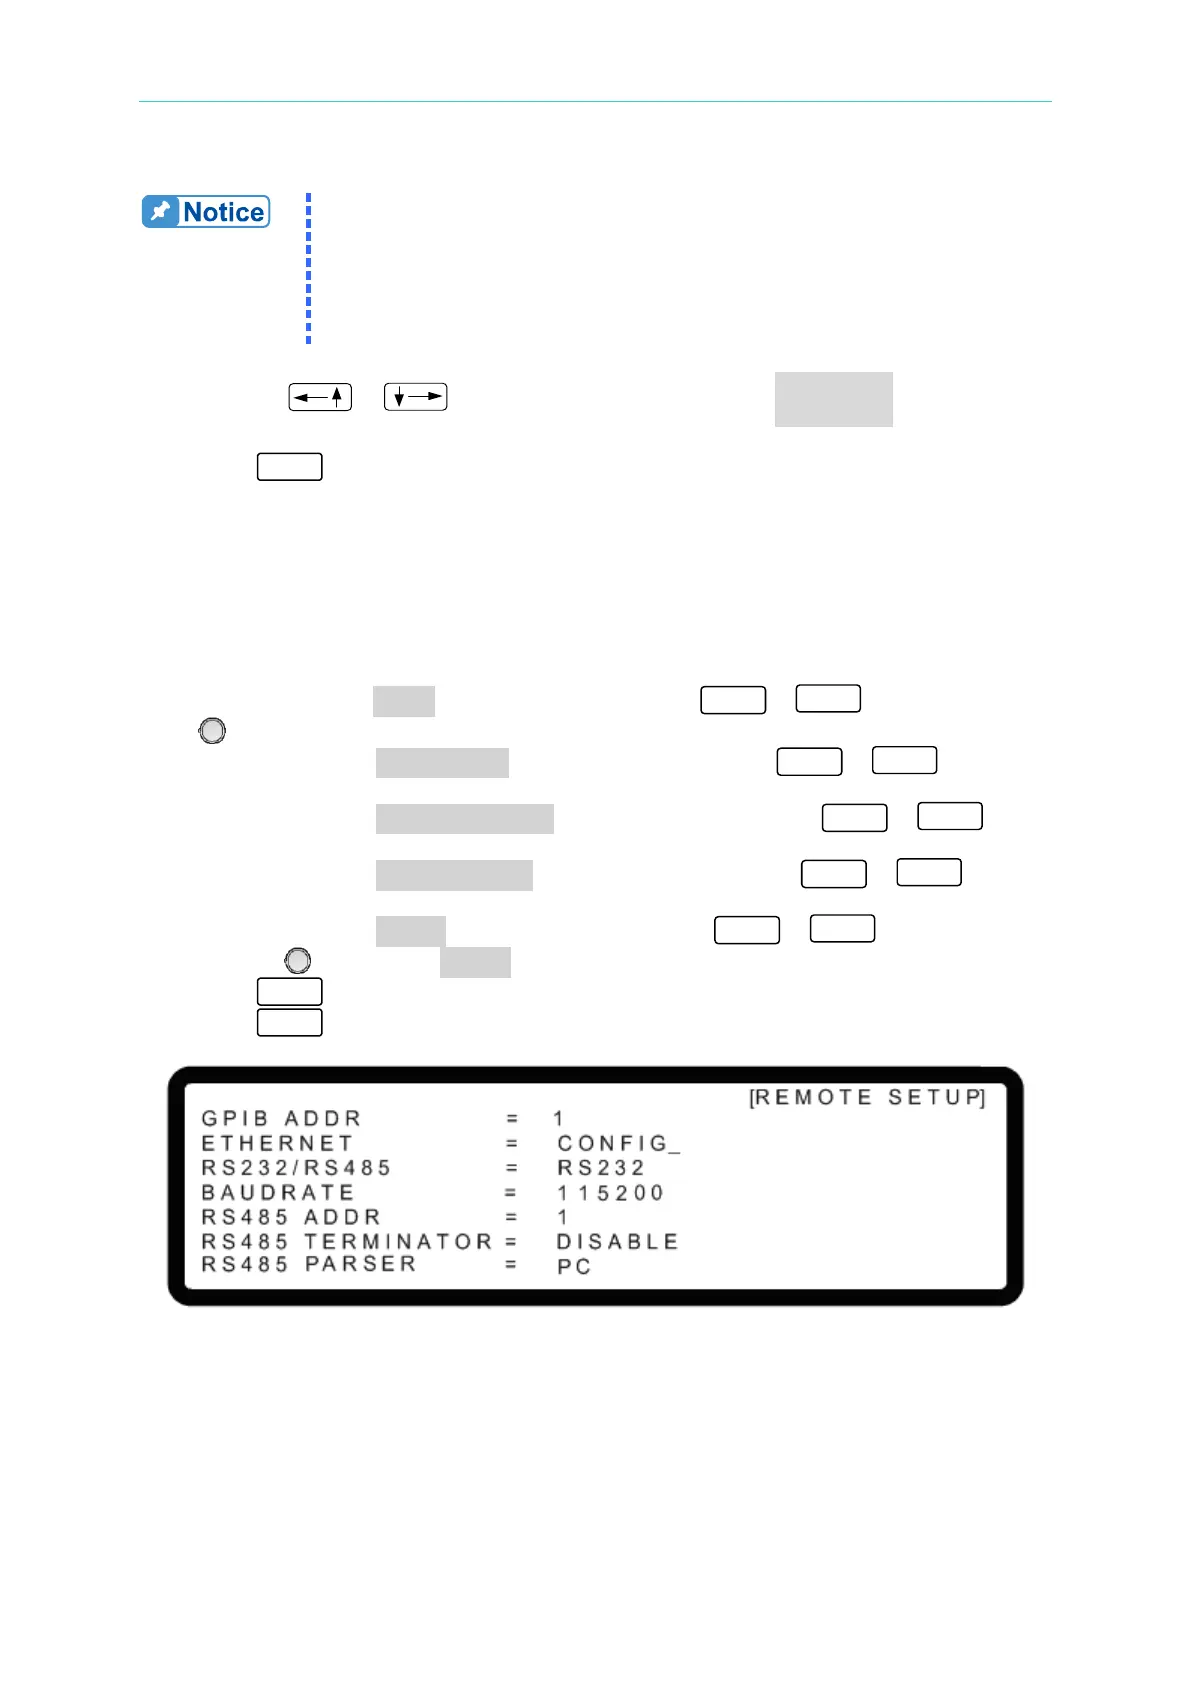
1. Use the “ ”, “ ” keys to move the cursor to the ETHERNET column as
shown in Figure 3-149.
2. Press “ ” to go to the ETHERNET IP address setting screen as shown in Figure
3-150.
Auto detection:
The DHCP default is “ON” and the DC Power Supply will automatically detect the external
network IP address as shown in Figure 3-150,
Manual detection:
3. Move the cursor to DHCP and use the numeric keys -
or turn the “Rotary”
(
) knob to set the DHCP to OFF.
4. Move the cursor to IP ADDRESS and use the numeric keys -
to set the
IP address.
5. Move the cursor to GATEWAY ADDR and use the numeric keys -
to set
the address.
6. Move the cursor to SUBNET MASK and use the numeric keys -
to set
the IP address.
7. Move the cursor to APPLY and use the numeric keys -
or turn the
“Rotary” ( ) knob to set APPLY to YES.
8. Press “ ” to confirm.
9. Press “ ” to return to the MAIN PAGE.
Figure 3-149