Program Sequence
4.1.1.1 Setting EXT._TRIG PULL
1. Use the “ ”, “ ” keys to move the cursor to the column to be set as shown
in Figure 4-3 (1).
2. Use the numeric keys
-
or the “Rotary” ( ) knob to set HIGH or LOW.
3. Press “ ” to confirm.
4. Press “ ” to return to Figure 4-1.
1. When the EXT._TRIG PULL is set to HIGH, input a negative edge
trigger signal (TTL level) on the Analog Interface PIN 8 on the rear
panel to go to the next sequence.
2. When the EXT._TRIG PULL is set to LOW, input a high level signal
on the Analog Interface PIN 8 on the rear panel and change it to a
low level signal (negative edge trigger) to go to the next sequence.
4.1.1.2 Setting PROG NO.
1. Use the “ ”, “ ” keys to move the cursor to the column to be set as shown in
Figure 4-3 (2).
2. Use the numeric keys (
- ) or the “Rotary” ( ) knob to set the value.
3. Press “ ” to confirm.
4. Press “ ” to return to Figure 4-1.
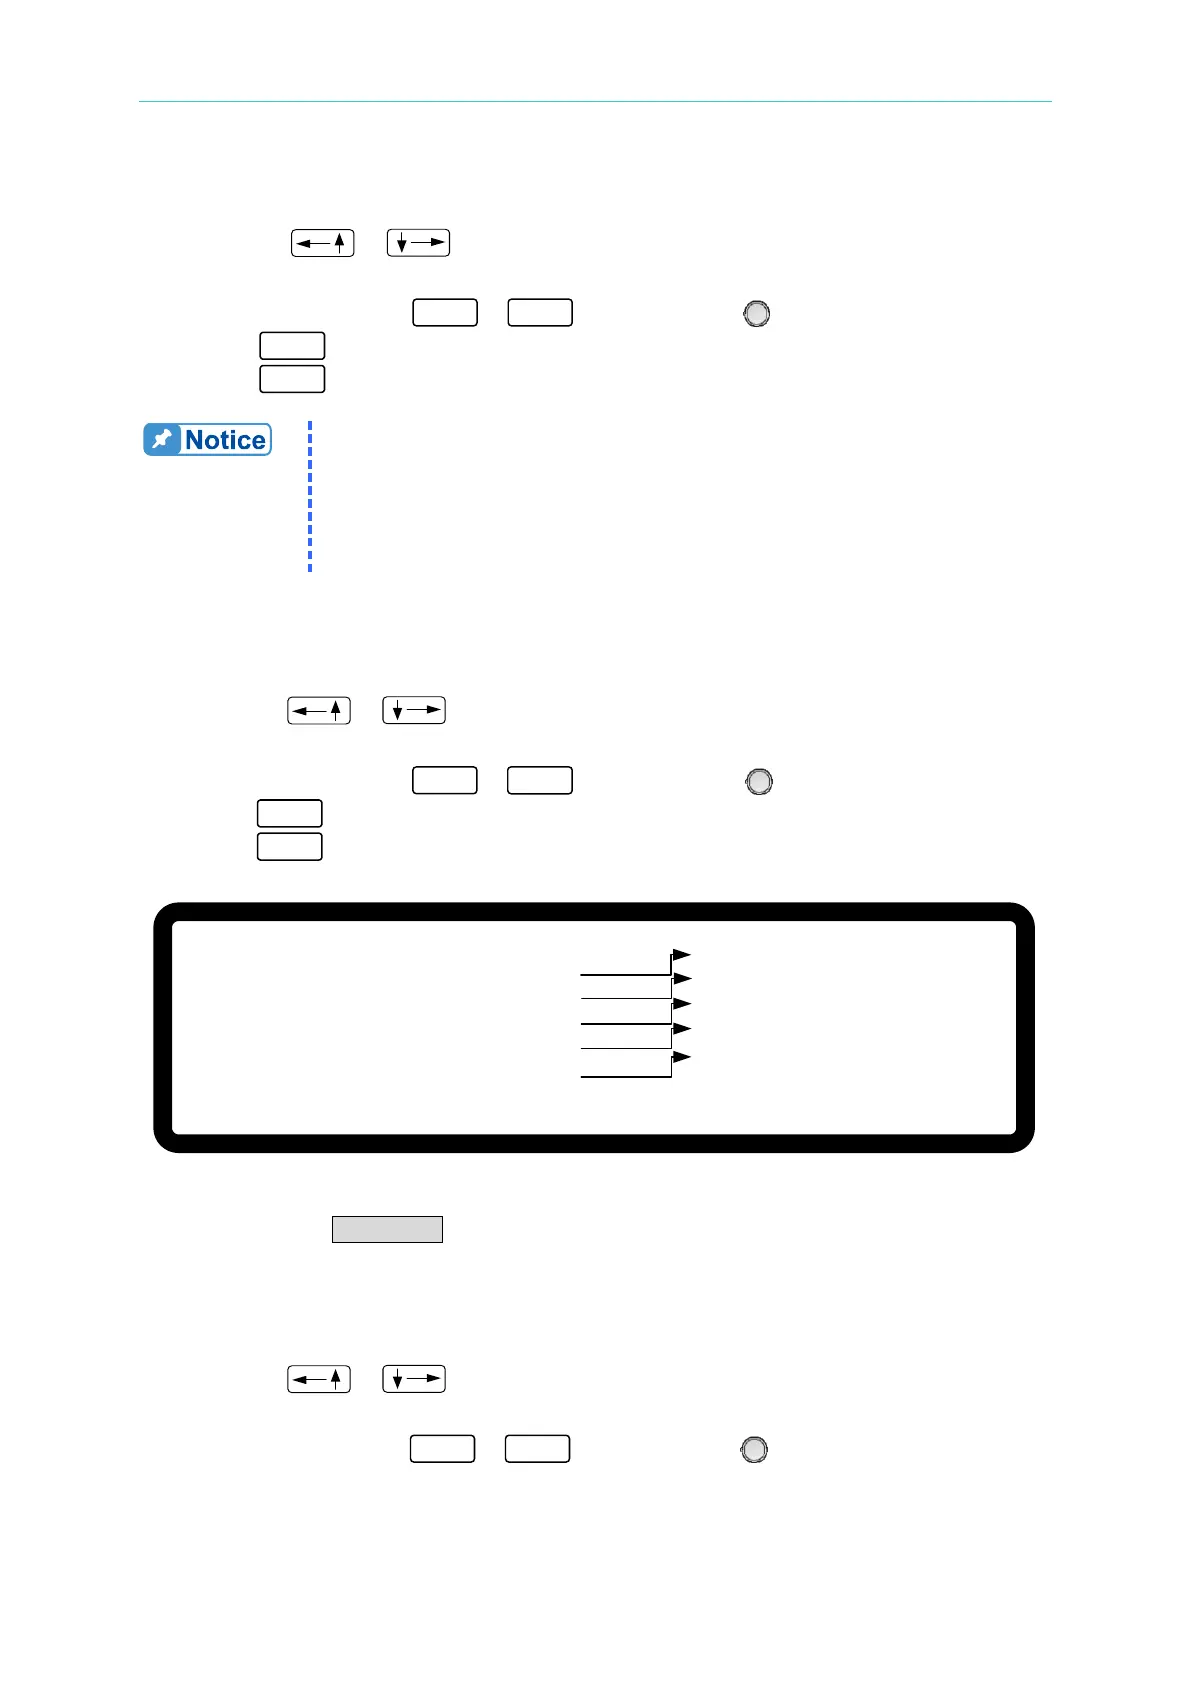
[ P R O G R A M ]
E X T . _ T R I G P U L L = H I G H _
P R O G N O .
=
1
R U N C O U N T
= 1
P R O G C H A I N =
N O
C L E A R P R O G
= N O
▼
( 1 )
( 2 )
( 3 )
( 4 )
( 5 )
Figure 4-3
The valid range for PROG NO. is 1 - 10.
4.1.1.3 Setting RUN COUNT
1. Use the “ ”, “ ” keys to move the cursor to the column to be set as shown in
Figure 4-3 (3).
2. Use the numeric keys
-
or the “Rotary” ( ) knob to set the value.