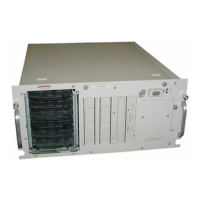
12 Compaq ProLiant ML570 Server Maintenance and Service Guide
NC3123 Fast Ethernet NIC PCI
10/100 Wake on LAN
(WOL) 1-7
PCI Hot Plug LED
switchboard 1-7
peripheral board 1-7
power cable kit 1-8
power supply 1-5
power supply blanking
panel 1-3
power switch 1-5
processor 1-7
rack-mount bezel 1-3
return kit 1-8
SCSI hot-plug drive cage with
6-bay backplane board 1-3
signal cable kit 1-8
system board kit 1-7
terminator board 1-7
tower-to-rack conversion kit 1-8
PCI boards, configuring
automatically 3-3
PCI Hot Plug
access door, opening,
illustrated 2-42
LED indicators, illustrated 4-15
LED switchboard
part number 1-7
removing 2-46
removing, illustrated 2-46
replacing 2-46
PCI slot connectors, identified 4-3
performance specifications 5-1
peripheral board
connectors, identified 4-4
connectors, illustrated 4-4
part number 1-7
removing 2-40
removing, illustrated 2-40
replacing 2-40
slot connector, identified 4-3
SW1 configuration
(maintenance) switchbank
(SW1), settings 4-6
illustrated 4-6
physical specifications 5-1
pointing device interface, test error
codes 3-32
POST
beeps, description 3-8
defined 3-7
error messages 3-7
power backplane board
connectors
identified 4-5
illustrated 4-5
part number 1-5
removing 2-54
removing, illustrated 2-54
replacing 2-54
power backplane sense connectors,
identified 4-3
power cable kit, part number 1-8
Power On/Standby switch
connector, identified 4-5
positions 2-4
removing 2-55
removing, illustrated 2-55
replacing 2-55
power supply
bay configuration,
illustrated 2-51
blanking panel
part number 1-3
removing 2-53
removing, illustrated 2-53
replacing 2-53
connectors, identified 4-3, 4-5
LEDs, illustrated 4-18, 4-19
part number 1-5
removing, illustrated 2-52
replacing 2-51, 2-52
specifications 5-3
power switch
LEDs, illustrated 4-11
part number 1-5
positions 2-4
removing, illustrated 2-55
power switch and front panel LEDs
function 4-11
identifying system status 4-11
locating 4-11
power switch connector, Power
On/Standby, identified 4-5
Power-On Self-Test See POST
processor
cage
part number 1-7
removing 2-50
removing, illustrated 2-50
replacing 2-50
fans (CPU fans) 2-13
identification, illustrated 2-47
part number 1-7
removing 2-48
removing, illustrated 2-48
replacing 2-48
slot connectors, identified 4-3
test error codes 3-23
 Loading...