References
302
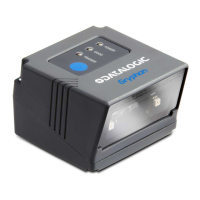
Gryphon™ I GD4100/GM4100/GBT4100/L GD4300
Symbologies
Decoding Level
Decoding Levels are used to configure a barcode symbology decoder to be very aggressive to
very conservative depending on a particular customer’s needs.
• Level 1 results in a very conservative decoder
at
the expense of not being able to read
poorly printed or damaged labels.
• Level 5 results in a very aggressive decoder. This aggressive
behavior allows decoding of
poorly printed and damaged labels at the expense of increasing the likelihood of decoding
errors.
• Level 3, which is the default setti
ng, allows the majority of product labels to be decoded.
There are many factors that determine when to change the d
ecoding level for a particular
symbology. These factors include spots, voids, non-uniform bar/space widths, damaged labels,
etc. that may be experienced in some barcode labels. If there are many hard to read or damaged
labels that cannot be decoded using a conservative setting, increase the decoding level to be
more aggressive. If the majority of labels are very good quality labels, or there is a need to
decrease the possibility of a decoder error, lower the decoding level to a more conservative level.
Set Length
Length Control allows you to select either variable length decoding or fixed length decoding for
the specified symbology.
Variable Length.
For variable length decoding, a minimum and maximum length may be set.
Fixed Length.
For fixed length decoding, two different lengths may be set.
Set Length 1
This feature specifies one of the barcode lengths for Length Control. Length 1 is the minimum
label length if in Variable Length Mode, or the first fixed length if in Fixed Length Mode.
Length includes the barcode’s data characters only.
The number of characters that can be set varies, dependi
ng on the symbology. Reference the
page for your selected symbology to see specific variables.
1. Determine the desired character length (varies depending on symbology). P
ad the number
with leading zeroes to yield two digits. For example: 0 = 00, 5 = 05, 20 = 20, etc.
2. Go to the Set Length page for your selected symbology
and scan the ENTER/EXIT PRO-
GRAMMING MODE bar
code to enter Programming Mode.
3. Scan the barcode to SELECT LENGTH 1 SETTING for y
our selected symbology.
4. Scan the appropriate two digits from the keypad in Appendix D, Keypad, that represent
the length setting which was determined in the s
teps ab
ove. You will hear a two-beep indi-
cation after the last character.
If you make a mistake before the last character, scan the CANCEL barcode to abort
and not save the entry string. You can then start again at the beginning.
5. Scan the ENTER/EXIT PROGRAMMING MODE barcode to exit Prog Mode.
 Loading...