(g.50/D)
(g.51/D)
(g.52/D)
7
1
1
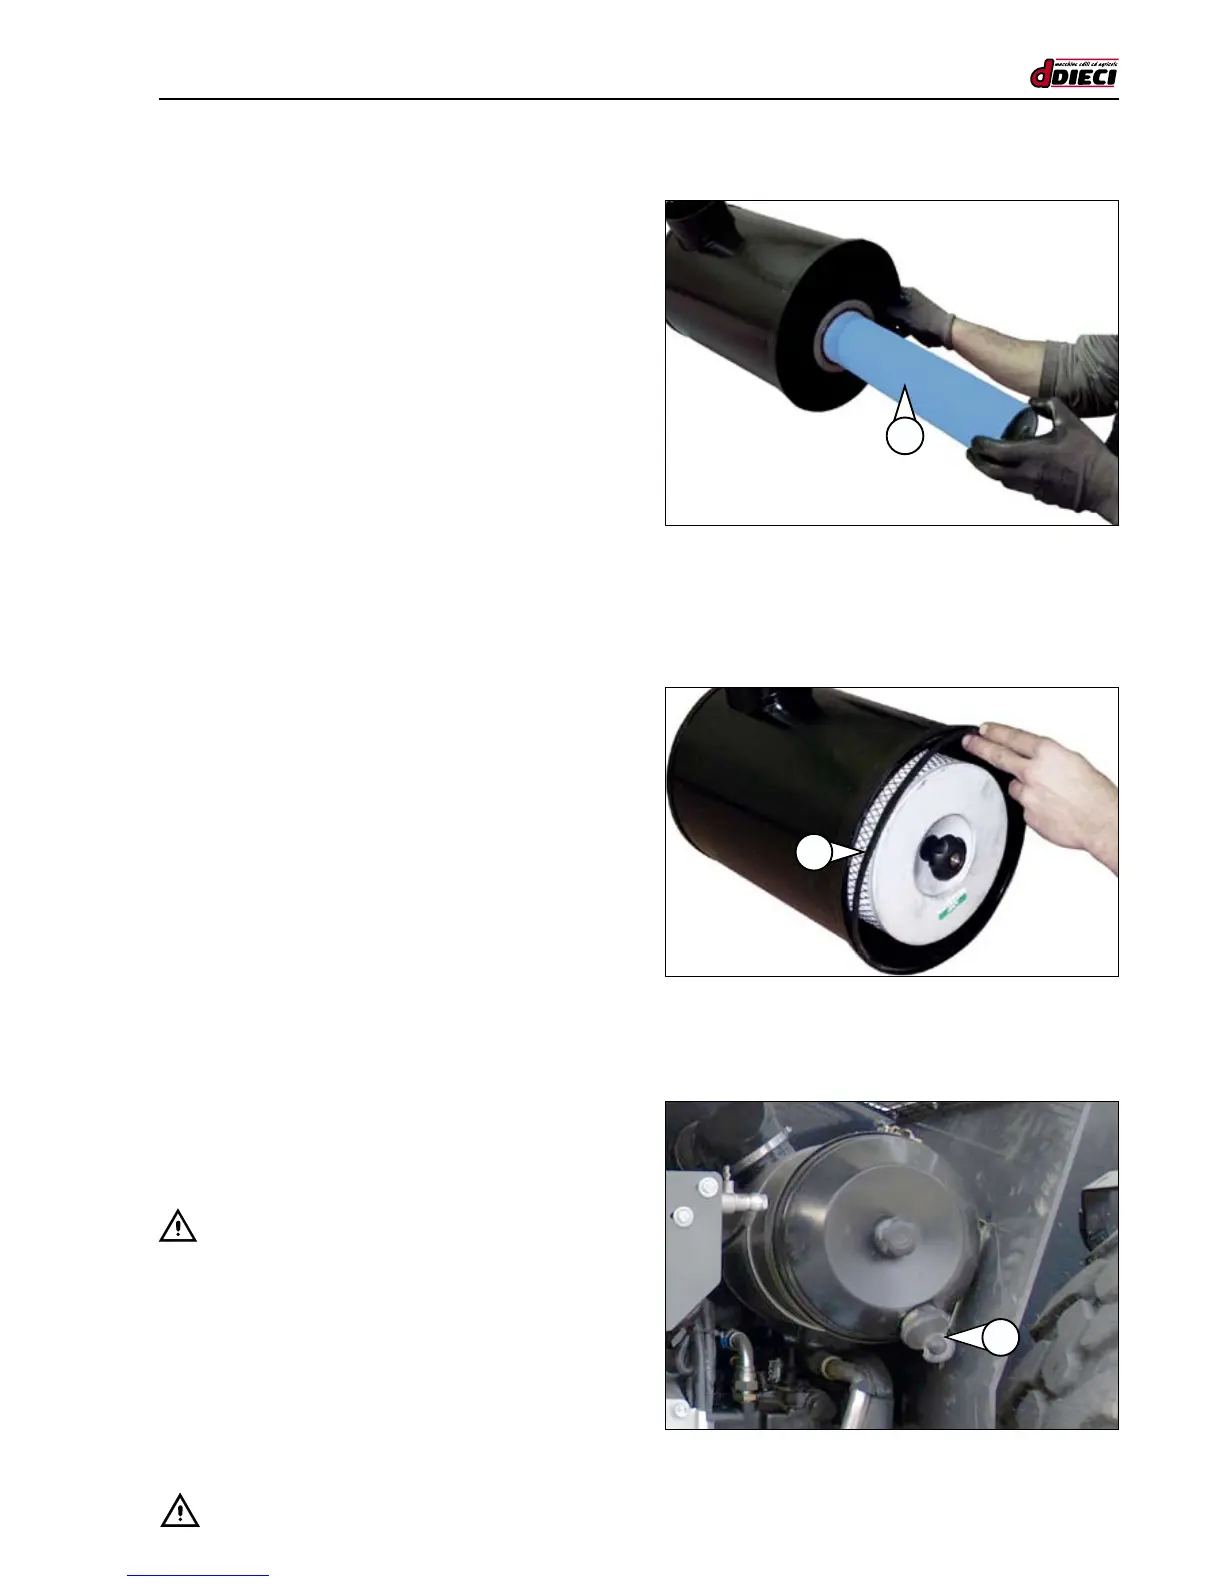
5. Extract the lter “7” (Fig.50/D).
6. Clean and replace the filters and re-mount everything
carrying out the same operations in the reverse order ta-
king care not to tighten the bolts and knobs excessively.
A sealing ring is present in the lid in order to prevent “1”
(Fig.51/D) draughts of air. Due to atmospheric agents, the
rubber of which it is composed, tends to deteriorate, mea-
ning it must be replaced when cracks appear.
Use a small at screwdriver to remove it. To insert the new
gasket, rest this in its seat and insert it exerting slight pressure.
The sealing ring will be taken exactly into its seat, re-
mounting the lid.
During assembly of the lter, the valve (g.51/D Pos.”1”)
must must always be positioned in the lowest part possible
with respect to the lter. If this is not the case, the expulsion
functionality is compromised, reducing the lifespan of the lter.
- ATTENTION:
Periodically check the state of the dust discharge valve and replace
it if deteriorated. Do not operate in absence of the drain valve.