D 31 37
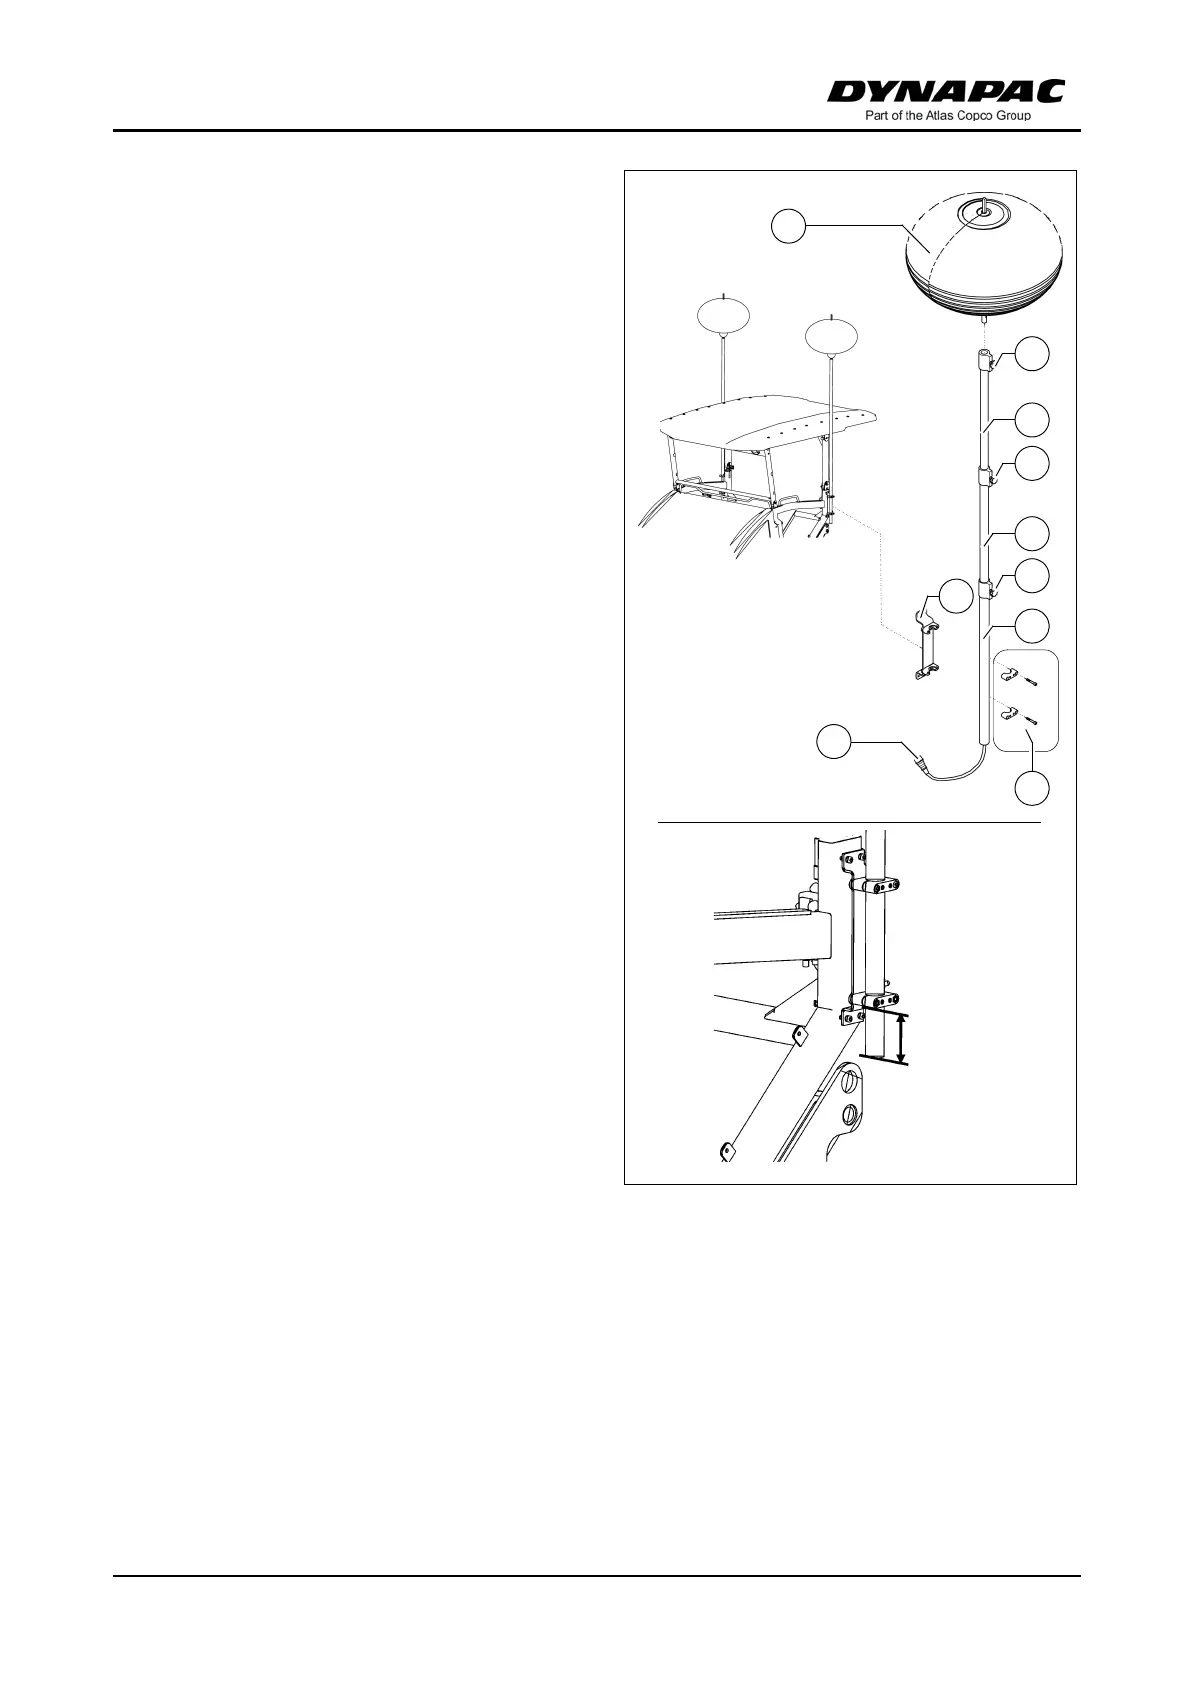
- Secure the lower part of the tripod (3)
to the preassembled bracket (5) using
the relevant assembly parts (4).
- Connect the tripod sections (6) and
secure with stop screws (7).
- Place the power moon's journal (8)
onto the top part of the tripod and se-
cure with the stop screws (9).
- Finally, place the assembled tripod
sections, together with the power
moon, onto the lower part of the tripod
(3) and secure with the stop screws
(10).
- When the power moon has been fully
assembled and secured, the power
moon connector (11) can be connect-
ed to its current supply.
- The power moon is switched off by re-
moving the power connector (11) from
the socket.
m
On assembly, make sure that the lower
part of the tripod projects max. 15 cm out
of the bracket. Risk of collision!
A
When equipped with an electric screed,
it is possible for the lamps to flicker irreg-
ularly during the heating-up phase with
simultaneous operation of 500 watt spot-
lights (o) and the power moon (o).
Preferably only one type of lighting
should be used during the heating-up
phase.