SOI 02.10 FV 21/142 599 70 59-01
3. The screws of the control components are now accessible.
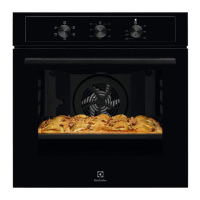
Fig. 37
1 - FIXING SCREWS
FOR THE CONTROL
COMPONENT.
2 - PIN FOR THE
COMPONENT
KNOB.
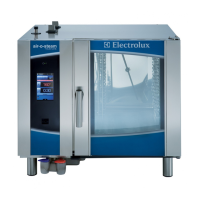
4. Slide the washers off from the knob control pins (in the models where featured).
Fig. 38
1 - PIN FOR THE
COMPONENT
KNOB.
2 - WASHER.
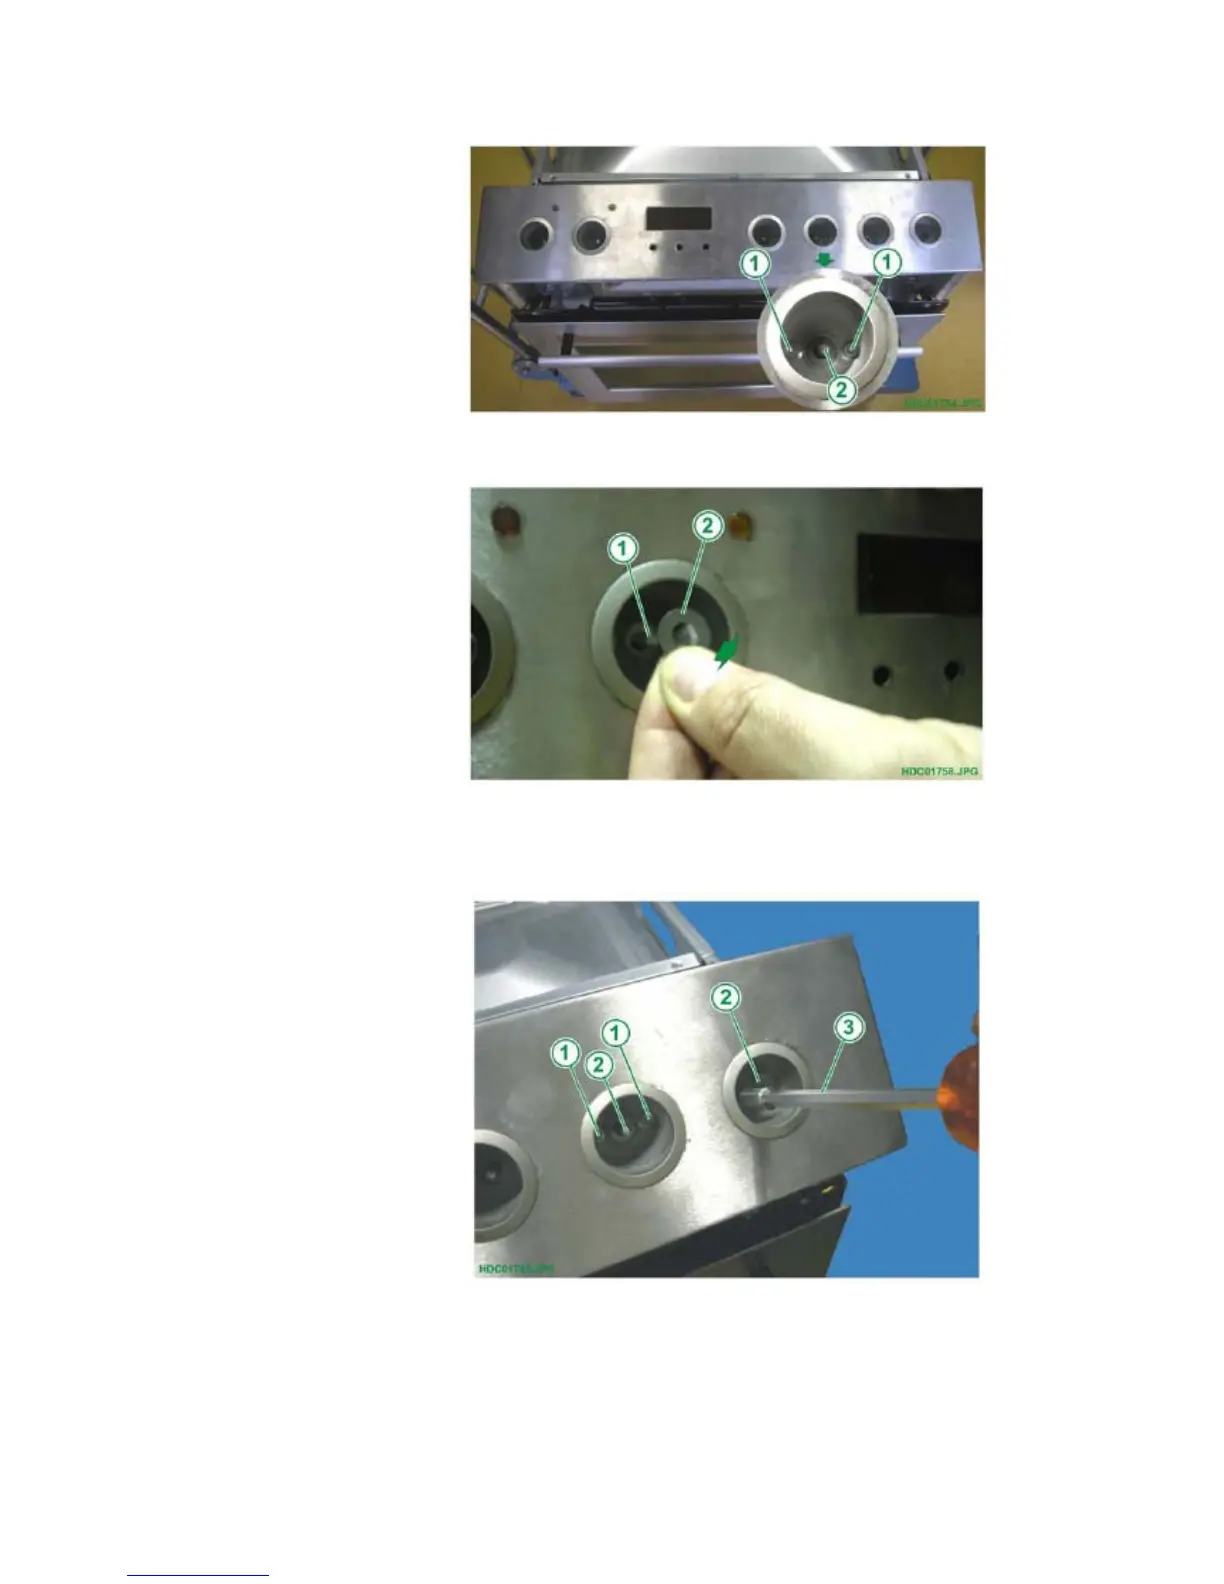
5. Remove the screws of the control components (switches, energy regulators, thermostat; two
for each component, see Fig. 39) that secure the component to the related support.
Fig. 39
1 - FIXING SCREWS
FOR THE CONTROL
COMPONENT.
2 - PIN FOR THE
COMPONENT
KNOB.
3 - TORX
SCREWDRIVER.
 Loading...