SOI 02.10 FV 44/142 599 70 59-01
2.6.2.3 - NORMAL ELECTRONIC VERSION
1 - Unfasten the fixing screws on the upper panel
Fig. 85
Upper panel fixing screws
Fig. 86
1 - KRONOS CONTROL UNIT
2 - OVC1000 POWER BOARD
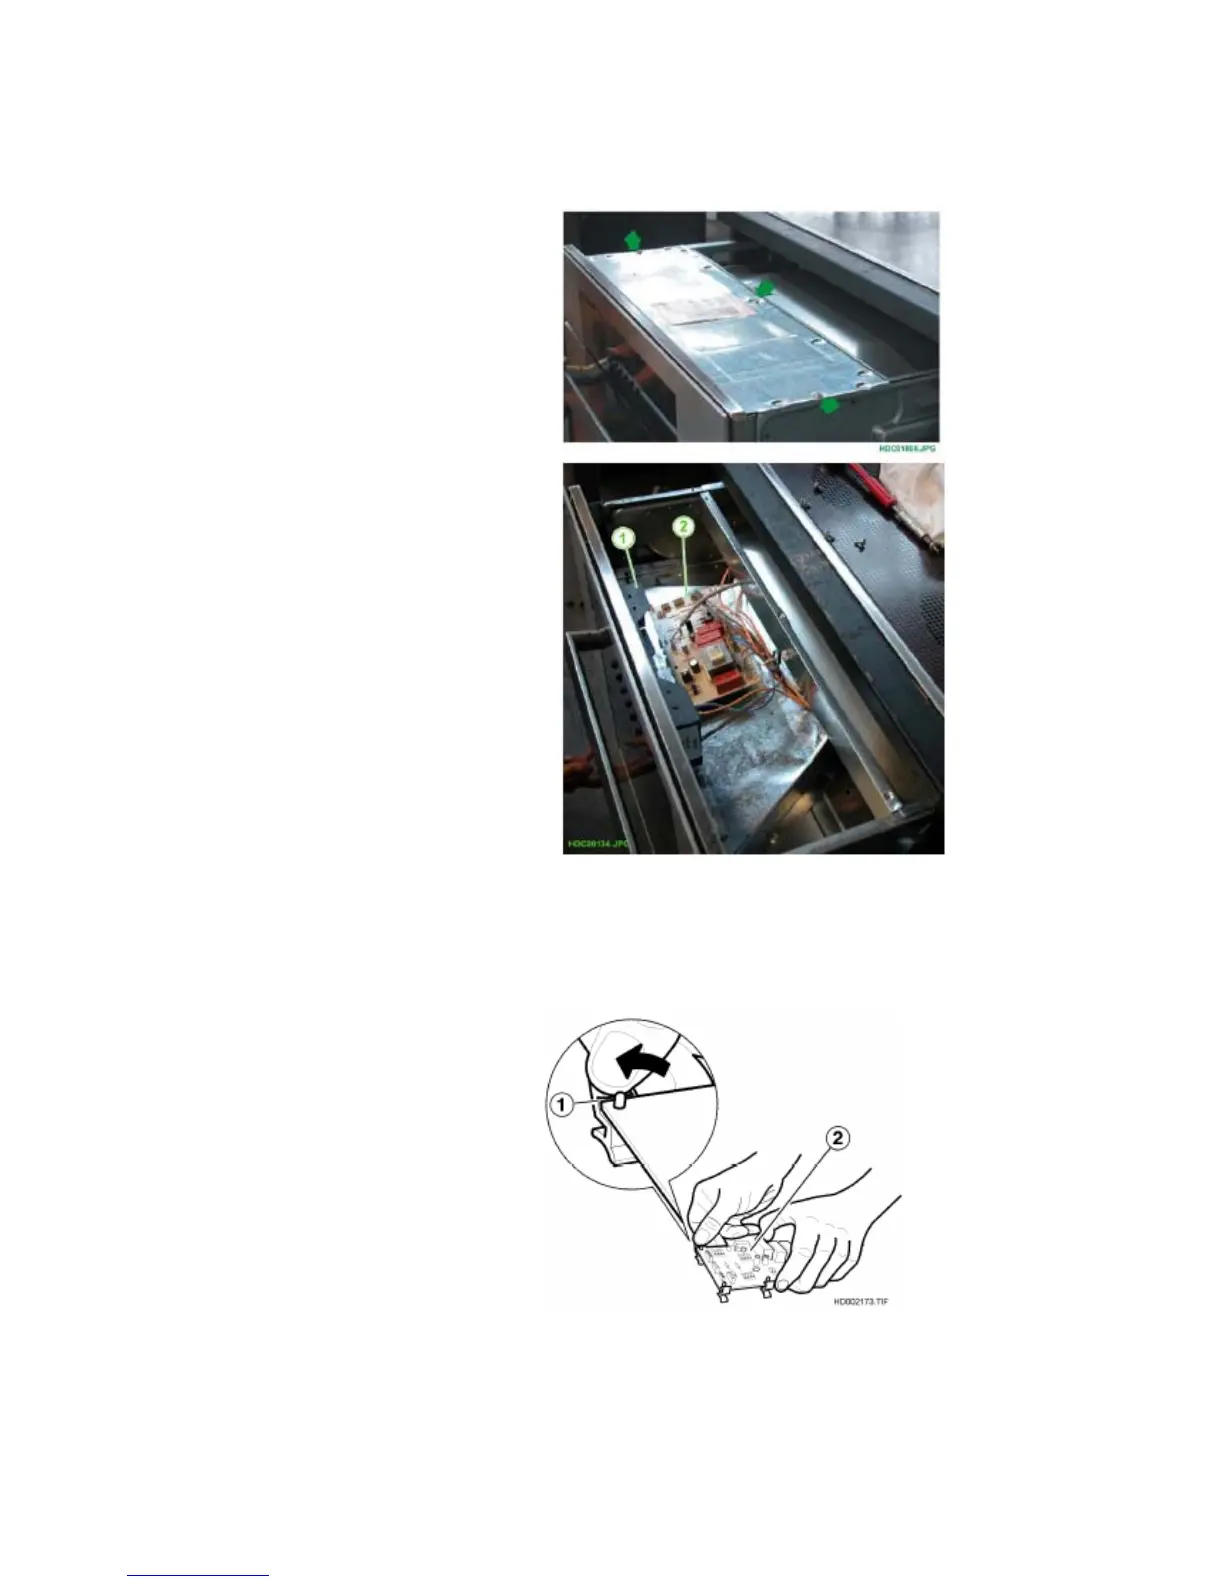
When removing an electronic board:
1 - Detach the connection wires, marking their position
2 - Release the board from the plastic supports (see Fig. 87) for the OVC1000 version, or remove
the fixing screws for the OVC2000 version.
3 - Remove the board.
Fig. 87
1 - PLASTIC SUPPORT PINS
FIXING THE BOARDS IN PLACE
2 - OVC1000 POWER BOARD
N.B.: From January 2010 (serial number 001….) access to the top of the oven has improved
thanks to the progressive introduction of a new one-piece top oven cover (see chapter 2.6.1).
 Loading...