Part 2: Maintenance 9. Replacing the Ball Screw Spline Unit
169
Installation
(1) Fit the U2 and Z belts into the shaft of a new ball screw spline unit. Place the ball
screw spline unit inside the arm.
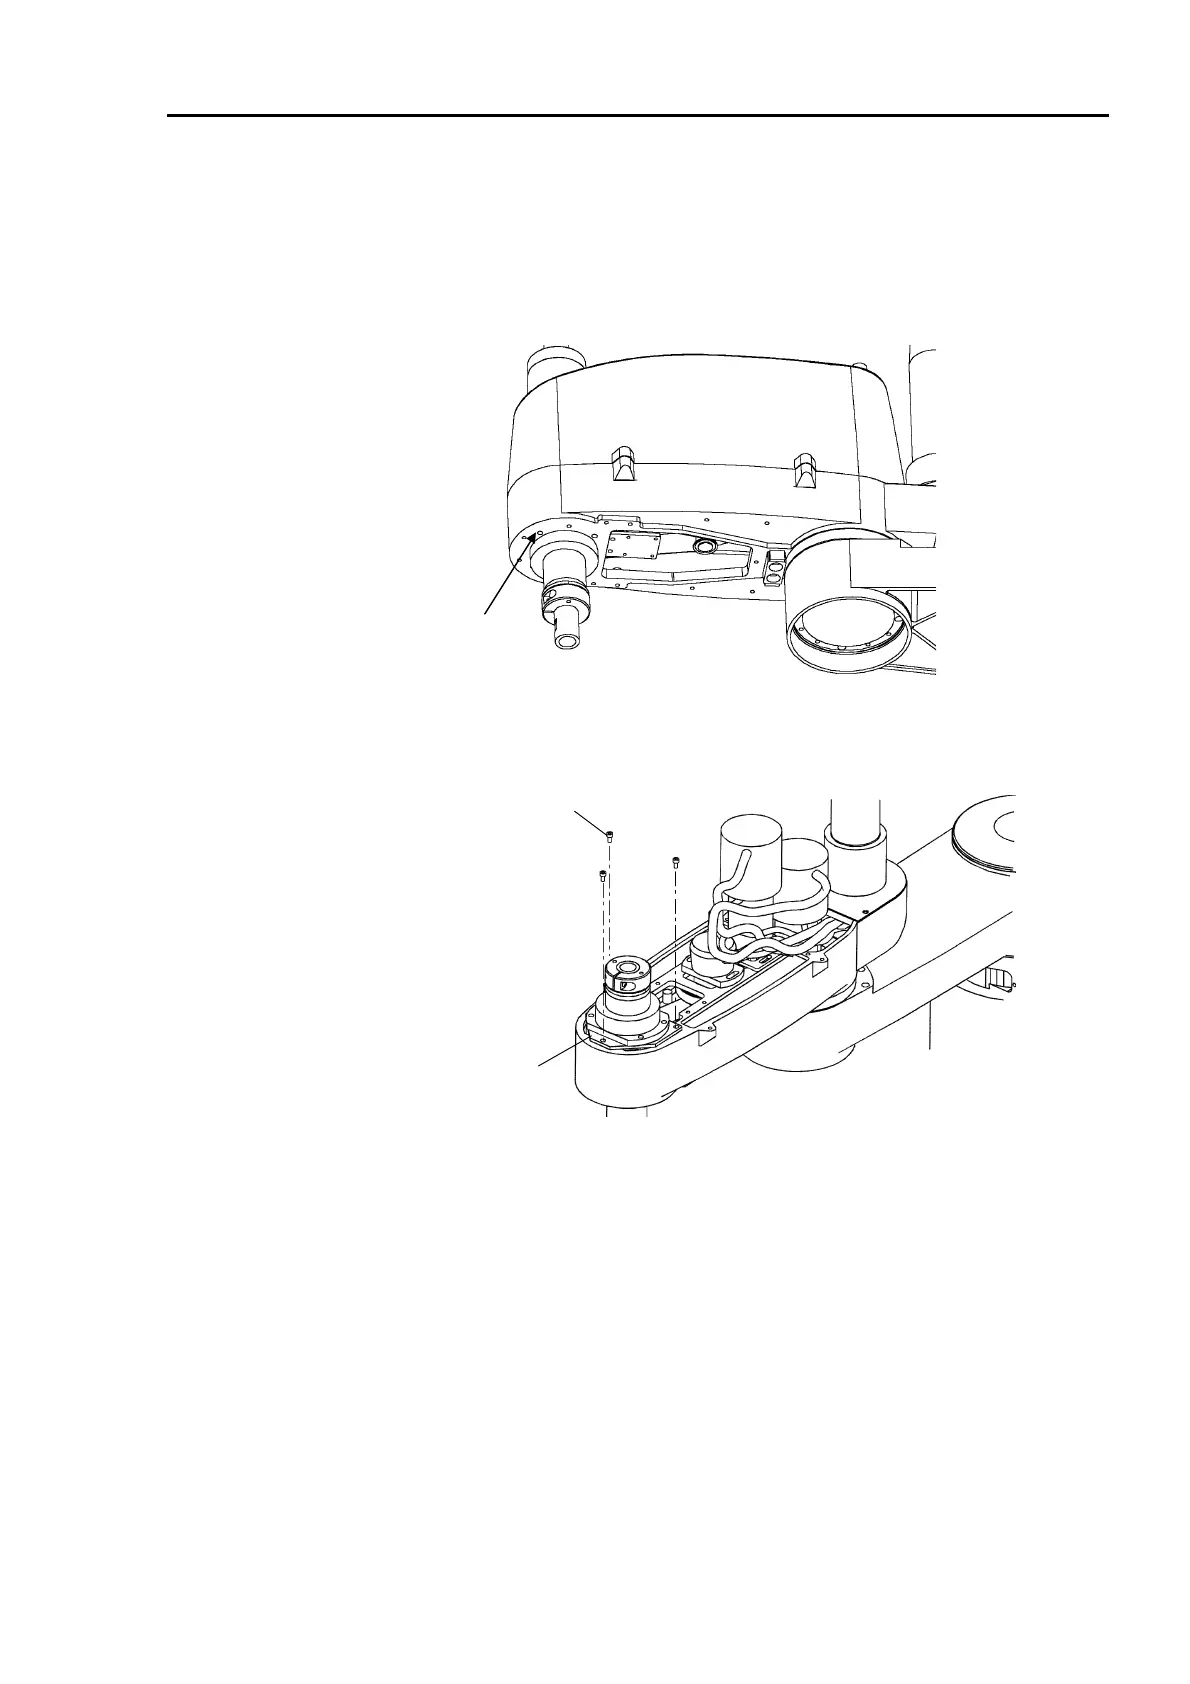
(2) Tighten four bolts (M4×10) at the ball screw spline unit under the arm. Beware so
that the timing belts will not be pinched between the nut and arm.
M4×10
(3) Temporarily tighten three bolts (M4×10) on the spline plate.
M4×10
Spline plate
(4) Move the shaft up and down several times and tighten the bolts on the spline plate
(temporarily tightened before) securely.
(5) Place the Joint #3 motor unit in the arm. The motor cables should be facing Joint #2.
 Loading...


