Part 2: Maintenance 13. Protected Model Maintenance
215
13.8 Replacing the Bellows
If the bellows are damaged, follow the steps described below to replace the bellows.
The specifications are the same for the upper and lower bellows.
Removal
Remove the wiring and piping to the end effector and the end effector itself after turning
OFF the power.
(1) Disengage the motors using the motor <OFF> button while keeping the Drive Unit
power ON.
(1) Disengage the motors using the MOTOR OFF command while keeping the Controller
power ON.
(2) Lower the shaft manually to its lower limit while pushing the brake release button.
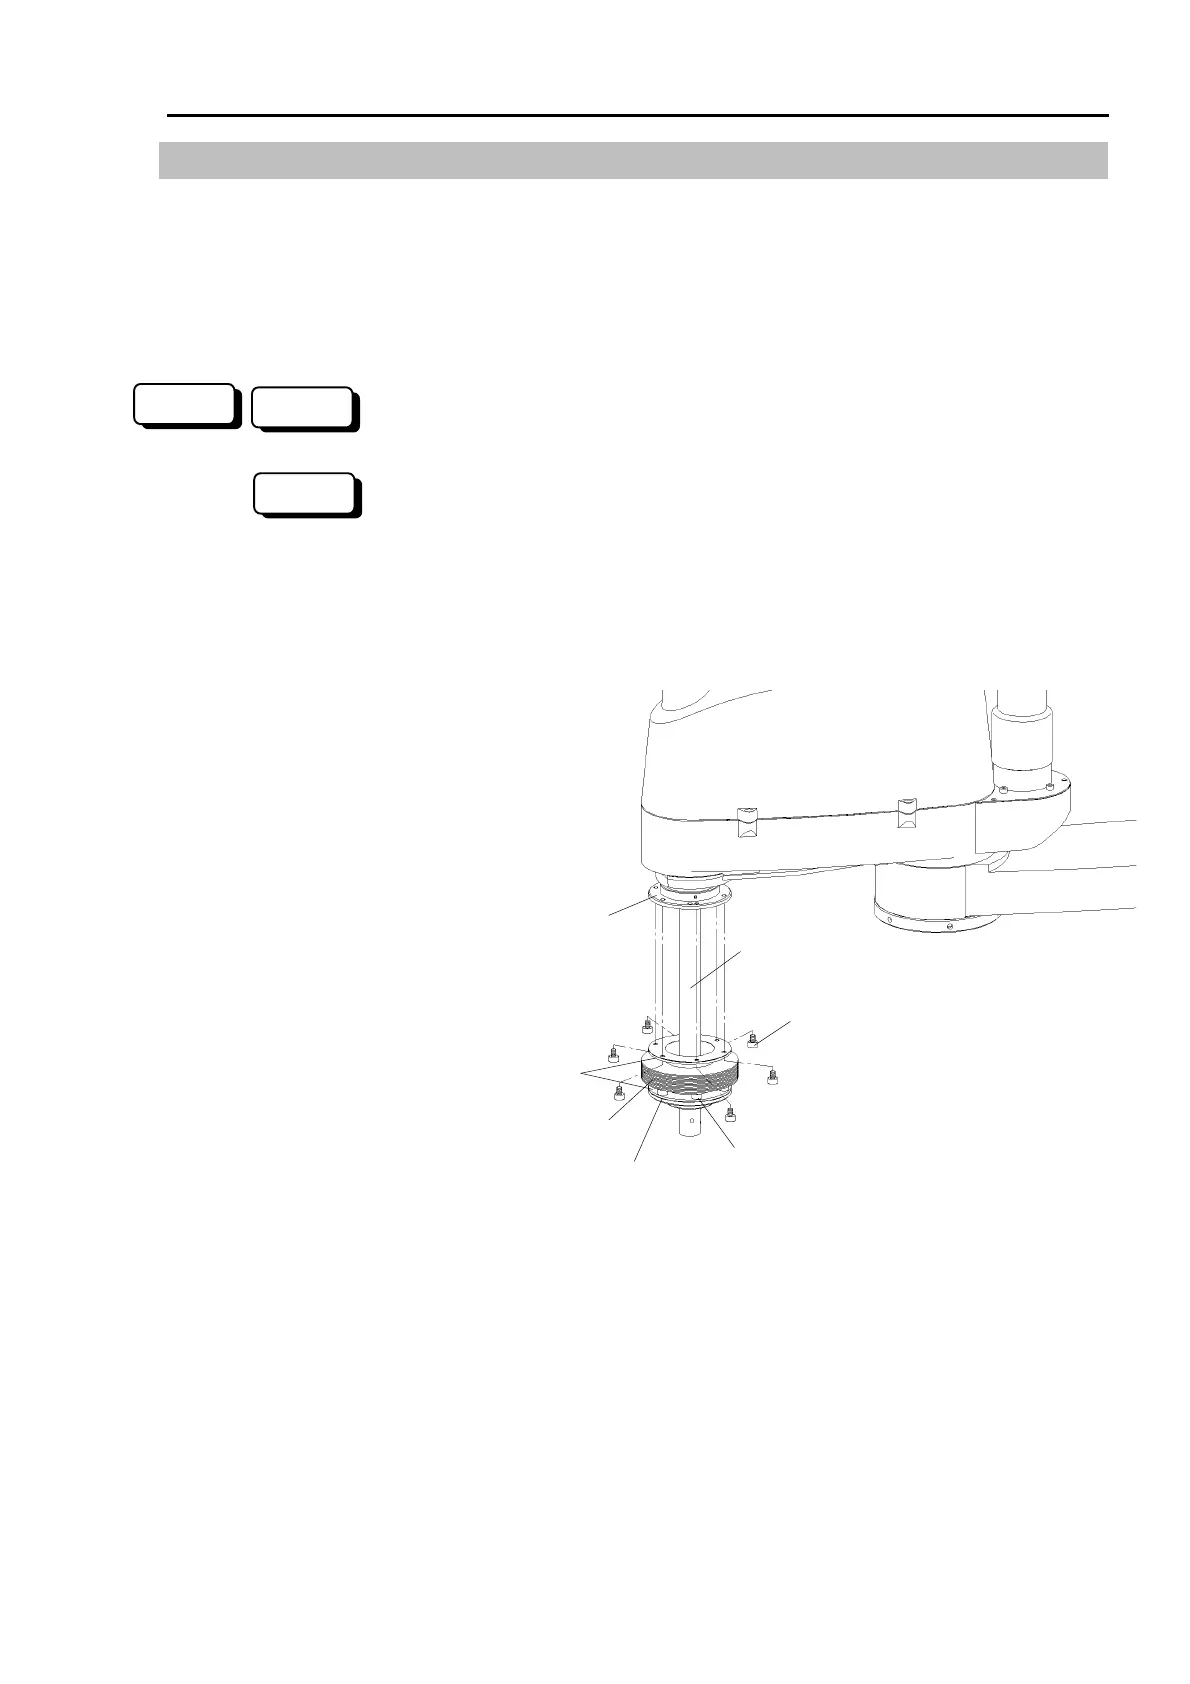
(3) Remove the six bolts (M4×6) from the mounting ring on the top of the lower bellows.
There is an O-ring between the bellows and flange that is fitted into a groove of the
flange.
Mounting rings
Shaft
Lower bellows
(3)
(4)
Flange
Flange
(4) Remove the six bolts (M4×6) from the mounting ring on the bottom of the lower
bellows. There is an O-ring between the bellows and flange that is fitted into a groove
of the flange.
300
RC+
SPEL 95
 Loading...


