5. Replacing the Motors Part 2: Maintenance
108
5.1 Replacing the Joint #1 Motor
Removal : Joint #1
(1) Open the base connector plate. (Refer to 2. Opening the Covers.)
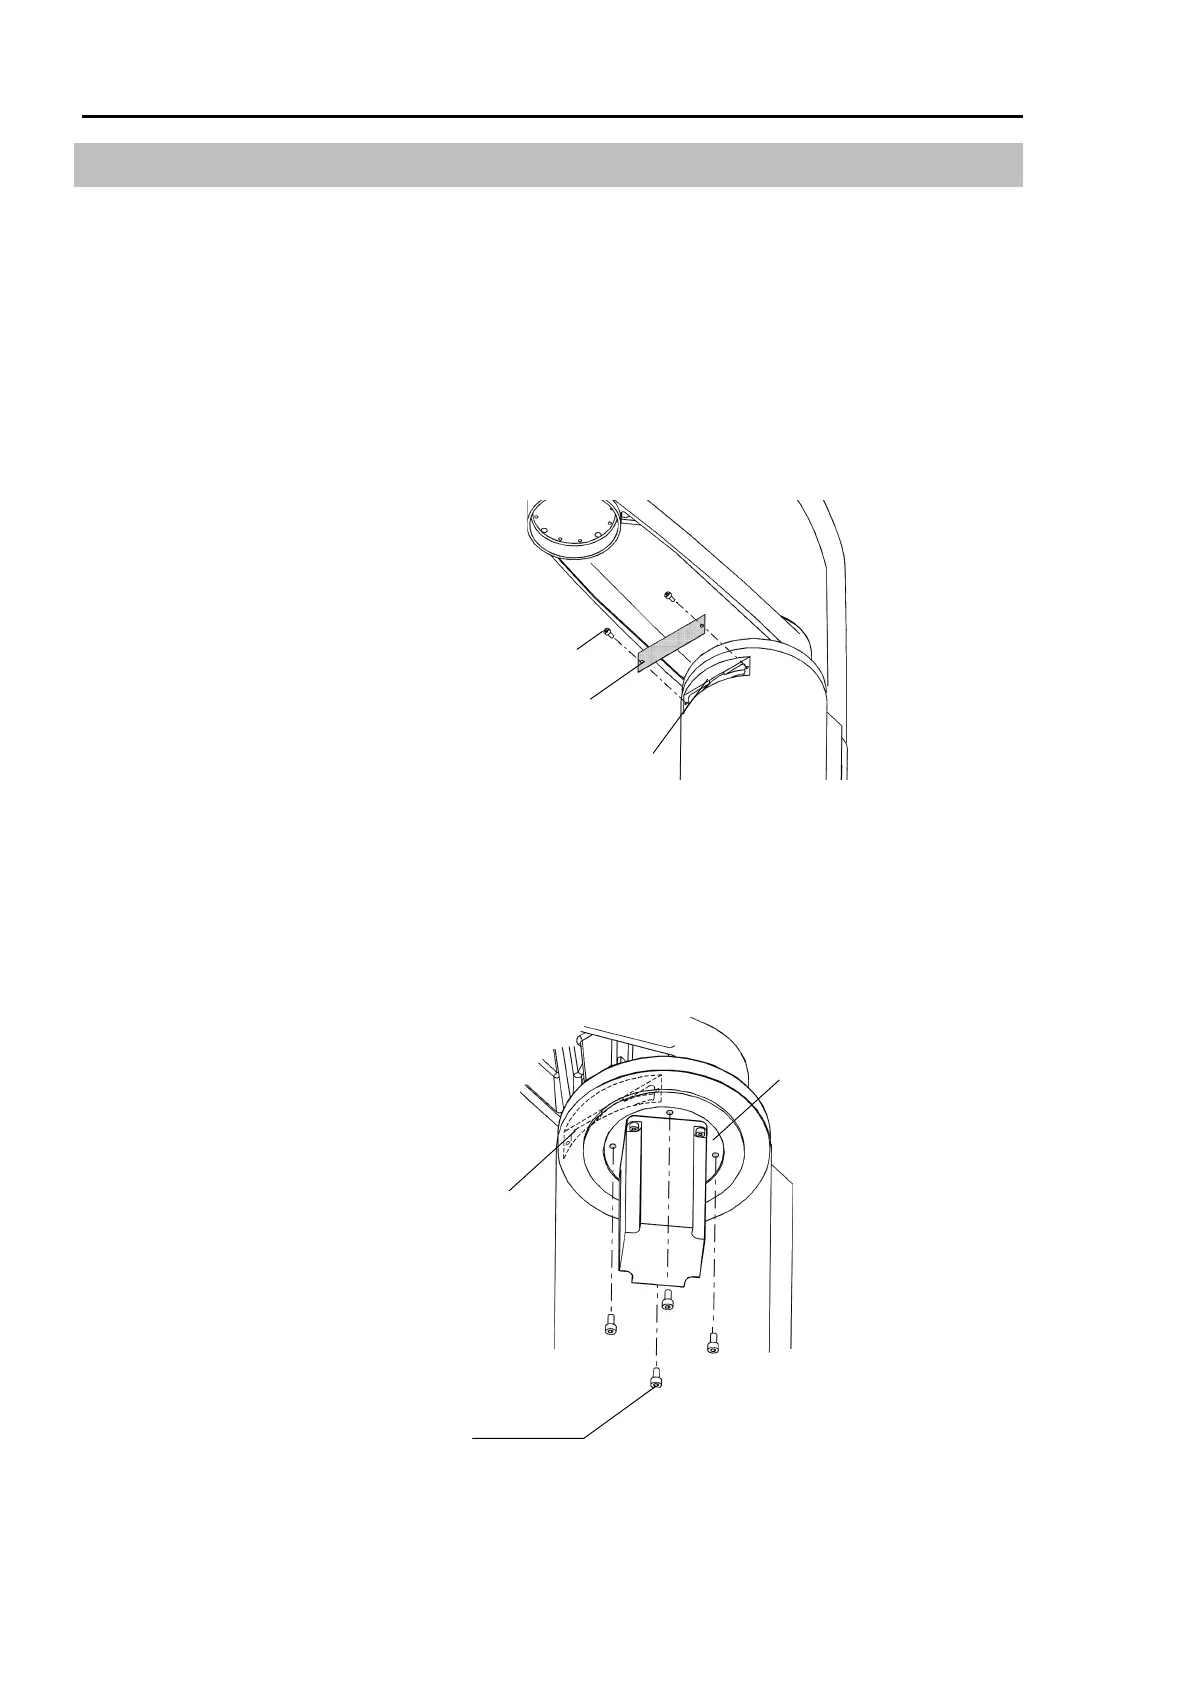
(2) Remove the two bolts (2-M4×8) from the maintenance plate and remove the
maintenance plate.
∗ If the manipulator is a Protected model, the waterproof cover 1 must be removed
before removing the maintenance plate. Refer to the section Sealing the
Manipulator in chapter 13. Protected Model.
Maintenance plate
Maintenance hole
M4
×
8
(3) Disconnect the connectors (X110 and X11). To disconnect X110, pull it out while
pushing the presser tongue next to the connector number on the motor side.
(4) Remove the four bolts (M4×15 for the ES series; M5×15 for the EL series) from the
motor flange and pull the motor downward. In this case, insert a hexagon head
wrench from the maintenance hole and remove the two bolts at the maintenance hole
side. If it is difficult to extract the motor, extract it while moving Arm #1 slightly.
Motor flange
ES: M4× 15
EL: M5× 15
Maintenance hole
 Loading...


