Part 2: Maintenance 8. Replacing the Timing Belts
155
8. Replacing the Timing Belts
WARNING
Only trained personnel should be allowed to maintain this part.
When replacing the timing belts, make sure the power is turned OFF and pull
out the power plug from the power source. Failure to turn OFF the power can
result in electric shock and malfunction.
Lower Joint #3 carefully to prevent it from colliding with nearby equipment. Joint #3 can
be moved while the brake release button (See Figure 11 in the chapter End Effectors in Part
1) is being pushed when the power is turned ON. The brake on the joint #3 motor, which
normally prevents the end effector lowering under its own weight when either the power or
the motor itself is turned OFF, does not work while the timing belt is being replaced.
The power should be OFF while replacing the timing belt.
Once the timing belt is removed or replaced, the origin position changes. As a result, the
teach points you have been using also deviate from position. In order to use the original
teach points, you need to adjust the origin position.
You need to choose one point from among the currently held teach points. The accuracy of
the selected point should be easy to check. Adjust the origin point as described in chapter
11. Calibration.
Types of timing belts
The timing belt is used one on Joint #3 and two on Joint #4. Specify the manipulator type
name and corresponding joint name when ordering a replacement timing belt.
Joint Name Specification Old code New code
#3 Z belt 264-2GT-6 ZA003214 R13ZA00321400
U1 belt 264-2GT-9-T434N1 ZA003213 R13ZA00321300
#4
U2 belt 264-2GT-20-T434N1 ZA003212 R13ZA00321200
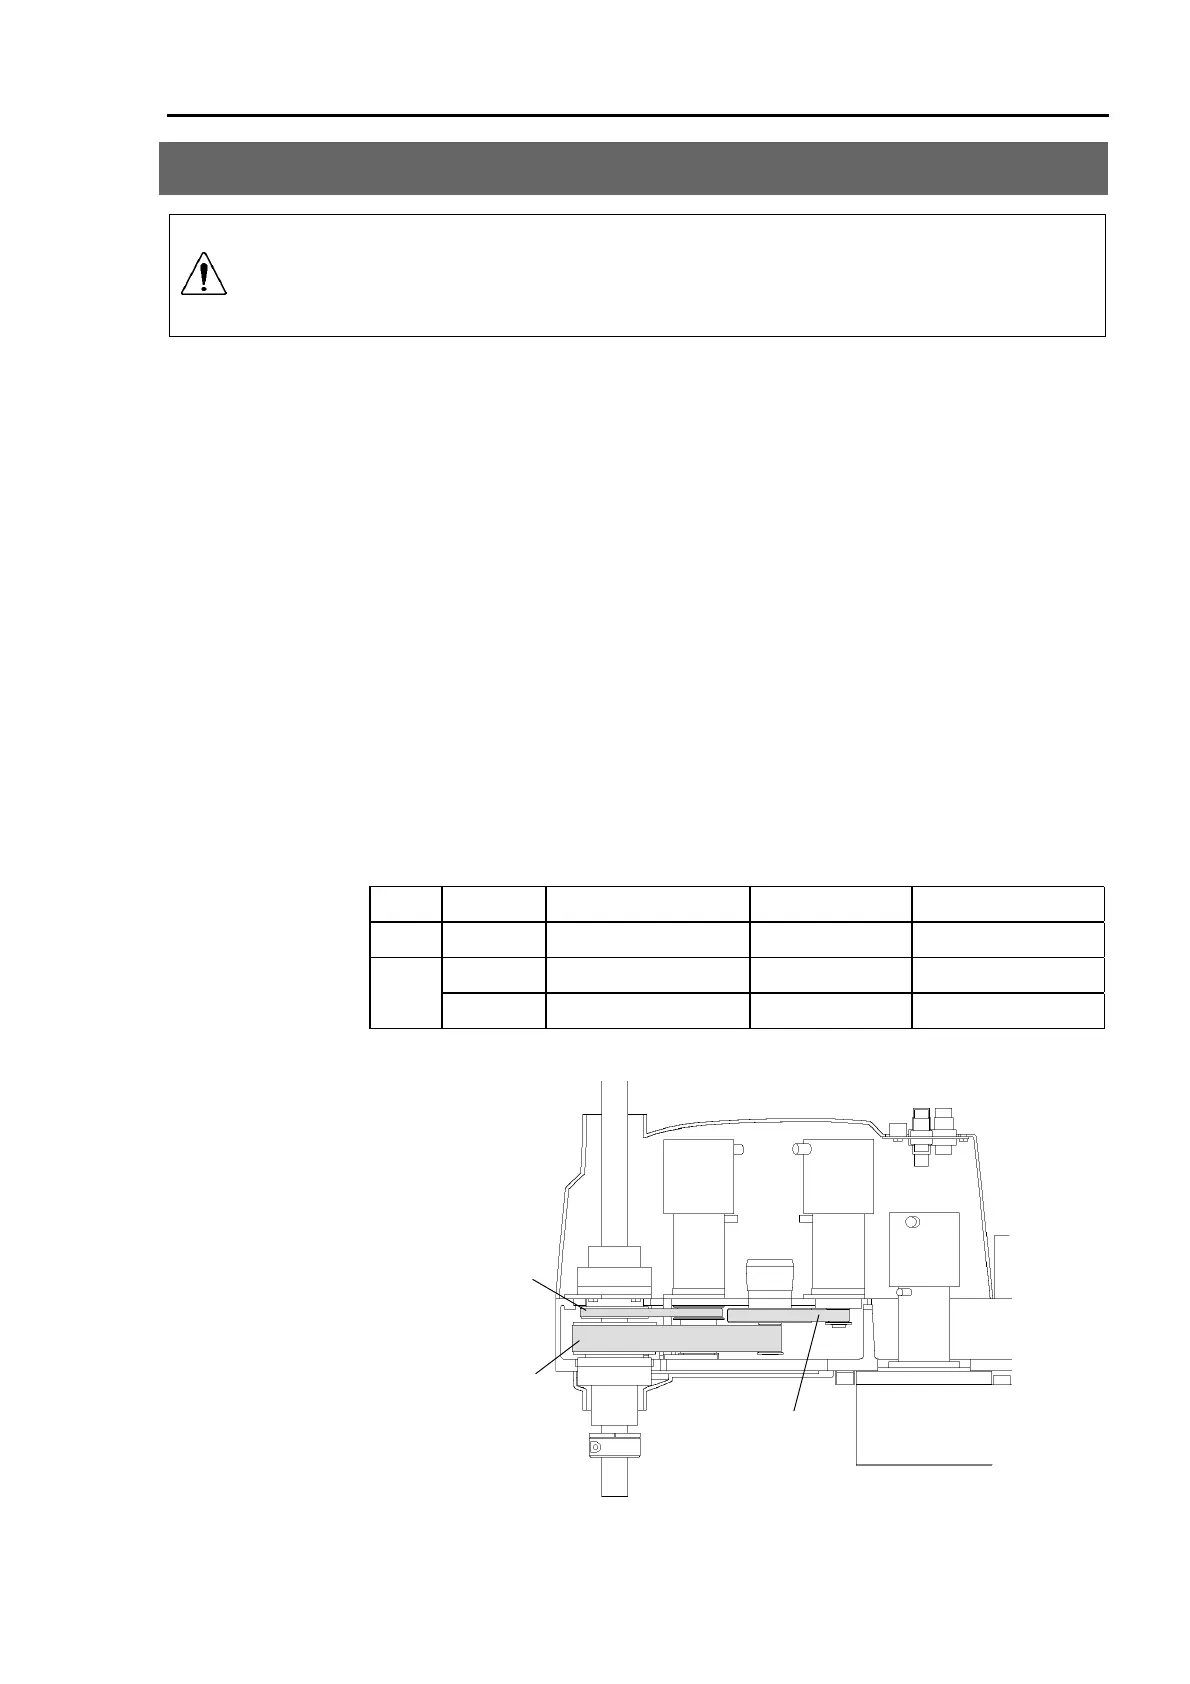
Locations of timing belts
Z belt (6 mm)
U2 belt (20 mm)
U1 belt (9 mm)
NOTE
NOTE
 Loading...


