Removing the defective 2.5-inch HDD/SSD module
▶
Remove the HDD/SSD module, see "Removing a 2.5-inch HDD/SSD
module" on page 146
.
▶
If applicable, remove the HDD/SSD from the installation frame, see
"Handling HDDs or SSDs without installation frame" on page 137.
Installing the new 2.5-inch HDD module
▶
If applicable, install the HDD/SSD in the installation frame, see "Handling
HDDs or SSDs without installation frame" on page 137.
▶
Install the HDD/SSD module, see "Installing a 2.5-inch HDD/SSD module"
on page 143.
Concluding steps
▶
If applicable, "Installing the front cover with lock" on page 61.
▶
If the HDD/SSD is configured using a RAID controller with a RAID level
higher than "0", the rebuild will start automatically, see "Performing a RAID
array rebuild" on page 105.
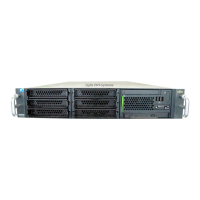
7.4.5 Replacing a 8x 2.5-inch HDD backplane
Field Replaceable Unit
(FRU)
Hardware: 20 minutes
Tools: Phillips PH2 / (+) No. 2 screw driver
Preliminary steps
▶
"Locating the defective server" on page 97
.
▶
If applicable,"Removing the front cover with lock" on page 45.
▶
"Shutting down the server" on page 46.
▶
"Disconnecting the power cord" on page 47.
▶
"Getting access to the component" on page 48.
Hard disk drive (HDD) / solid state disk (SSD)
RX4770 M6 Upgrade and Maintenance Manual 149

 Loading...