Concluding steps
▶
Insert all HDD/SSD modules, see "Installing 2.5-inch HDD/SSD modules"
on page 142
.
Make sure that you reinstall the HDD/SSD module in the bay it was
located before the HDD backplane replacement.
▶
If applicable, install the ODD, see "Installing the ODD" on page 303
.
▶
"Installing the fan cage" on page 66.
▶
"Installing the air duct 1 (top system board)" on page 71.
▶
"Reassembling" on page 53.
▶
"Connecting the power cord" on page 59.
▶
"Switching on the server" on page 60.
▶
If applicable,"Installing the front cover with lock" on page 61.
7.4.7 Upgrading configuration from eight to 16 2.5-inch
HDDs/SSDs
Upgrade and Repair Unit
(URU)
Hardware: 10 minutes
Tools: Phillips PH2 / (+) No. 2 screw driver
CAUTION
All data on all HDDs/SSDs in the array will be lost when deleting the
RAID array!
▶
Be sure to back up your data before deleting a RAID array.
▶
For more information, see the "ServerView Suite RAID
Management" user guide.
Preliminary steps
▶
If applicable,"Removing the front cover with lock" on page 45.
▶
"Shutting down the server" on page 46.
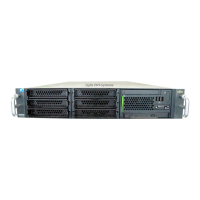
Hard disk drive (HDD) / solid state disk (SSD)
RX4770 M6 Upgrade and Maintenance Manual 159

 Loading...