Section 4
4-2 © Copyright 2009 GBC. All rights reserved. Advanced Punch Service Manual
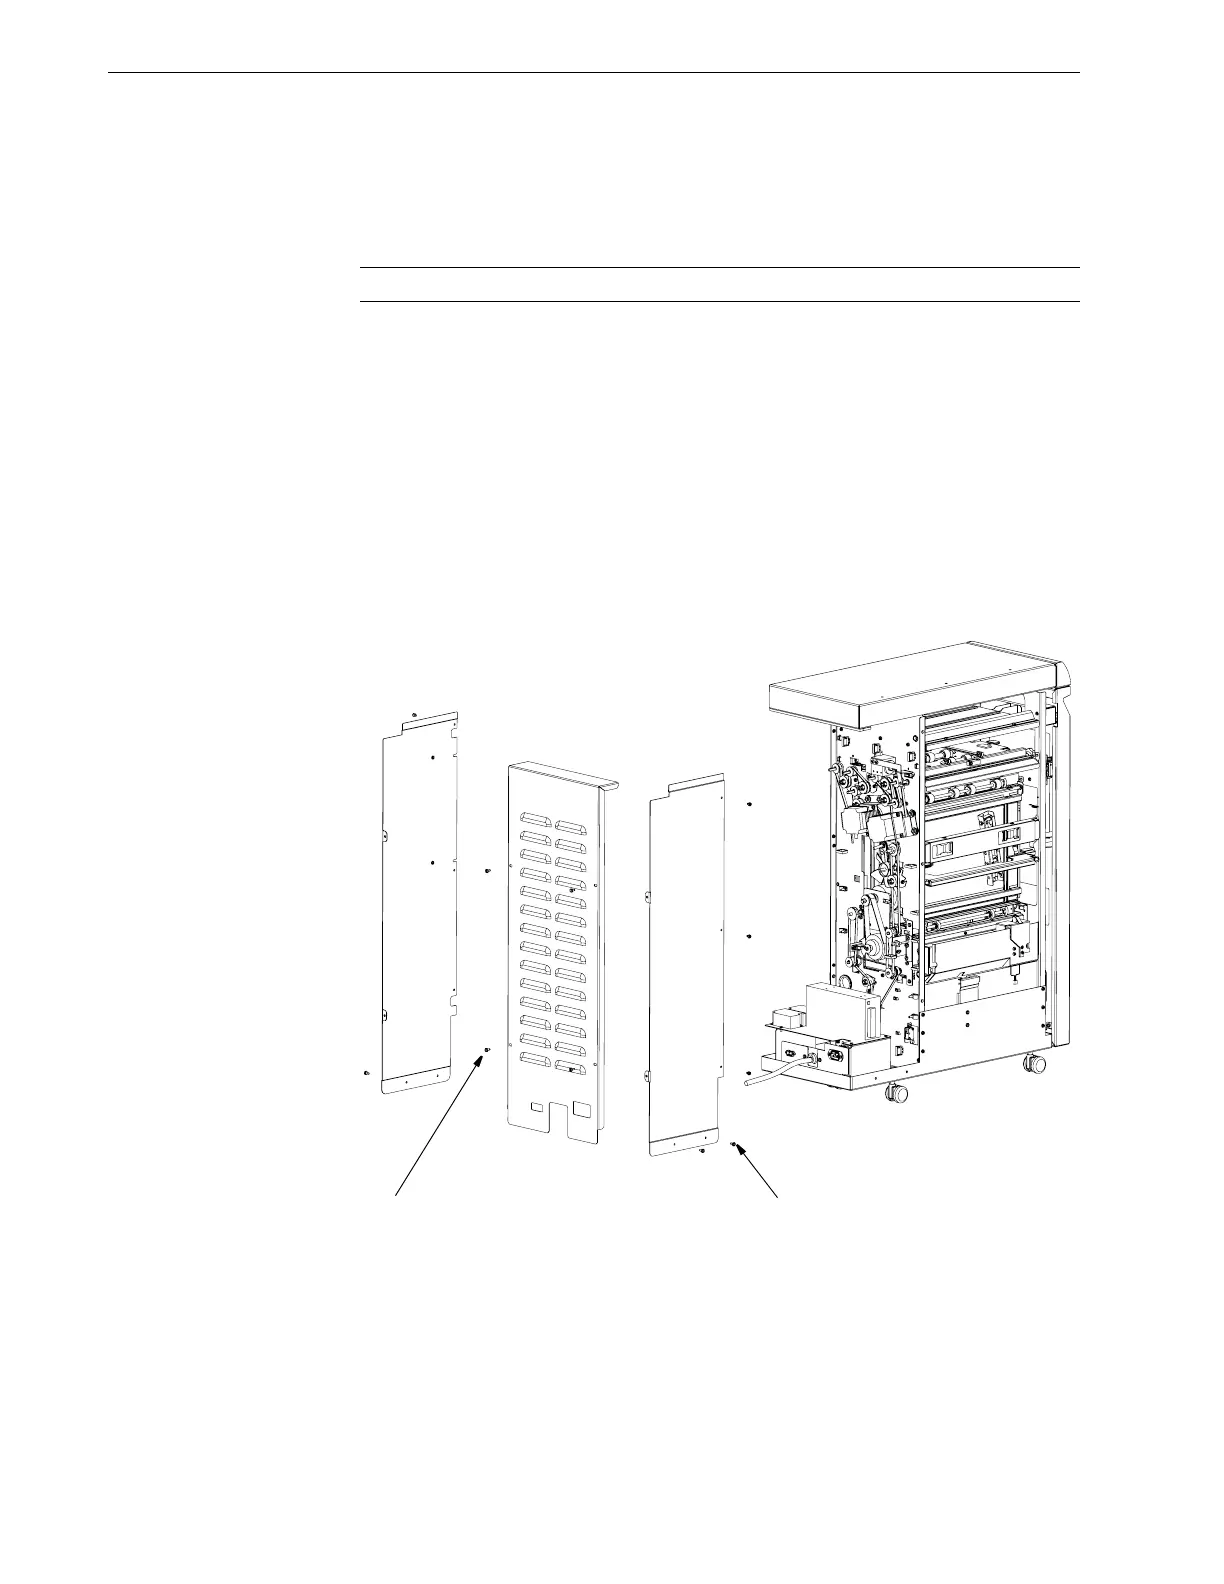
4.1.2 Removing the Rear Cover
Separate the punch from the printer and finisher first. Refer to “Separating
thePunch From the Printer” in Section 4.1.
Note: It is not necessary nor recommended that you remove the top cover.
Procedure
Tool Required
• Phillips screwdriver or 1/4" hex head nut driver
To remove the rear cover:
1. Remove the 5 screws on the entrance side [1] & remove the 4 rear cover
screws [2]
2. Slide the cover out from under the top cover. Do not remove the top cover.
Figure 4.1 Removing Rear Cover.