Section 4
4-70 © Copyright 2009 GBC. All rights reserved. Advanced Punch Service Manual
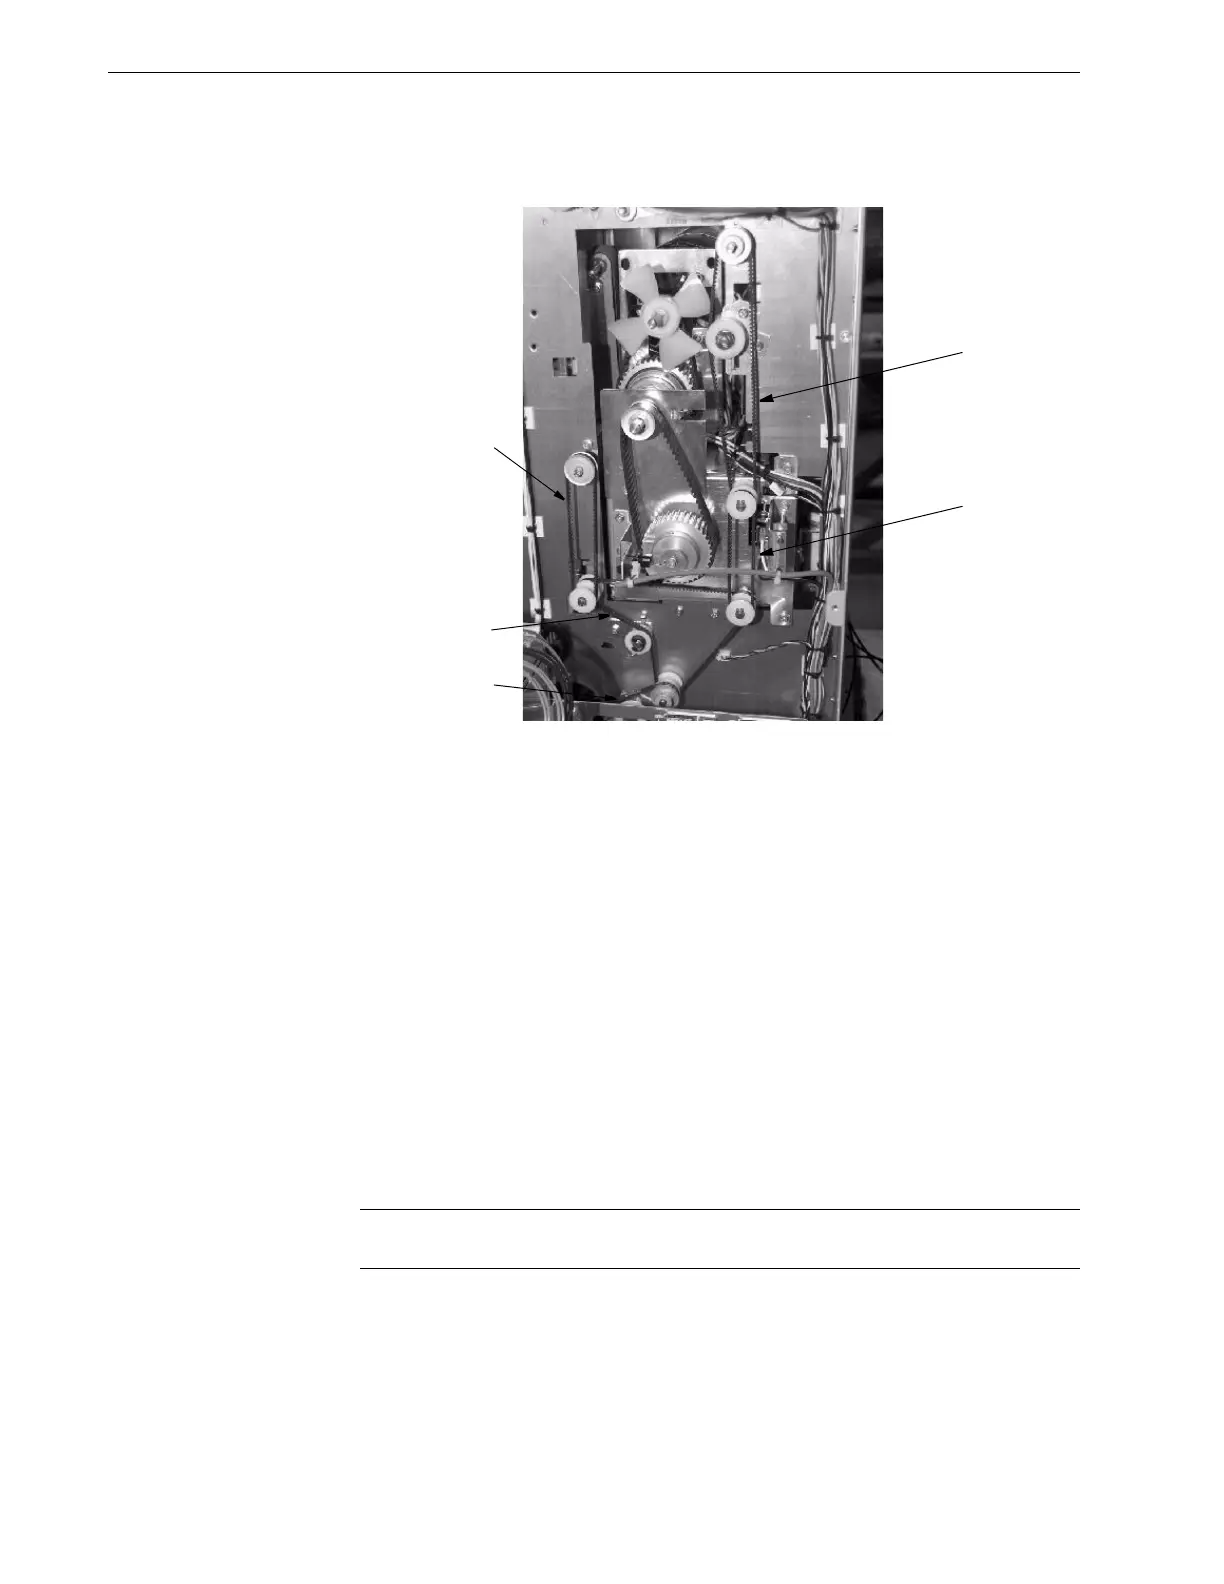
2. Remove the belts in order as shown in Figure 4.81.
Figure 4.81 Order of Belt Removal.
3. To install and adjust the tension of the belts, reverse these steps.
4.11Hole Alignment Adjustment
Die Set Position Cradle Adjustment, The die set position cradle is set in the
factory; however, because of the punched-hole spacing on the PB die sets, there
is a minimal amount of paper on each edge of the punched paper. The die set
position cradle may have to be fine adjusted to center the punched-hole pattern in
the paper.
Listed below are the step-by-step instructions to adjust the die set to the proper
position.
1. The punched-hole alignment must be checked on a piece of punched paper.
Fold the punched sheet of paper in half and the punched-holes should be
aligned. If the punched-holes are not aligned, then the die set cradle must be
adjusted to align the punched holes.
Note: The paper path is always constant, if the holes are not centered, you must
adjust the die set cradle.