Section 4
4-74 © Copyright 2009 GBC. All rights reserved. Advanced Punch Service Manual
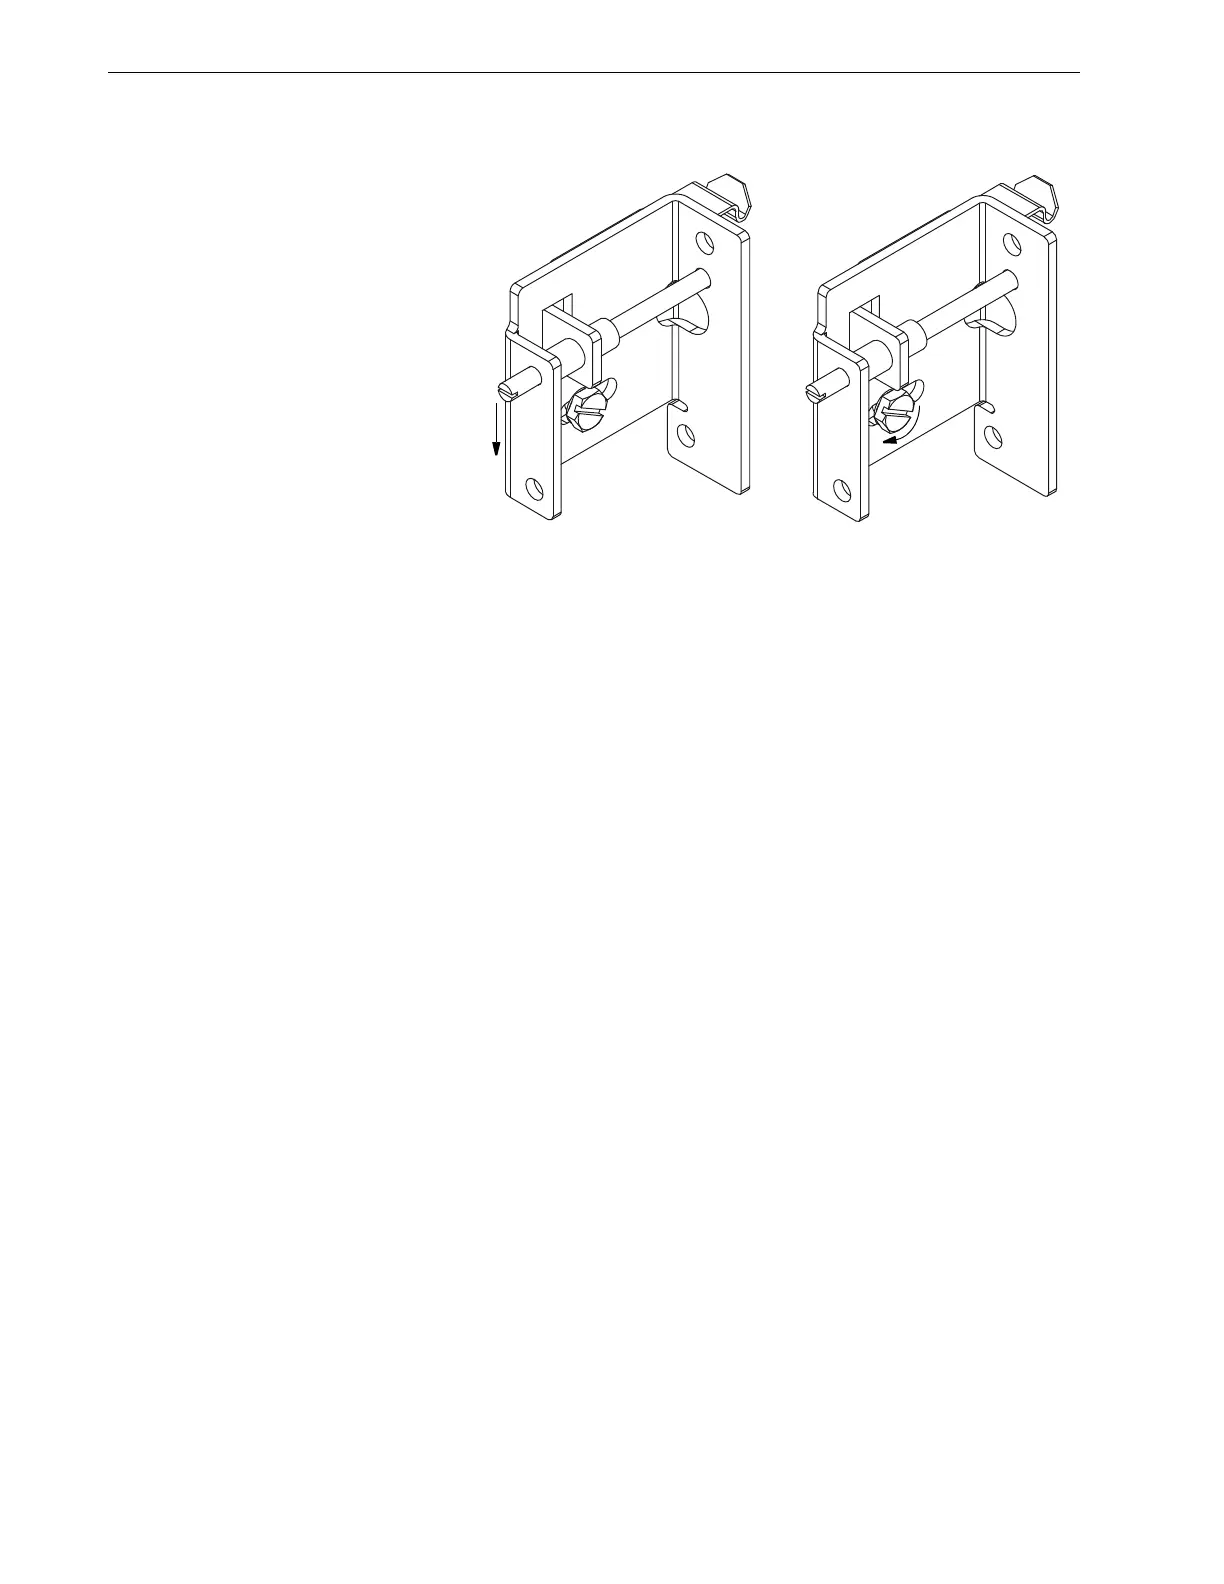
Figure 4.88 Tightening the Lock-Down Screw.
9. Run a test sample of punched paper and recheck paper alignment. Re-adjust
if necessary
4.12Replacement - ChipTray Microswitch
Procedure
• To Replace of Chip Tray Microswitch
1. Remove the rear cover & side panel as per Sec 4.1.2
2. Remove the two mounting screws [1] & nuts [2], cut the wire tie and disconnect
the harness.
3. To install the new switch, reverse the removal steps.
No adjustment is required. The Chip tray snap (micro) switch should be pushed
towards the front of the AdvancedPunch and then tightened.
TILT TO BOTTOM
OF M/C
TIGHTEN
SCREW