EasyManuals Logo

GBC AdvancedPunch User Manual

GBC AdvancedPunch
244 pages
To Next Page IconTo Next Page
To Previous Page IconTo Previous Page
Page #84 background imageLoading...
Page #84 background image
Section 4
4-26 © Copyright 2009 GBC. All rights reserved. Advanced Punch Service Manual
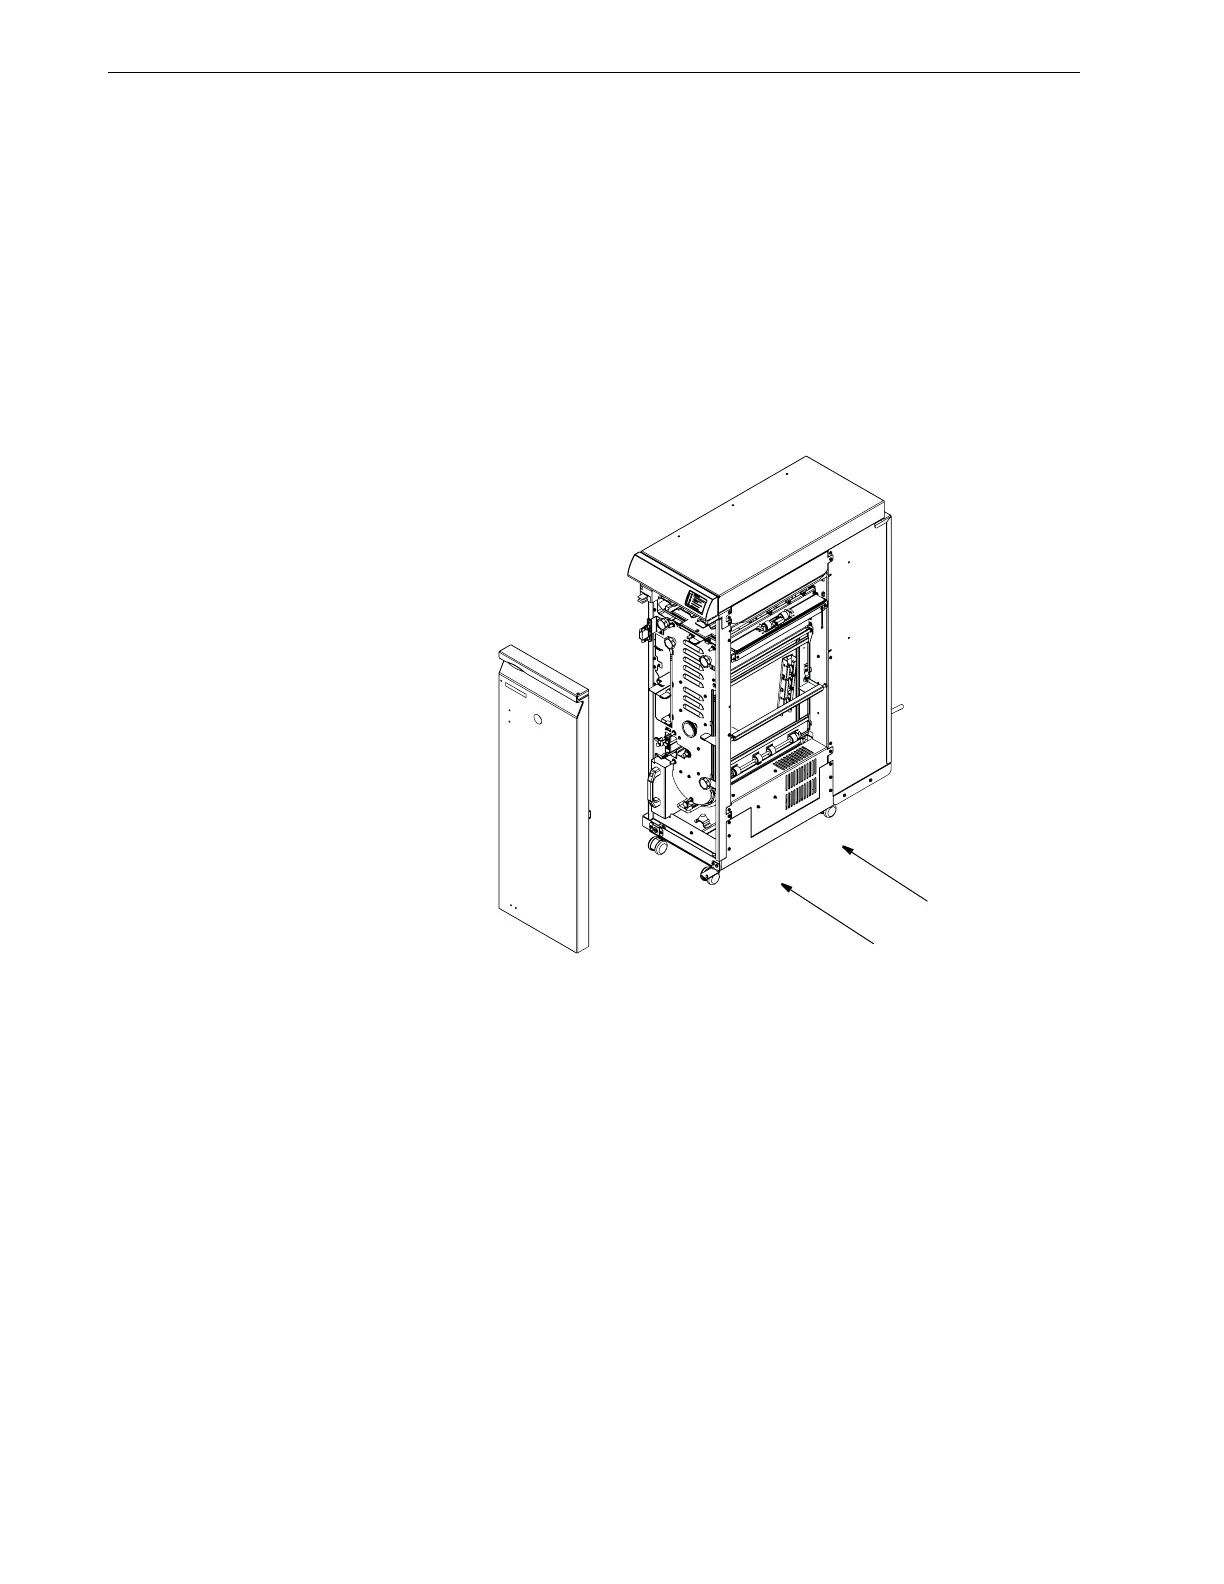
4.6.3.3 Entrance Aligner Panel Installation
To install the Idler Aligner panel, refer to “Back Gauge Solenoid Inspection and
Cleaning” on page 1-20. Then insert the punch into the printer and finisher and
connect the power cord.
Test the Advanced Punch by doing the following:
1. Run10 copies in bypass mode.
2. Run 1 sheet in punch mode.
3. Run 10 sheets in punch mode.
4. Run 100 sheets in punch mode.
Figure 4.26 Removing Rear Aligner.
AFTER ASSEMBLY

Table of Contents

Questions and Answers:

Question and Answer IconNeed help?

Do you have a question about the GBC AdvancedPunch and is the answer not in the manual?

GBC AdvancedPunch Specifications

General IconGeneral
BrandGBC
ModelAdvancedPunch
CategoryPaper Cutters
LanguageEnglish

Related product manuals