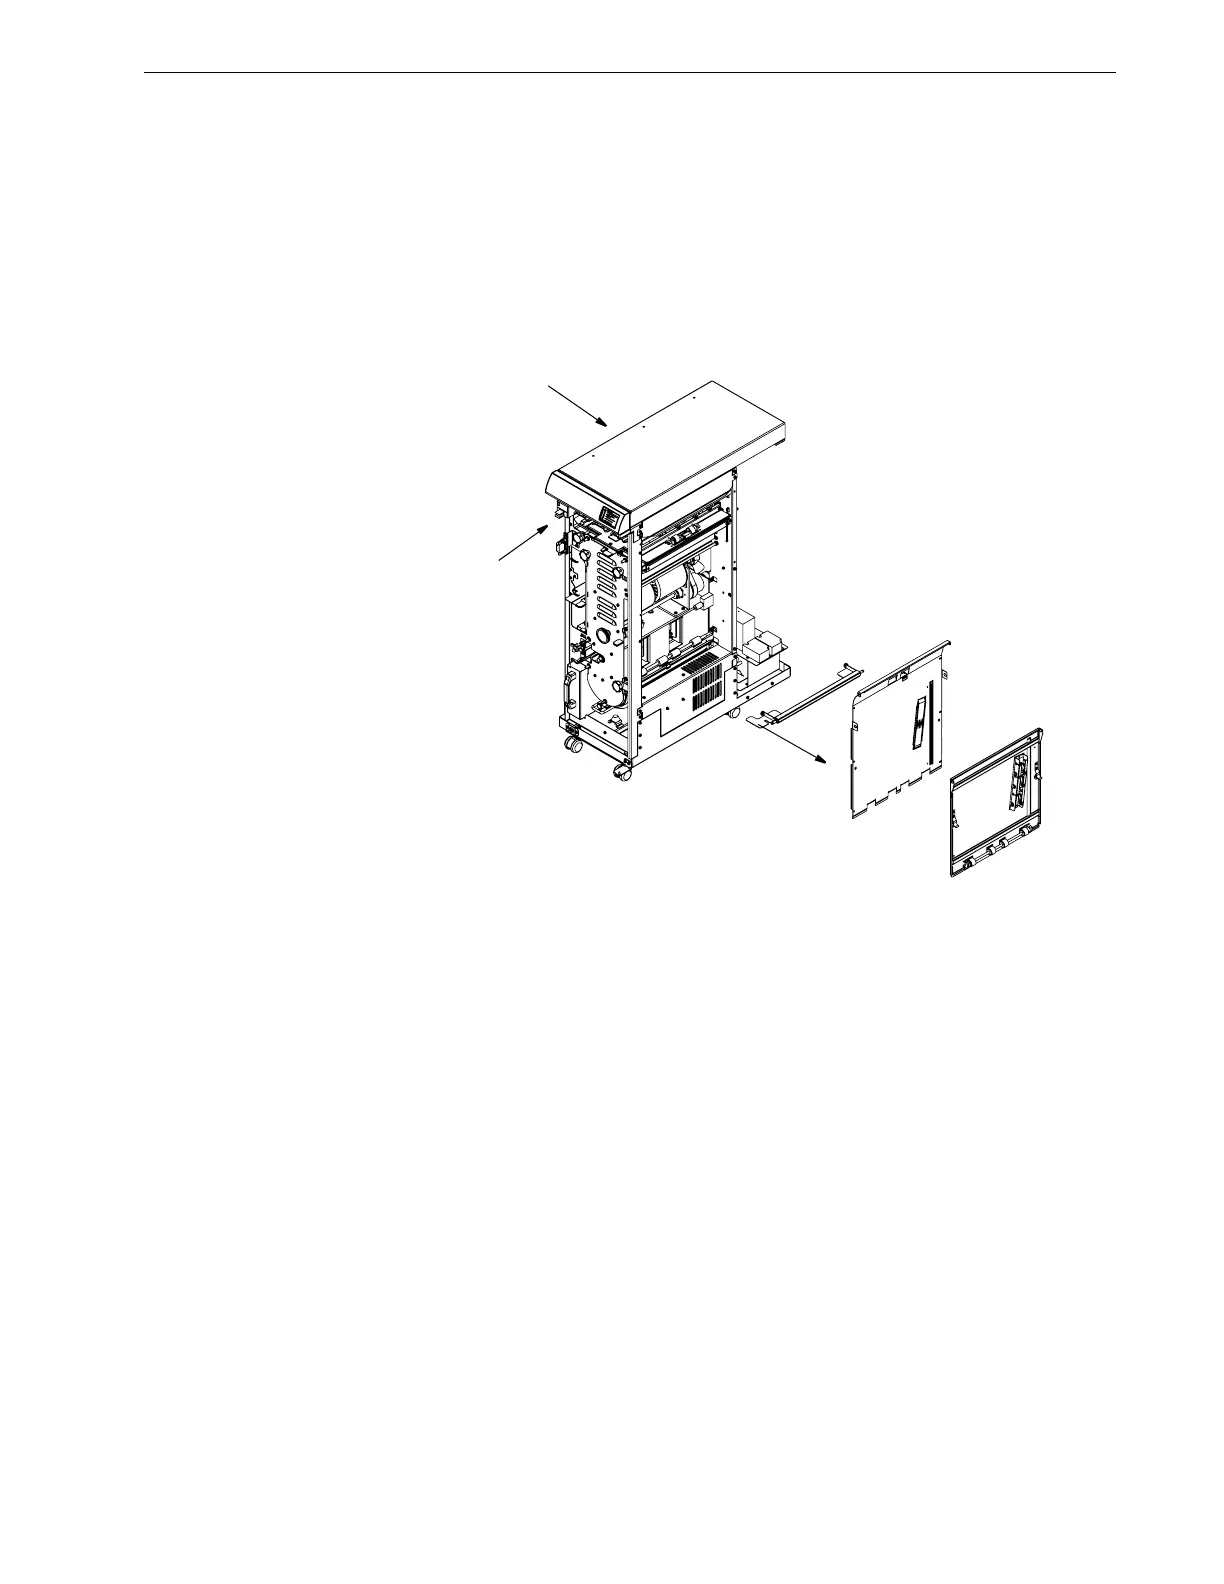
Repair and Adjustment Procedures
Advanced Punch Service Manual © Copyright 2009 GBC. All rights reserved. 4-27
4.6.3.4 Paper Exit Side Green Drive Belt Replacement
1. To remove the Flipper (C), Door Latch:
a. Remove only one (the one closest to the frame) of the E-Rings of the
Flipper on the right end (front door side).
b. Push the Flipper in toward the front door until it clears the rear frame.
c. Pull the entire Flipper, door latch out and set it aside.
Figure 4.27 Removing Rear Aligner.
2. To remove the Rear Aligner, Idler Paper Guide assembly:
a. Remove 2 E-Rings from the Pivot Shaft.
b. Slide the Shaft all the way out through the front of the Advanced Punch.
c. Remove the 2 nylon bearings.
d. Remove and set aside the Rear Aligner, Idler Paper Guide assembly.
3. To remove the curved sheet metal Exit Paper Guide assembly:
a. Remove the 4 screws (2 rear and 2 front) of the curved sheet metal Exit
Paper Guide assembly.
b. Unplug the sensor.
c. Pull the entire sheet metal Exit Paper Guide assembly out, set aside.
4. To remove the Rear, Drive Side, and Paper Guide Aligner assembly. This is the
large sheet metal assembly within the Advanced Punch that contains the green
drive belt Aligner.
PAPER ENTERANCE
PAPER EXIT
SIDE
FRONT DOOR SIDE