4
Operating instructions
HERMA 400 APPLICATOR DESCRIPTION
3.28 US (130519) 25/154
Adjusting the reel brake (basic adjustment)
The point of activation of the unwinder’s reel brake is factory-set and usually does not have to be
changed. If however the label reel is too loose (activation point too late) or only moves at strong pull
(activation point premature) a new basic adjustment is required.
An irregular adjustment of the point of activation of the reel brake may reduce the labeling accuracy.
Risk of electric shock! Disconnect all sources of supply and wait for five
minutes before opening the rear cover or touching the connector pins!
Electrocution may occur.
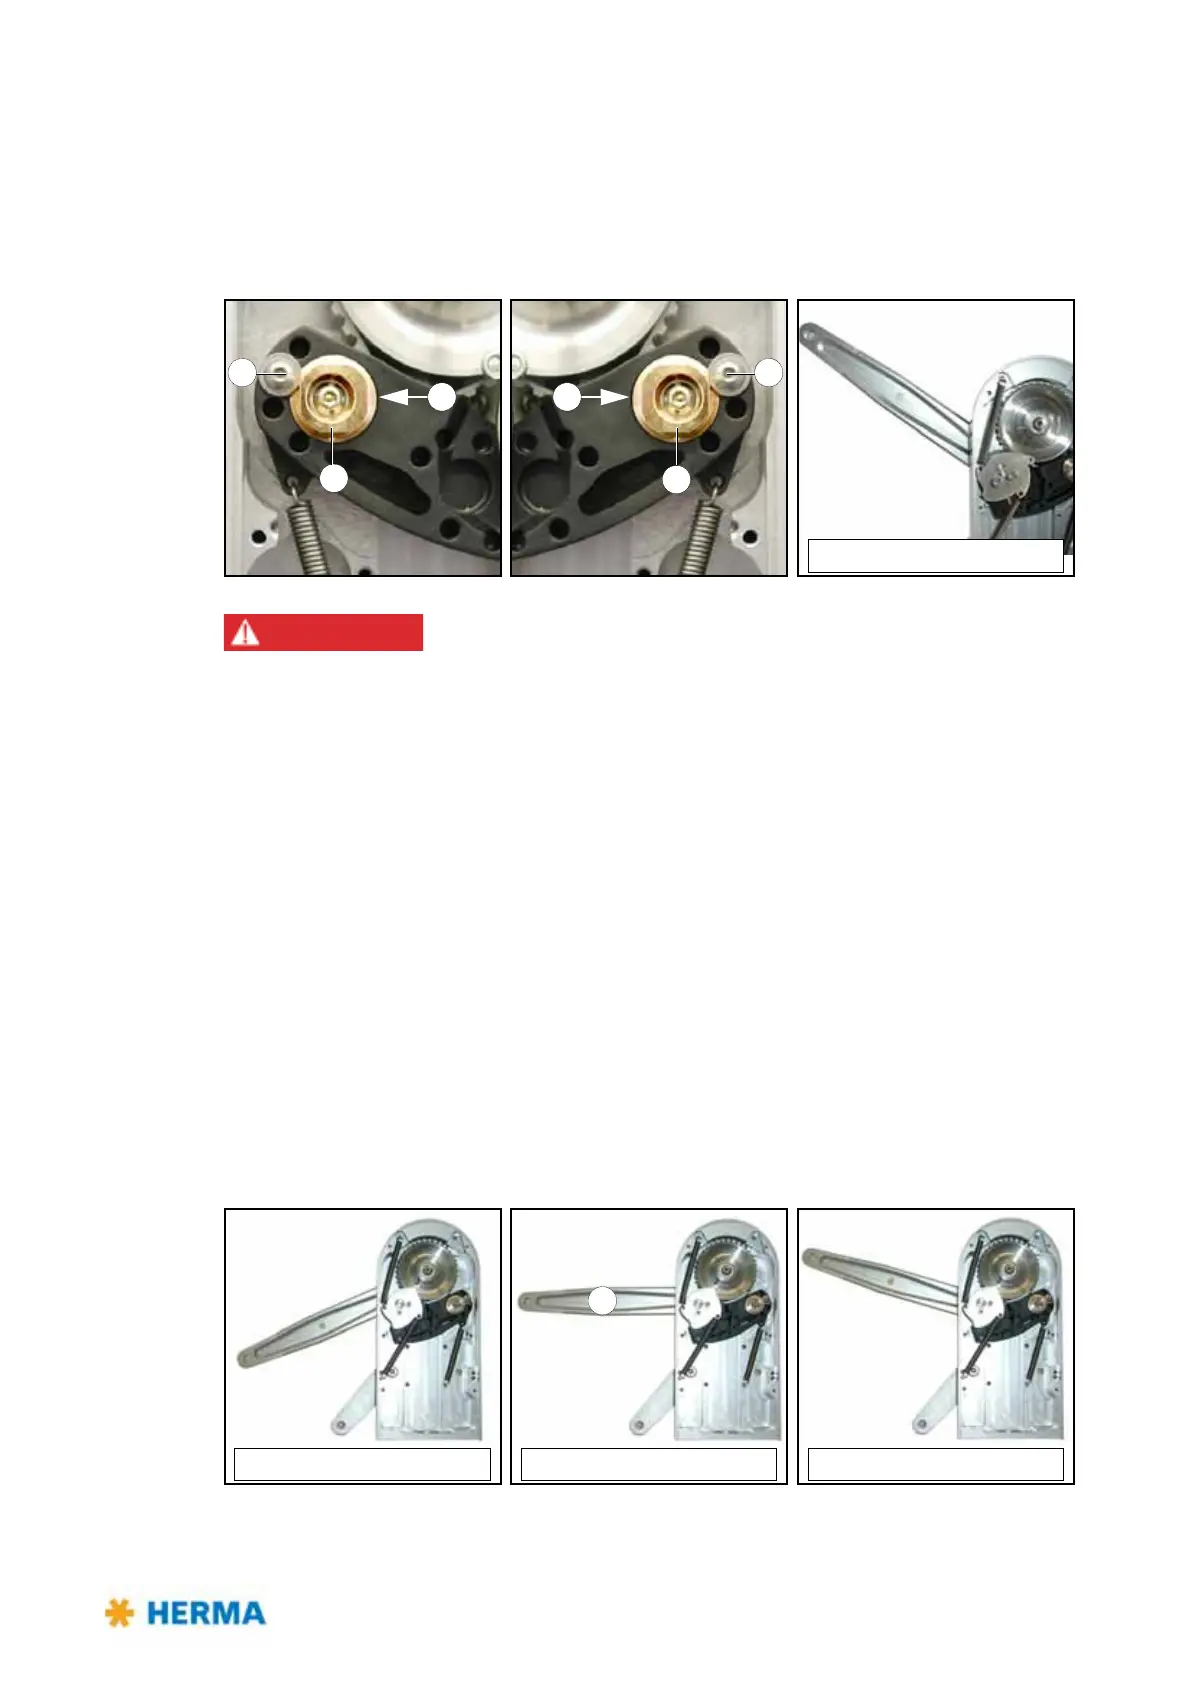
After opening the cover loosen screw 6 on the back (do not remove!).
> Insert appropriate tool (pin) into hole a.
> Turn bushing 7 slightly upwards to shift the activation point towards the basic position of the
pendulum lever (braking later), turn it slightly downwards to shift the activation point to the
opposite direction (braking earlier).
> Prerequisite for this description is that you engage the tool at the side of bushing 7 that faces
towards the middle of the unit (points a).
> Fasten screw 6 afterwards.
The point of activation of the reel brake is adjusted correctly if pendulum lever 8 is about perpendicular
(90°) to the housing when braking starts to work.
For checking the point of activation insert a label reel and turn the unwinder’s disk until it turns easily,
i.e., the brake is open. Then let the disk go. The disk will be braked and you can determine the
adjustment of the activation point through the lever position.
Basic position pendulum lever
Activation point premature
Activation point correct
8
Activation point too late