4
Operating instructions HERMA 400 A
PPLICATOR DESCRIPTION
3.28 US (130519) 27/154
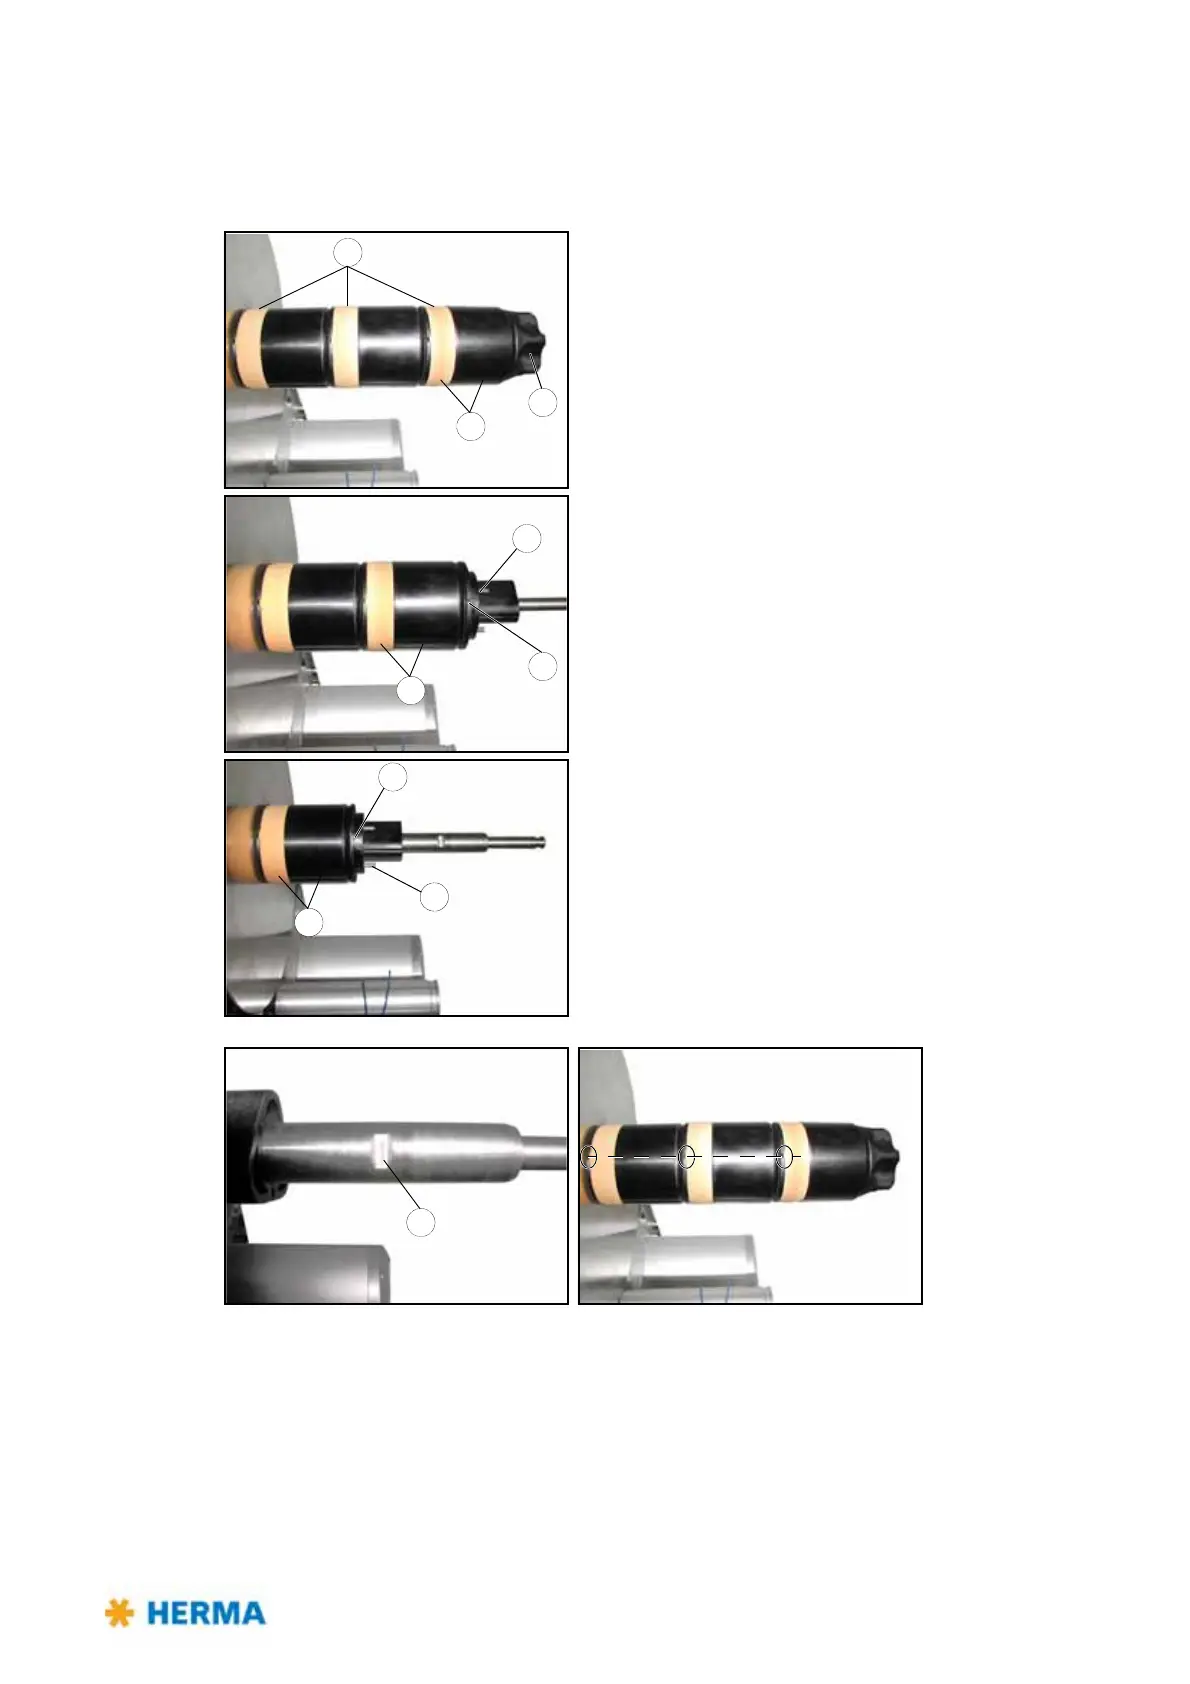
Replacing the tension rings
If after a long time of use tension rings 11 are worn proceed as follows when preplacing the worn rings
(example with constructional width 16, vertical applicator):
> Remove handle 1, as described above („Replacing the
handle“).
> Pull off parts 12.
> Loosen screw 13 (do not remove!).
> Pull off parts Teile 14.
> Loosen screw 15 (do not remove!).
> Pull off parts 16.
When remounting the core sleeve in reverse order with the new tension rings make sure that the
scr
ews (13, 15) are aligned exactly onto the respective flat surface 17.
After assembling the unit completely all screws must
be aligned along the same line.
Important: Pins a (th
ree per plug-in part) are absolutely required for a proper function.
Verify correct function / reliable
clamping of the unwinder after complete assembly.