4
Operating instructions HERMA 400 A
PPLICATOR DESCRIPTION
3.28 US (130519) 37/154
Teaching the loop unwinder
Note: As the case may be, e.g. in case of a new unit, you may have to teach the unit the positions
of the DIP switches in order to ensure a correct function and to avoid errors. For teaching
the unit proceed as follows:
> Disconnect the unit from mains.
> Remove the label web from the unit.
> Press the illuminated button and keep it pressed while
applying the power supply. Keep on pressing
the button. This will blink at low frequency.
> Let the illuminated button go. This will now blink
at a higher frequency, i.e., in more rapid
succession.
> Press the button briefly. This wi
ll blink again in slow succession. Thus, teaching was successful.
> For completing the procedure disconnect the unit from mains and consequently apply power once
more.
If teaching was not successful an error code will be is
sued and the procedure must be repeated. See
as well the corresponding error messages in chapter 11.
You can call up an animation in our service portal herma.com/machines , item "Startup/How to?", that
i
llustrates this procedure.
Make sure to regularly clean sensors and reflectors of the loop control.
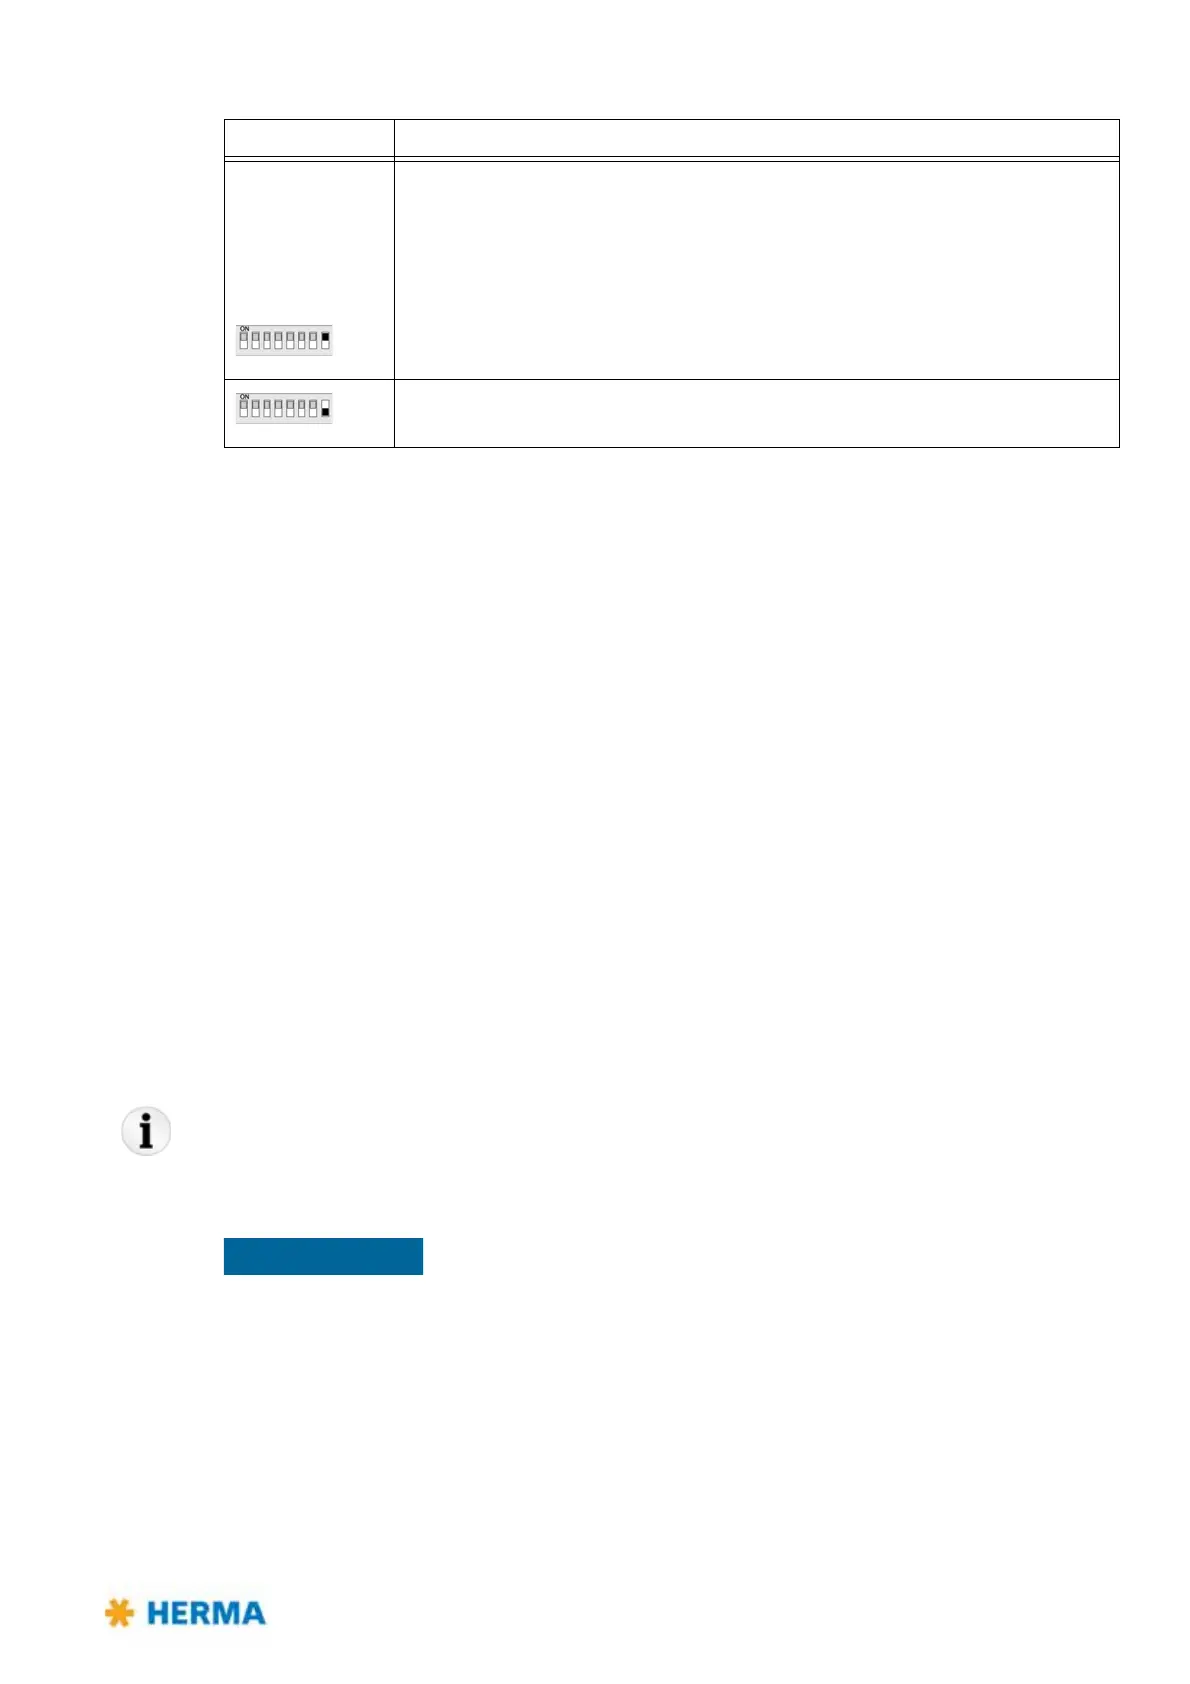
Switch 8 Determines the pre-set sense of rotation of the unit, seen fro the front side
of t
he unit, facing to the disc / the roller
(Motorised unwinder: any change is to be e
ffected with the illuminated
button).
Motorised rewinder: See the note below
On: Clockwise (choose this setting with unwinder / rewinder variant R, with loop
unit and with magazine filler variant L)
Off: Counterclockwise (choose this setting with unwinder / rewinder variant L,
with loop unit and with magazine filler variant R)
DIP switch Configuration