③
④
①
②
Advanced
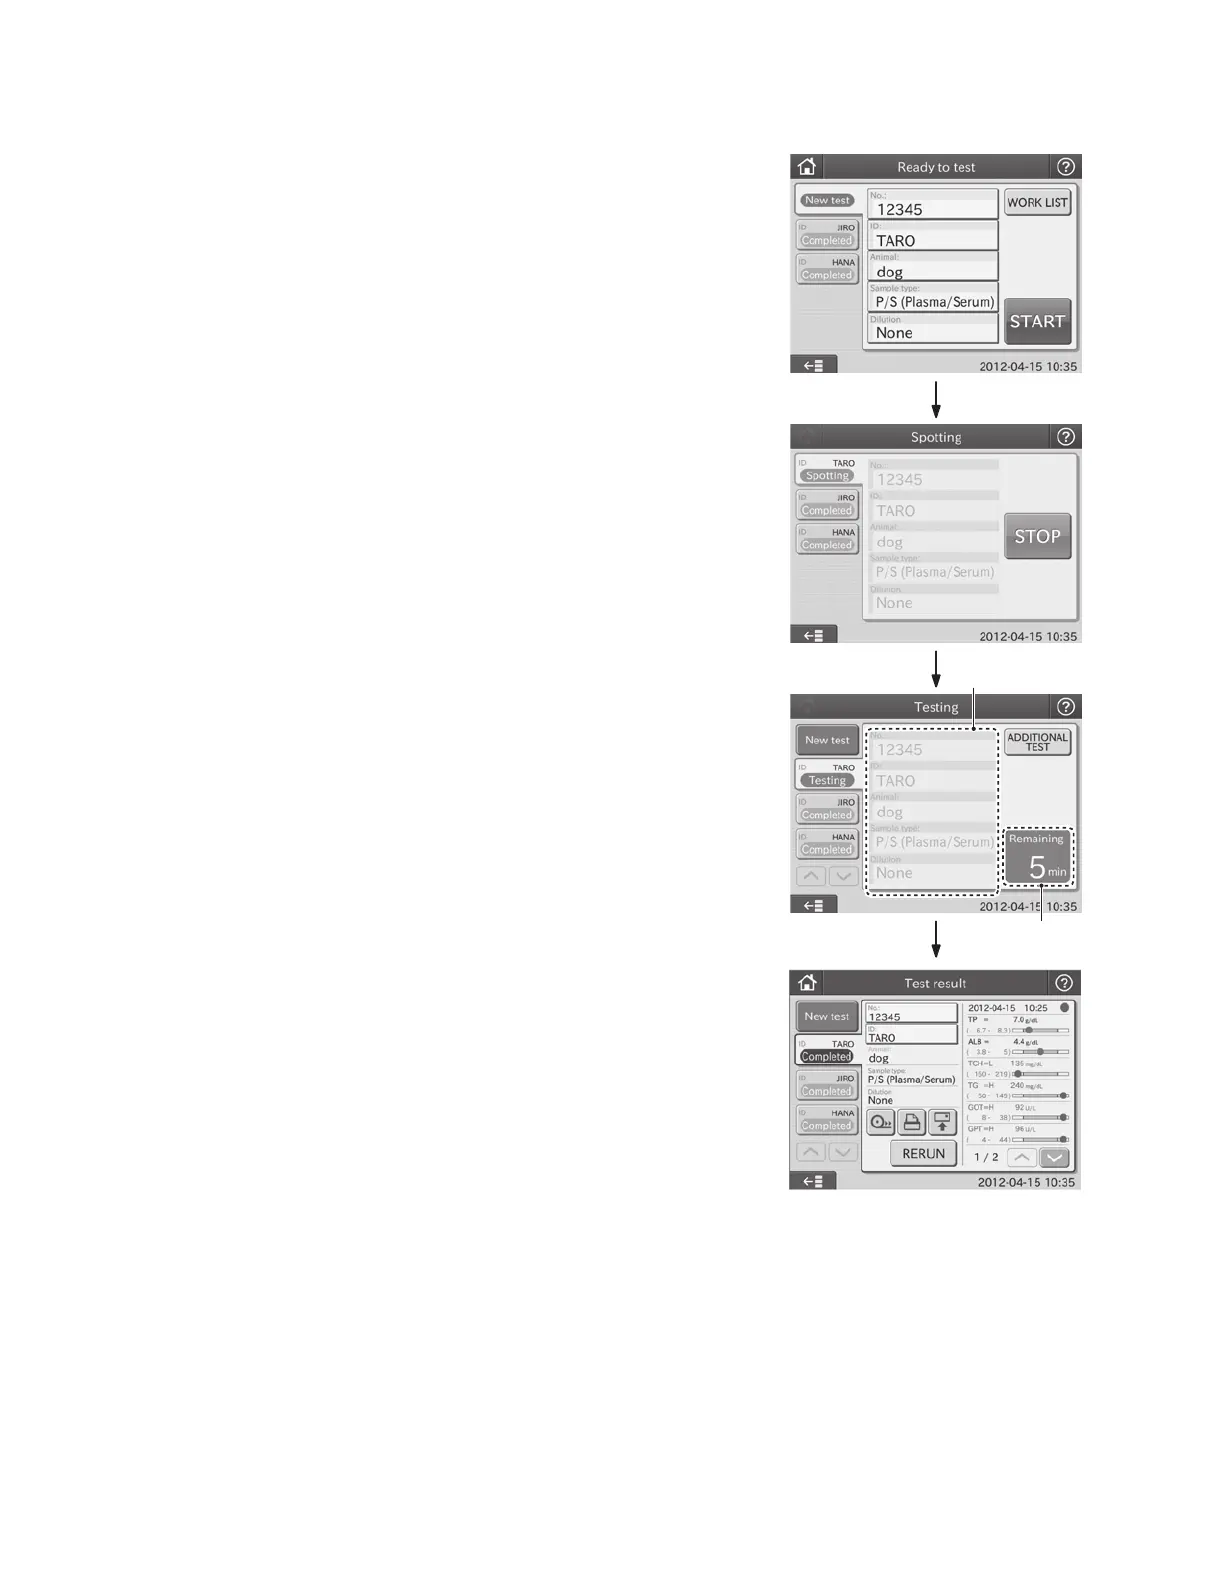
Sample information shown on
the screen remains the same.
Remaining time until test results
of the sample are ready.
Operation Steps and Screen Displays for Advanced Dialogue
1. Before Testing
Make sure [Ready to Test] is displayed.
Touch NEW TEST, and input the sample information.
If the device is connected to PMS, you can obtain test
requests by touching WORK LIST in the test preparation
dialogue before performing tests.
Place sample rack, slide cartridge, tips, and sample.
Close and lock the sampler cover with the key.
Touch START to start a test.
2. Being Spotted
[Spotting] is displayed.
The dialogue is displayed until all sides are spotted.
Touch STOP to cancel spotting. Spotted slides are measured.
3. Being Tested (After Spotting Process)
After completing the spotting, the measurements start and
[Testing] is displayed.
An approximate remaining time to complete the test is
displayed as a guide.
NOTE: When multiple samples are being measured, an
approximate remaining time to complete each test can be
checked.
The measurement can be continued with a new sample.
Open the sampler cover, and replace a sample with the
preliminary preparation for the measurement, and touch
START.
4. End of Testing
After all tests are completed, the remaining time disappears
from the LCD touch panel.
When performing a new test, touch NEW TEST to prompt
the new test preparation dialogue.
Open the sampler cover, and replace a sample with the
preliminary preparation for the measurement, and touch
START.
16