c. Wipe off the spotting part with soft gauze-like cloth or
cotton swab moistened with water.
5. Cleaning the slide transfer bar.
Wipe off the slide transfer bar with soft gauze-like cloth or
cotton swab moistened with water.
NOTE: For the slide transfer bar left edge, move the slide transfer
bar to the right.
6. Cleaning the ISE probe unit.
Press on the black plastic piece to make probes accessible.
Make sure there is no dust on the six ISE probes. When
cleaning the ISE probes, wipe off the dust using a dry cotton
swab.
NOTE: Do not use solvents, such as methyl alcohol or isopropyl
alcohol.
CAUTION
ISE probes are needle-shaped parts. Do not touch directly by
hands. Be careful not to bend the probes.
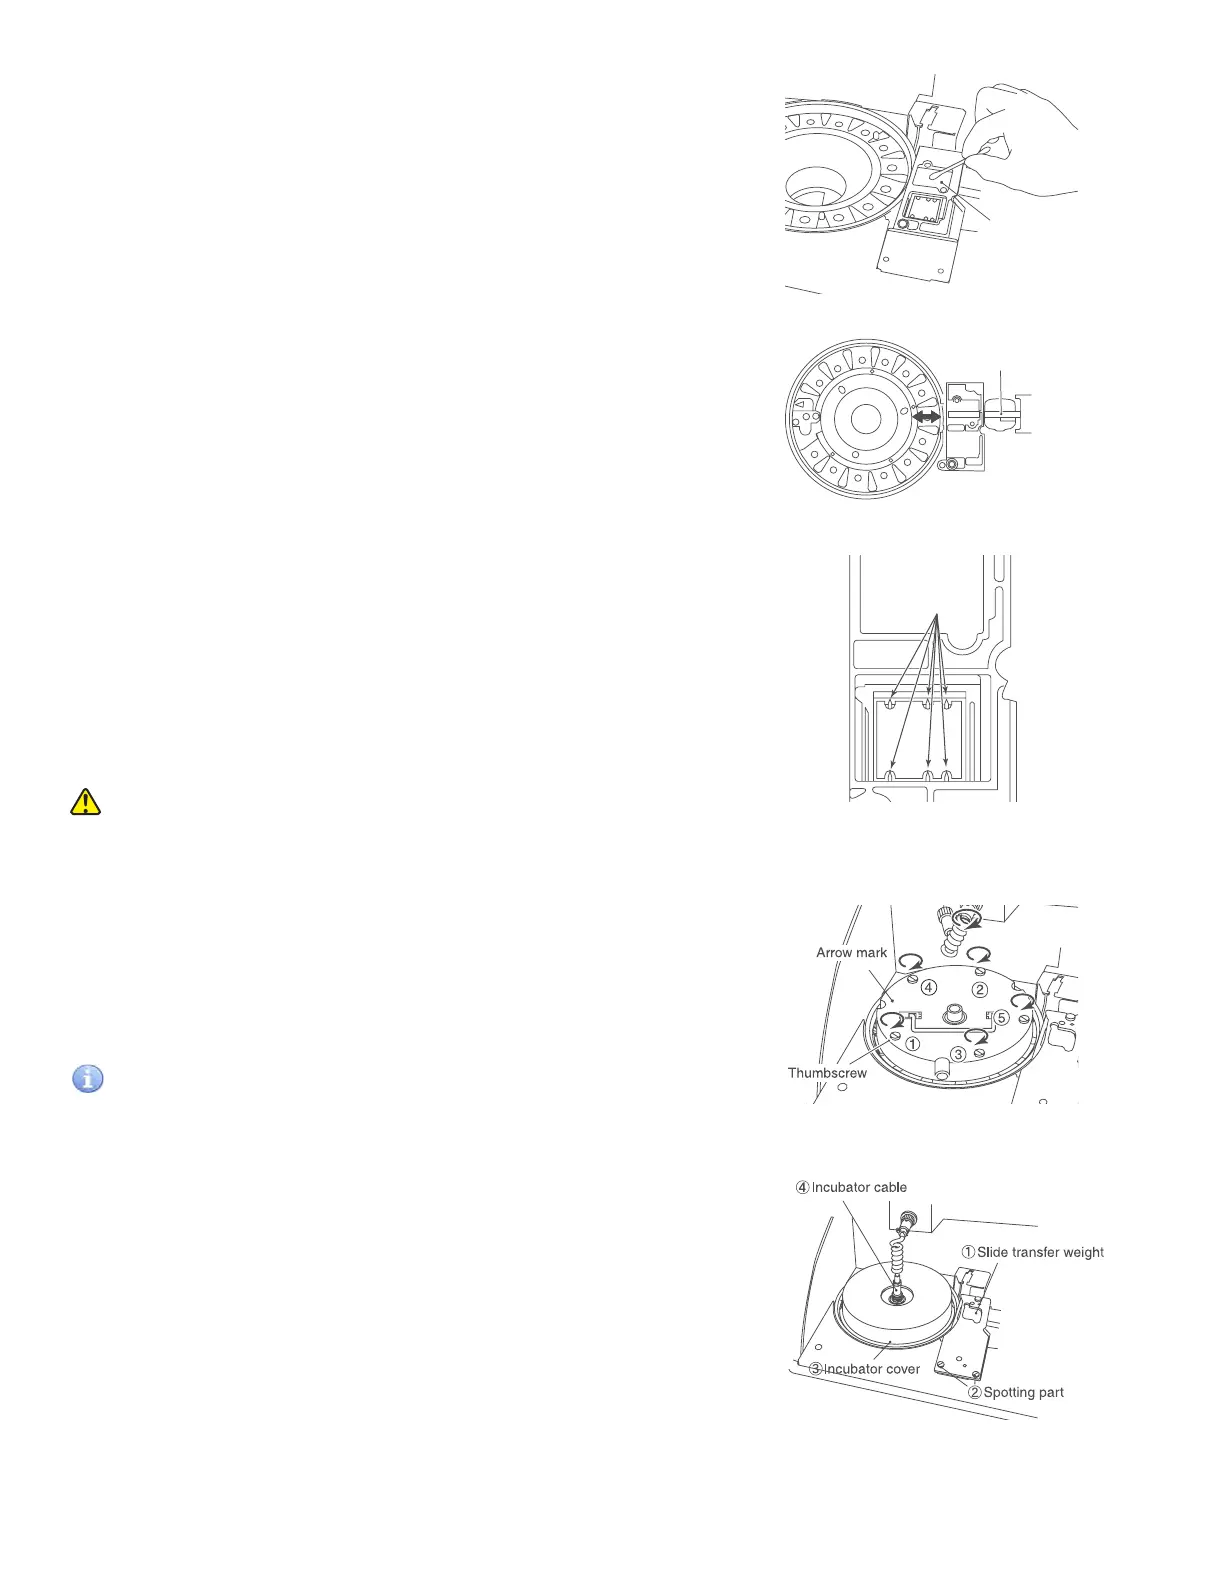
7. Reassembly
a. Reassemble the upper incubator.
Align the arrow mark on the upper incubator with the
arrow mark on the analyzer. Screw 5 thumbscrews in the
order (1 to 5) evenly.
IMPORTANT
Tighten the five thumbscrews securely. Otherwise, adverse
effects on test results may occur.
b. Reassemble each part as shown in the figure to the right.
Set the slide transfer weights.
Set the spotting part cover and screw the
thumbscrews.
Set the incubator cover.
Positioning the connector of the incubator cable in
the groove, plug it into the incubator, turn it to the
right and tighten securely.
Spotting part
Probe
Transfer (slide feed) bar
cover
53