Figure 5-55 Installing the USB enablement kit and air duct- CB
520H A1/B1/B2/B3/B4
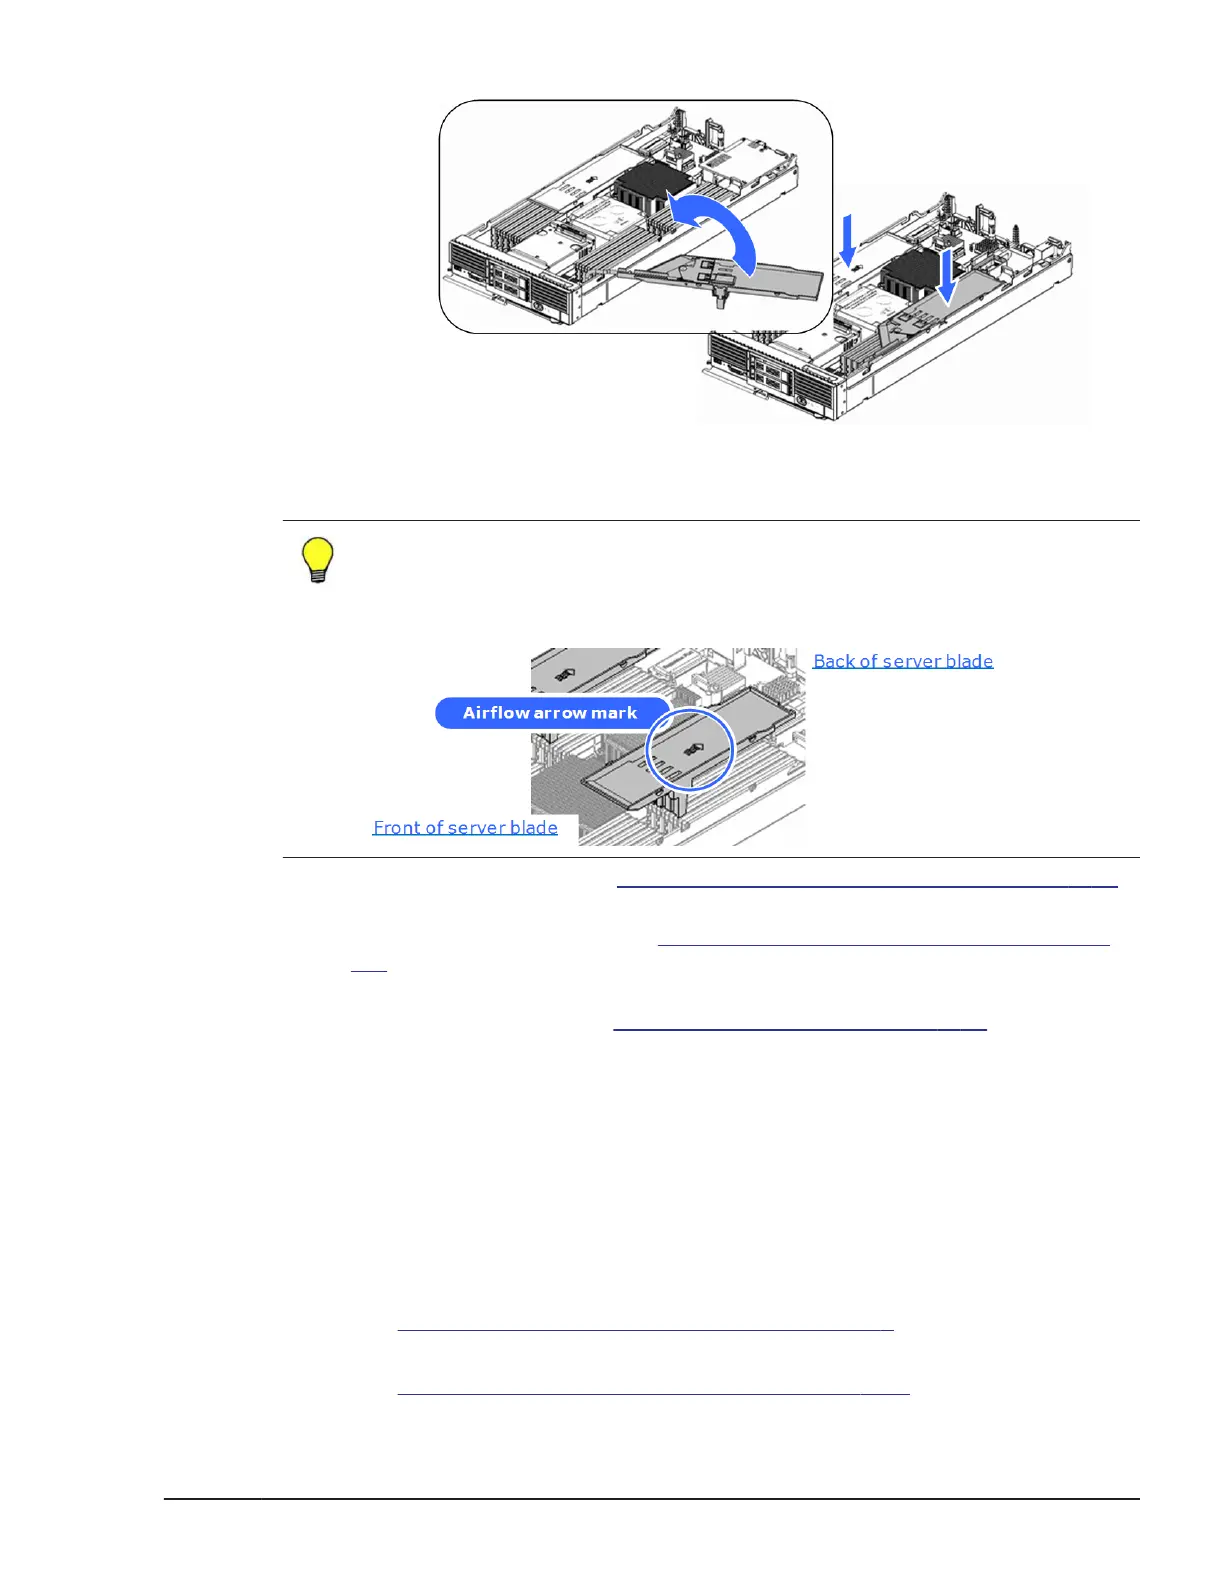
Tip: Place the air duct with the airflow arrow facing back of the server
blade.
Do not care which the LEFT and RIGHT air ducts of CB 520H
A1/B1/B2/B3/B4 are as they are completely same.
7. Close the top cover. See Closing a top cover, Server blade on page 5-39
section.
8. Install the server blade. See
Installing a half-wide server blade on page
5-5 section.
9. When the SAS kit 2 was mounted in the server blade, install the SAS kit 2
to the server blade. See
Installing a SAS-kit 2 on page 5-94 section.
Replacing a DIMM in full-wide server blade
This procedure describes how to remove a DIMM from the server blade.
Removing a DIMM
1. Put on an anti-static wrist strap.
2. Remove the target server blade.
See Removing a full-wide server blade on page 5-6 section.
3. Open the top cover of the server blade.
See
Opening a top cover, Server blade on page 5-38 section.
Replacing parts
5-45
Hitachi Compute Blade 500 Series System Service Manual
 Loading...


