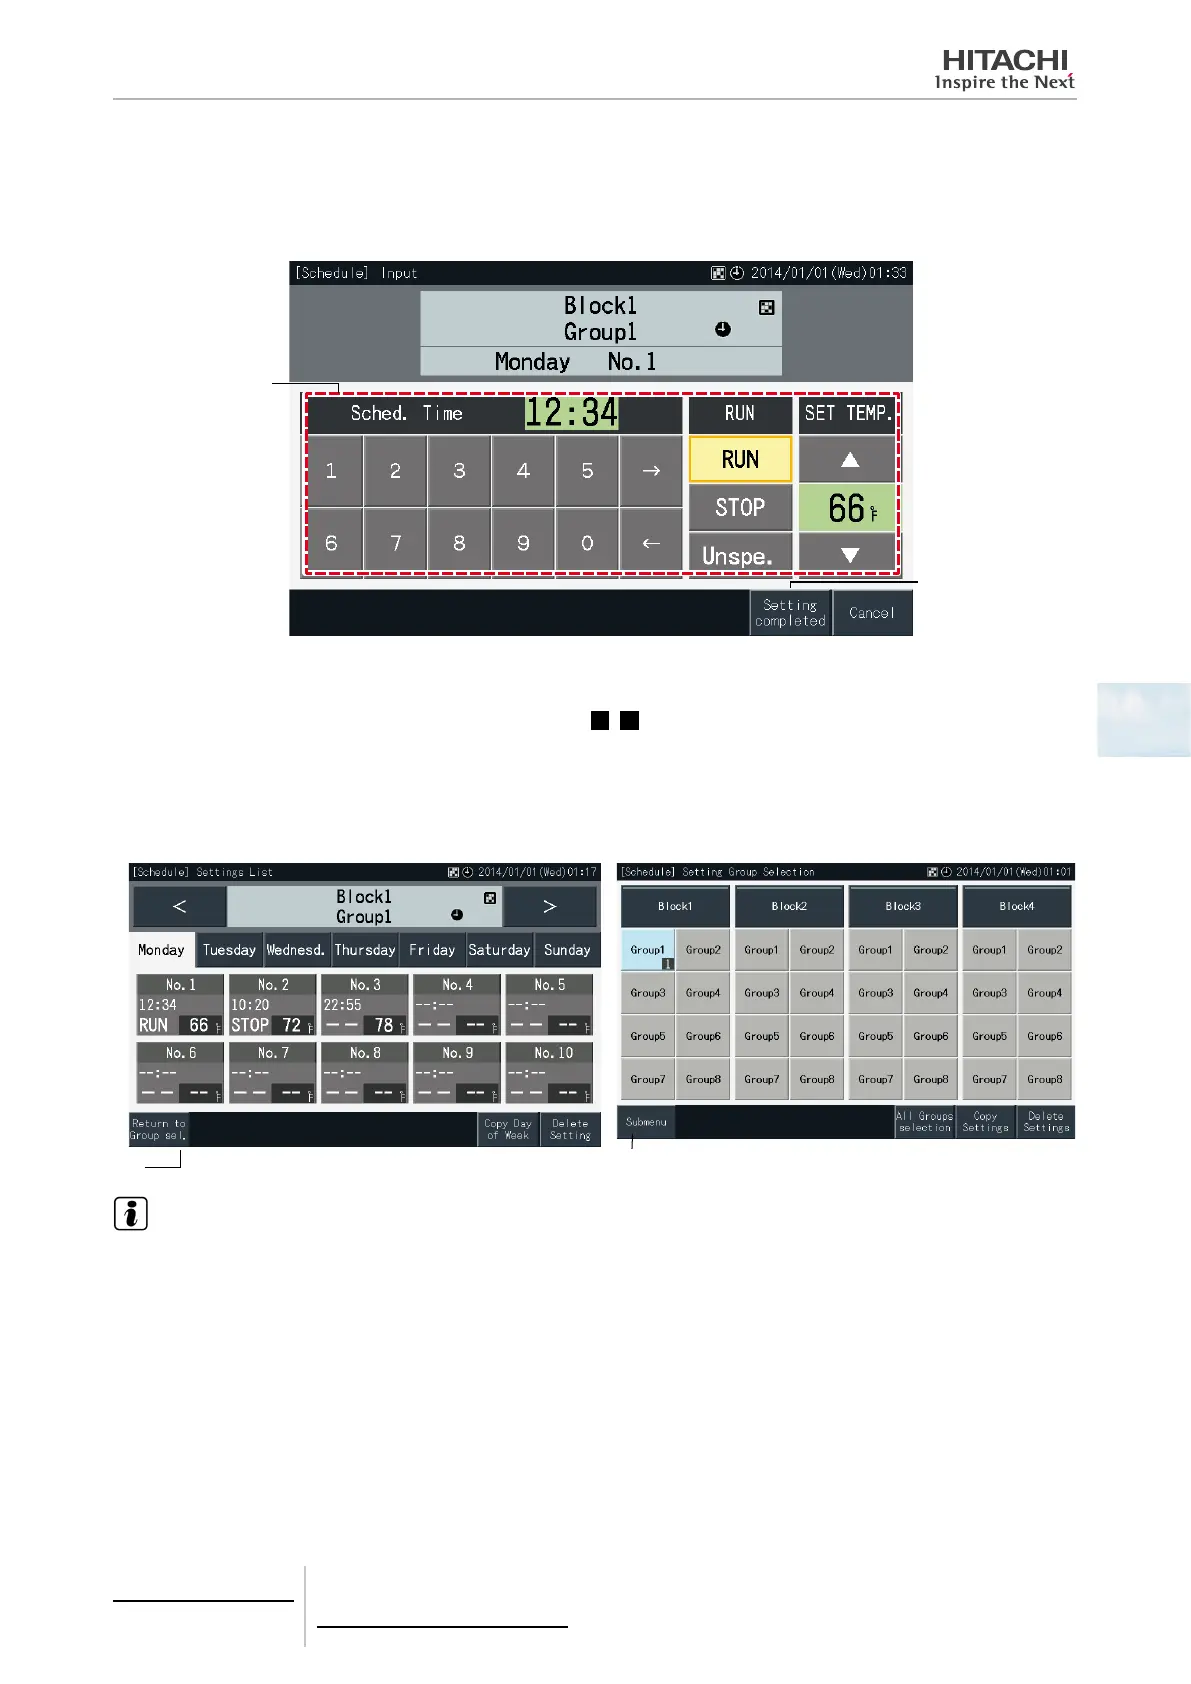
7 Tap “Setting completed” to conrm the setting. If “Cancel” is tapped, the displayed setting contents are discarded, and
the screen returns to the schedule setting screen.
Go back to step (5) to continue adding settings for the same day of the week.
Go back to step (4) to continue adding settings for other days of the week.
(6)
(7)
8 Tap “Return to Group Sel.” to set the schedule timer for other groups. The screen returns to “Setting Group Selection”
screen.
After setting the schedule, the registered schedule number (
1
~
64
) appears indicated in the group button. (The colour of
the buttons with schedule changes to blue)
In case that multiple groups share the same setting is the same, the same registered schedule numbers appears in all of
them.
9 Tap “Sub Menu” to return to the “Schedule Settings” screen.
(8)
(9)
NOTE
• Make sure that the time and run/stop are set for the timer setting. (It is not necessary to set the temperature).
• The schedule control selection screen may be different depending on the control pattern.
5 Centralised remote controls
PSC-A32MN
TCGB0106 rev.0 - 12/2014
331
5

 Loading...


