424
[Router-attack-defense-policy-2] quit
# Apply policy 2 to GigabitEthernet 1/3.
[Router] interface gigabitethernet 1/3
[Router-GigabitEthernet1/3] attack-defense apply policy 2
[Router-GigabitEthernet1/3] quit
Verifying the configuration
Use the display attack-defense policy command to view the contents of attack protection policy 1
and 2.
If Smurf attack packets are received on GigabitEthernet 1/2, the device should output alarm logs. If
scanning attack packets are received on GigabitEthernet 1/2, the device should output alarm logs
and add the IP addresses of the attackers to the blacklist. If SYN flood attack packets are received
on GigabitEthernet 1/3, the device should output alarm logs and drop the subsequent attack packets.
After a period of time, you can use the display attack-defense statistics interface command to
display the attack protection statistics of each interface. If scanning attacks occur, you can use the
display blacklist command to see the blacklist entries added automatically by scanning attack
protection.
Blacklist configuration example
Network requirements
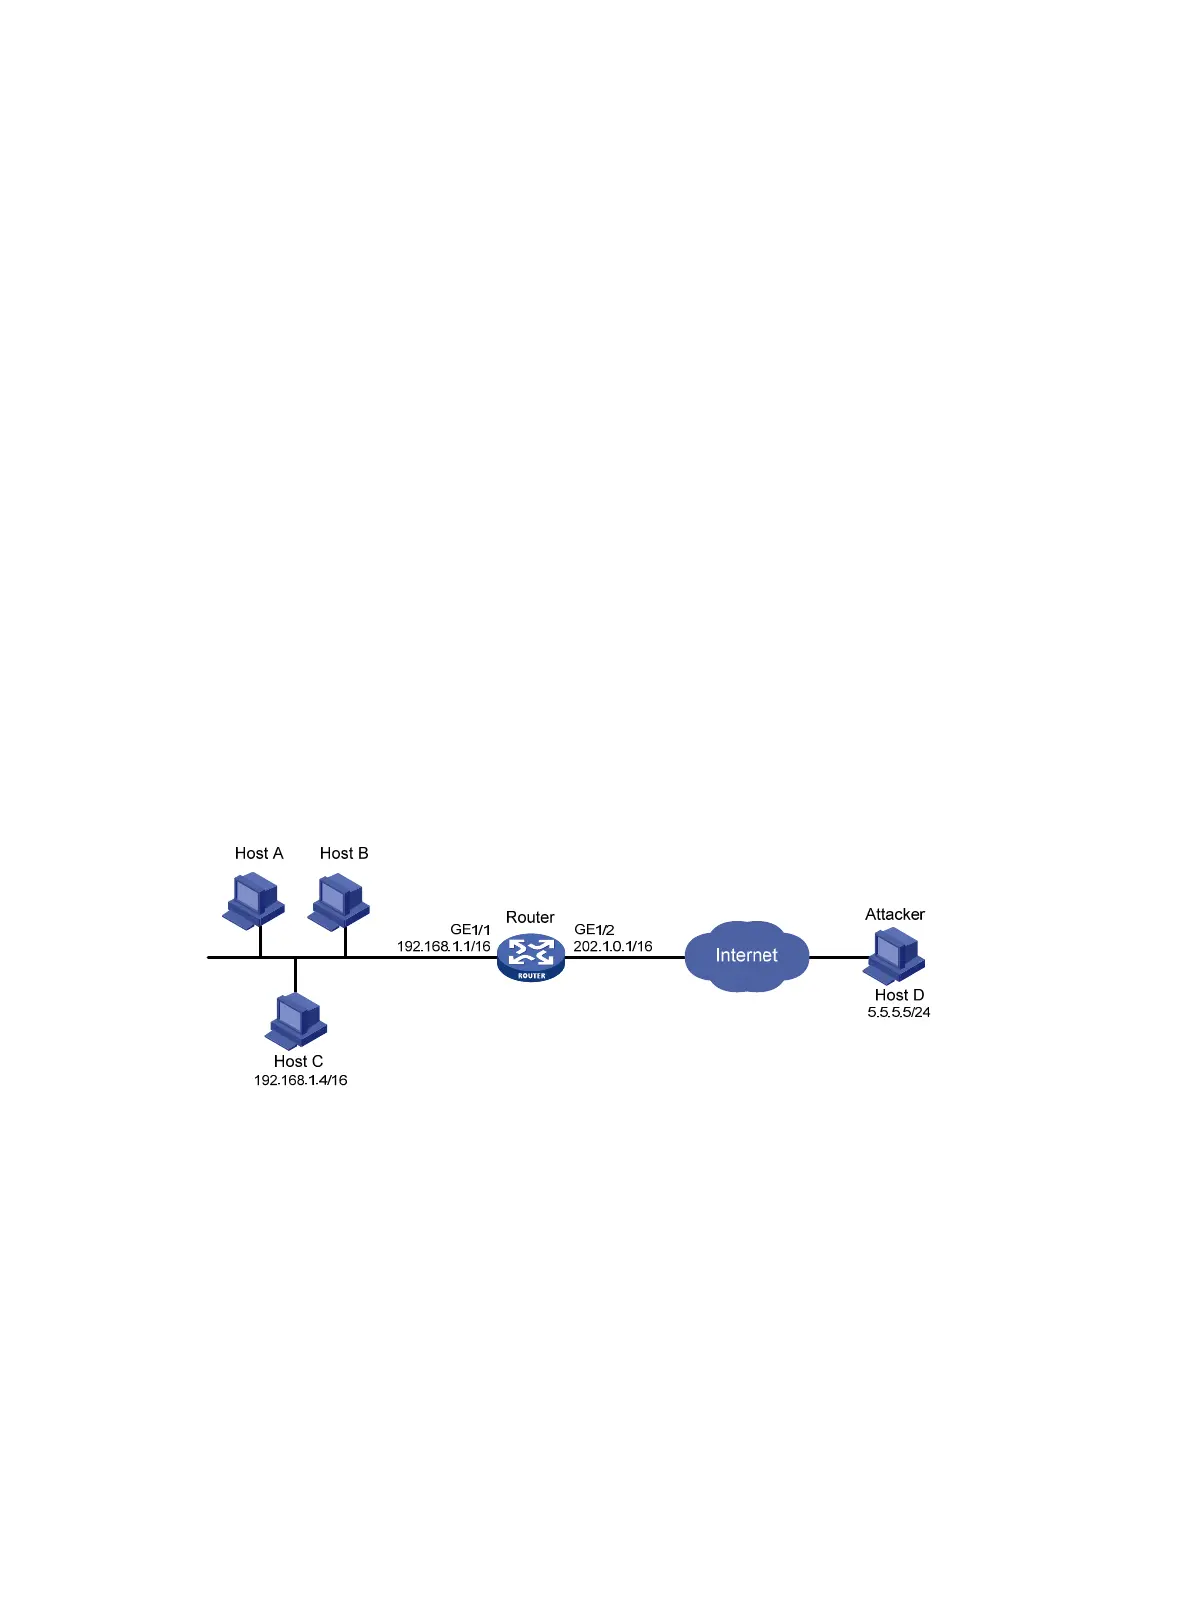
As shown in Figure 142, assume that you find an attacker (Host D) in the outside network by
analyzing the traffic statistics, and decide to configure the router to filter packets from Host D
permanently. In addition, to control Host C's access temporarily, configure the router to filter packets
from Host C for 50 minutes.
Figure 142 Network diagram
Configuration procedure
# Configure IP addresses for interfaces. (Details not shown.)
# Enable the blacklist function.
<Router> system-view
[Router] blacklist enable
# Add Host D's IP address 5.5.5.5 to the blacklist without configuring an aging time for it.
[Router] blacklist ip 5.5.5.5
# Add Host C's IP address 192.168.1.4 to the blacklist and configure the aging time as 50 minutes.
[Router] blacklist ip 192.168.1.4 timeout 50
Verifying the configuration
Use the display blacklist all command to view the added blacklist entries through.
 Loading...