Note: Alternately, any commercially available bipolar IS-1 port plug may be used to plug
the atrial port of the OPTIMIZER Smart IPG.
7.6 Dissection of the IPG Pocket
Blunt dissection directly on top of the fascia is the preferred method for creating the
pocket, which should be just large enough to accommodate the IPG and any loops of
excess lead.
Note: When dissecting the pocket, please bear in mind that for charging to be possible,
the distance between charging wand and OPTIMIZER Smart IPG must not exceed 4 cm
(1.5 in).
Before tightening the set screws, please ensure that the connector pin of each lead is
completely inserted into the corresponding connector terminal of the OPTIMIZER Smart
IPG.
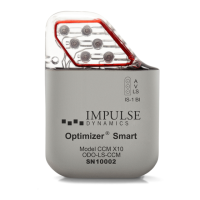
7.7 Inserting the OPTIMIZER Smart IPG and Closing the Pocket
Insert the OPTIMIZER Smart IPG into the subcutaneous pocket. Although the
OPTIMIZER Smart IPG can theoretically be interrogated and charged in any position,
the preferred placement is such that the lettering points to the front, which provides the
best link between the charging coil inside the header and the OPTIMIZER Mini Charger.
The recommended maximum depth of implant for proper device interrogation and
charging is not more than 2.5 cm. Coil any excess lead and place these coils around the
IPG or in the pocket inferior to the device. Ensure that the leads form not more than a
gentle curve where they exit the IPG connector terminal and that they are not under
traction or strain. Secure the IPG to the fascia with a non-absorbable suture and close the
pocket.
Radiographs should be obtained after device implantation to rule out pneumothorax, even
if there are no symptoms. In addition, proper device function should be verified by device
interrogation, which can also detect lead displacement. Thereafter, patients should
receive standard post-operative care for a minimum of 24 hours prior to discharge. The
use of narcotics for pain relief should be minimized.
Remark: If the patient is also implanted with an ICD, concomitant device interaction
testing should be performed (see Appendix IV).
8. DEVICE EXPLANTATION / REPLACEMENT
Special care should be exercised when opening the IPG pocket so as to not damage the leads
implanted with the OPTIMIZER Smart IPG. Once the IPG is lifted out of the pocket, the set
screws can be loosened with a sterile #2 Allen wrench. While holding the IPG in one hand, grasp
each silicone lead connector between thumb and forefinger. Pull the lead connectors from the
terminal by cautious application of constant traction. Grasping the plugs with a sterile pad can
help improve traction. Never apply traction to the actual lead body, which could damage the
leads and cause lead failure.
Note:
• When tightening or loosening a set screw, always insert the tip of the torque wrench fully
into and in line with the set screw. Do not insert the torque wrench into the set screw at
an angle.