Assembly
Supplement: CUSA Excel Ultrasonic Surgical Aspirator System User’s Guide S-7
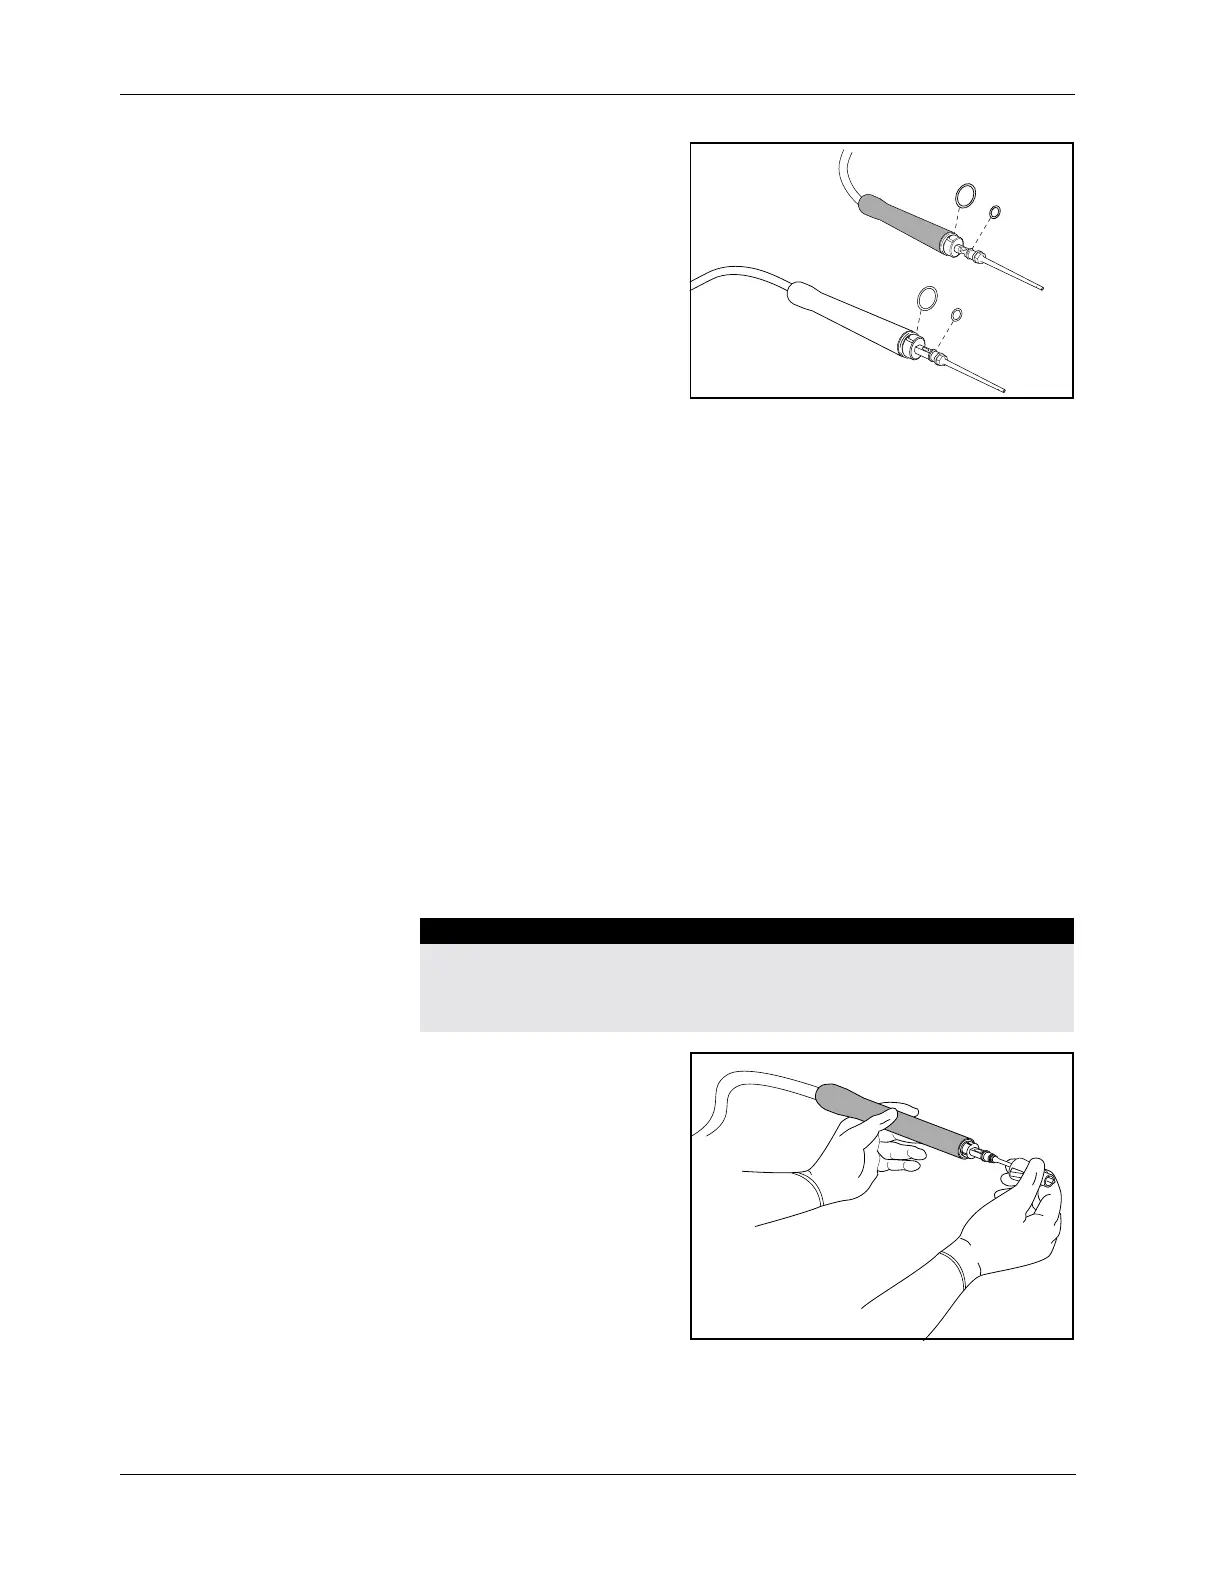
10. Slide the larger o-ring
over the connecting body
and into the groove in the
neck of the handpiece.
Slide the smaller o-ring
into the groove in the
metal connecting body.
Attach a Nosecone and Flue
Attach either a standard or a sterile CEM nosecone. The procedure for
putting on a standard nosecone or a CEM nosecone is the same.
1. If using a CEM nosecone, put the standard nosecone into the sterilizer
tray for safe storage.
2. If reattaching a CEM nosecone while changing tips on the sterile field,
use a soft cloth to dry the following components:
•Handpiece
• CEM nosecone inside and outside surfaces
• CEM switchcover inside and outside surfaces, or apply a new
switchcover
• Red o-ring, or apply a new red o-ring.
3. If reattaching a CEM nosecone, replace the o-rings on the handpiece
each time you change a tip.
4. Holding the handpiece,
insert the tip into the
nosecone.
Warning
Electric Shock Hazard – When using a CEM nosecone, be sure to dry all CEM
surfaces before reassembling the nosecone to the handpiece. Wet surfaces may
result in electric shock to the patient, the surgeon, or the operating room staff.