Iris Diagnostics, a Division of International Remote Imaging Systems, Inc.
iQ
®
200 Sprint™ Automated Urine Microscopy Analyzer Service Manual 300-4949 Rev A 01/2005 4-25
4. Adjustments
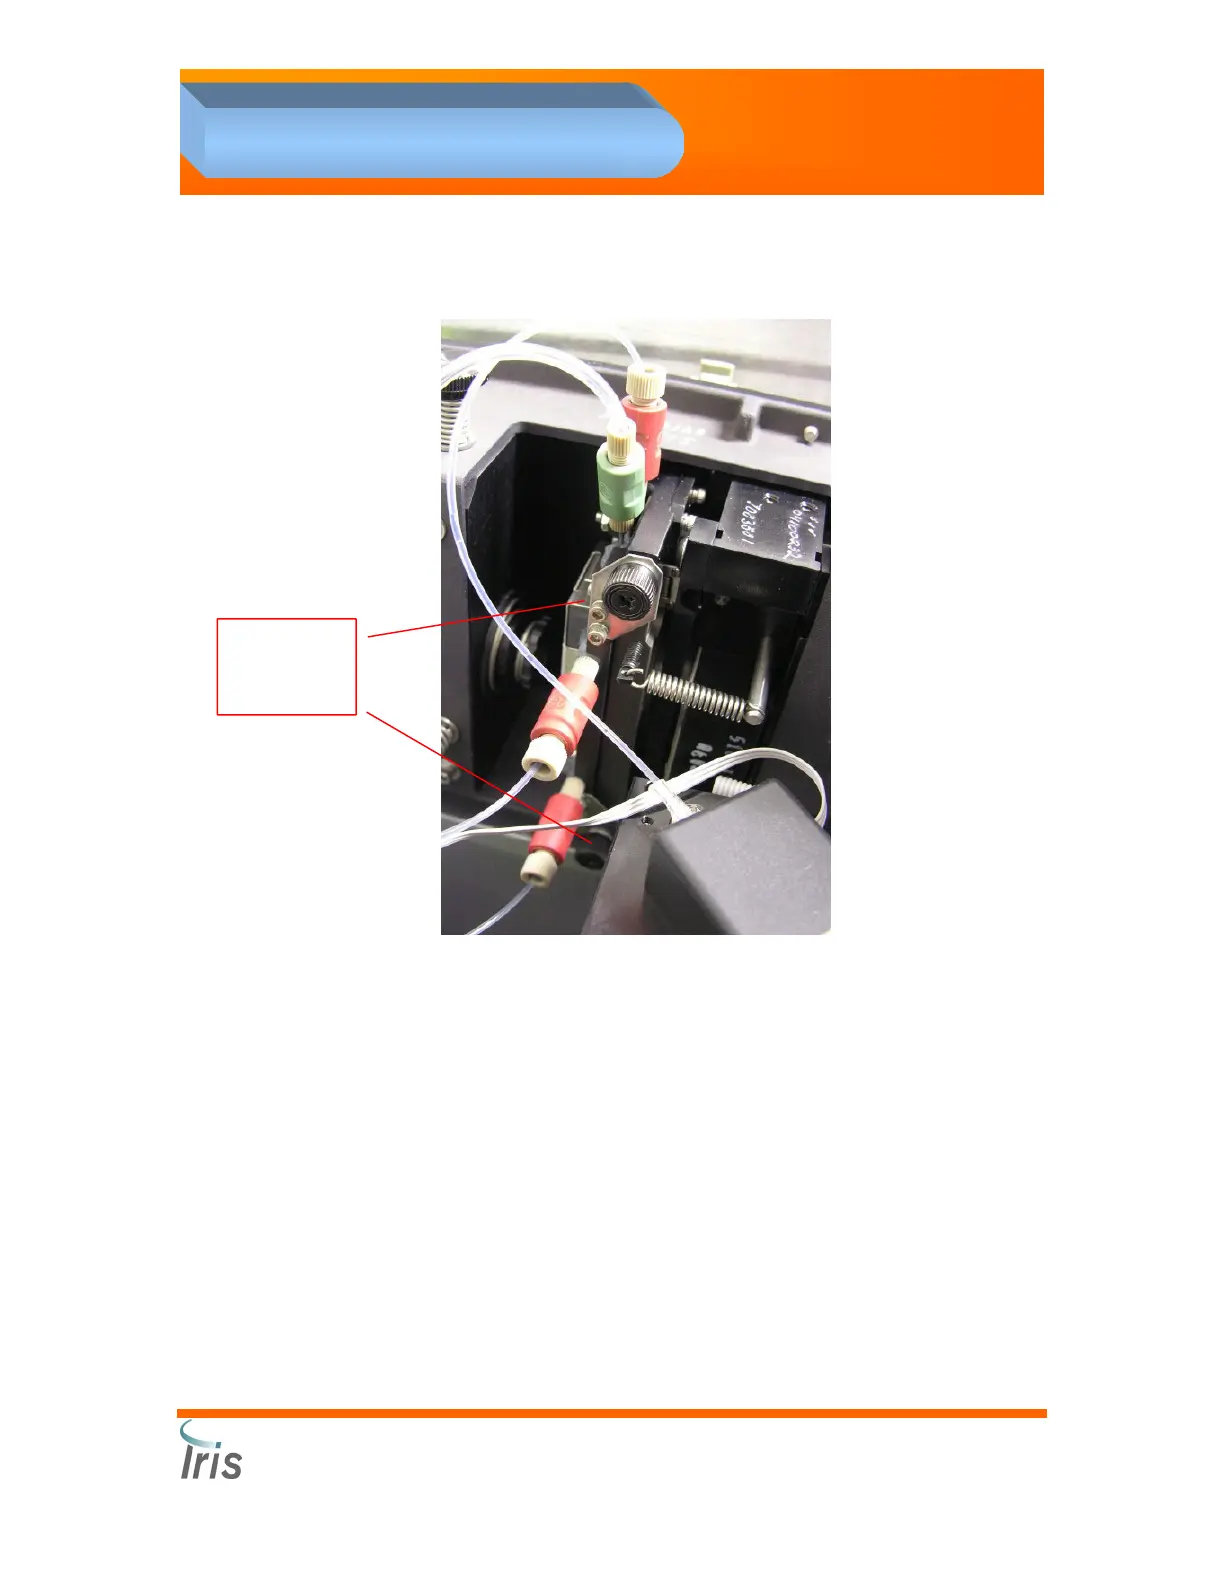
2. Loosen the two locking screws located on the side of the flow cell.
3. Remove the flow cell from the Optical Bench Assembly.
4. Using a syringe, flush the flow cell with deionized water and recap.
Flow Cell Installation
1. Connect the four tube assemblies to the flow cell.
2. Slide the flow cell into the mount, and then tighten the two locking
screws.
Flow cell
Locking
Screws
 Loading...