•
Disconnect this cable from the router port and connect it to the Internal port (Port 1)
on the MAG4611.
•
Connect a crossover cable from the router port to the External port (Port 2) on the
MAG4611.
Related
Documentation
Junos Pulse Gateway Features and Functions on page 4•
• Status LEDs on the Junos Pulse Gateway on page 22
• Junos Pulse Gateway MAG4611 Back Panel on page 11
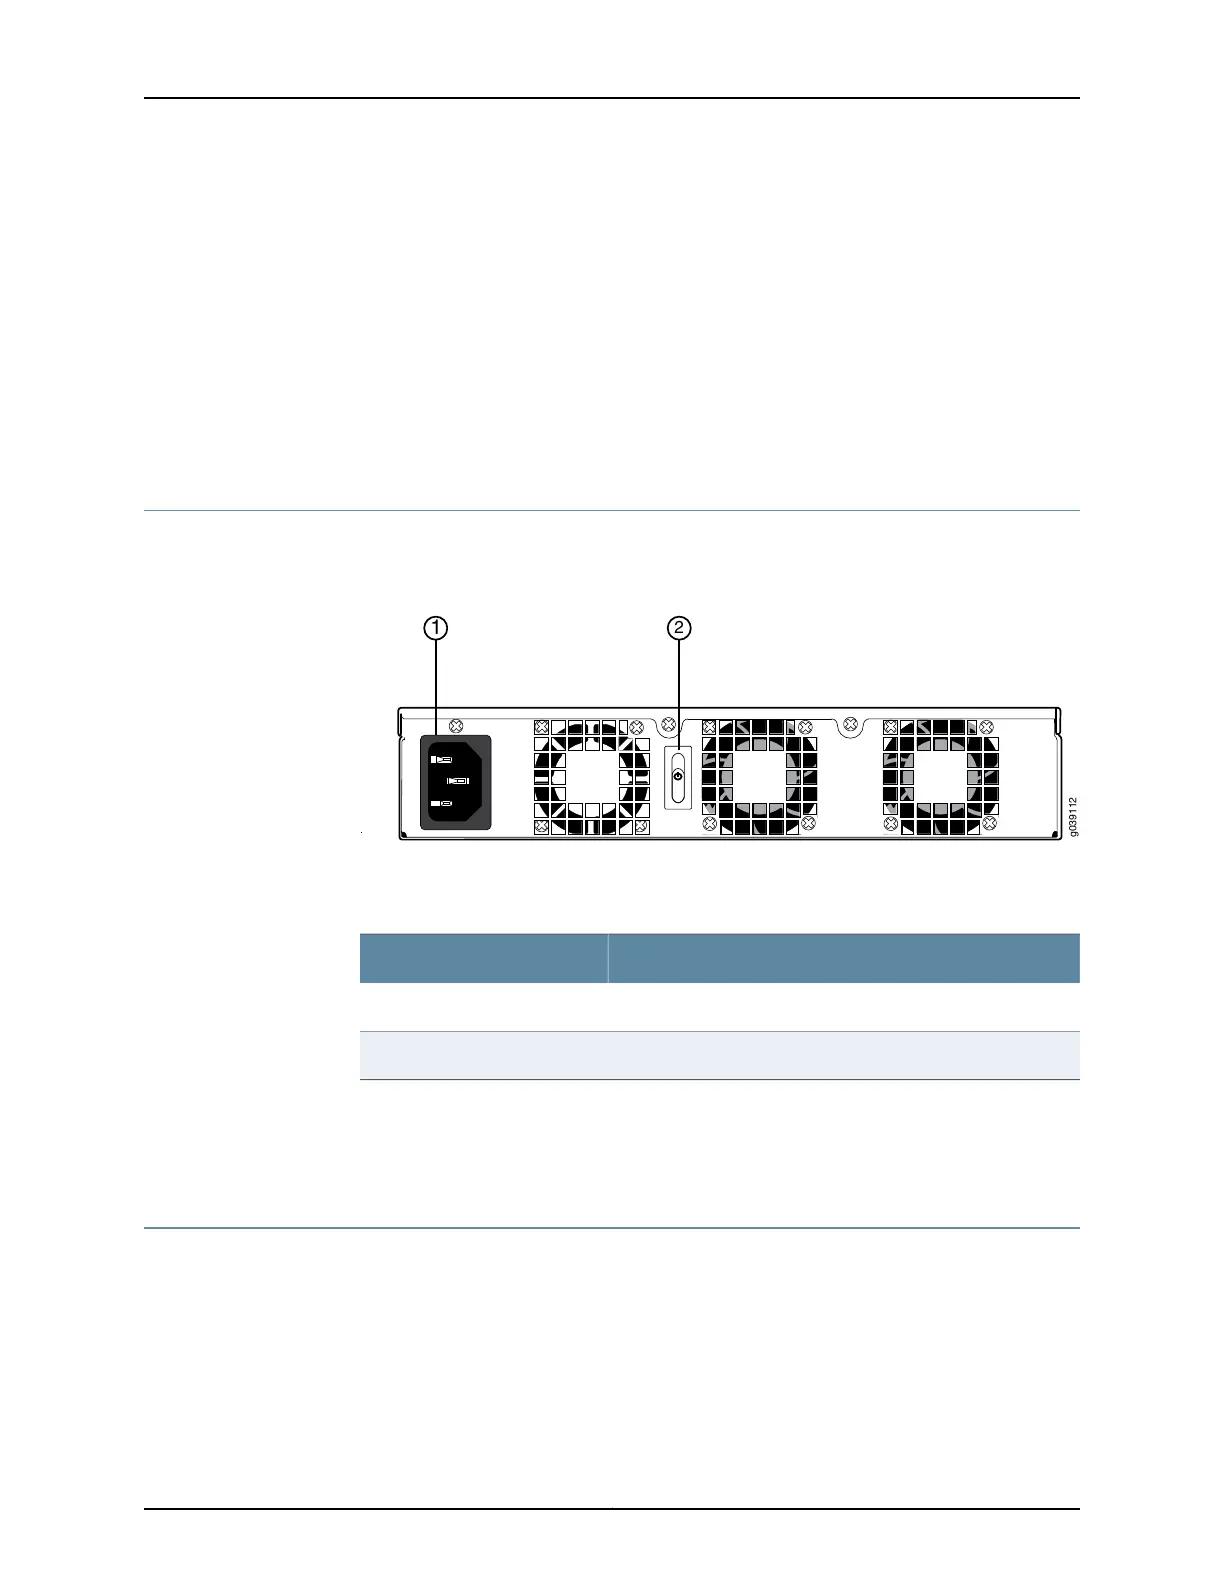
Junos Pulse Gateway MAG4611 Back Panel
Figure 6 on page 11 shows the back panel of the MAG4611.
Figure 6: MAG4611 Back Panel
Table 9 on page 11 lists the back panel components of the MAG4611.
Table 9: Junos Pulse Gateway MAG4611 Back Panel
ComponentNumber
Power supply1
Power switch2
Related
Documentation
Junos Pulse Gateway Features and Functions on page 4•
• Junos Pulse Gateway MAG4611 Front Panel on page 10
Junos Pulse Gateway MAG6610 Front Panel
The front panel of the MAG6610 contains four horizontal slots in which you can install
cards. The slots are numbered from 0 through 3, left to right. Table 10 on page 12 provides
the physical specifications of the device.
11Copyright © 2014, Juniper Networks, Inc.
Chapter 2: Junos Pulse Gateway Specifications